User's Manual 254 Document #: LTRT-68822
Mediant 2000
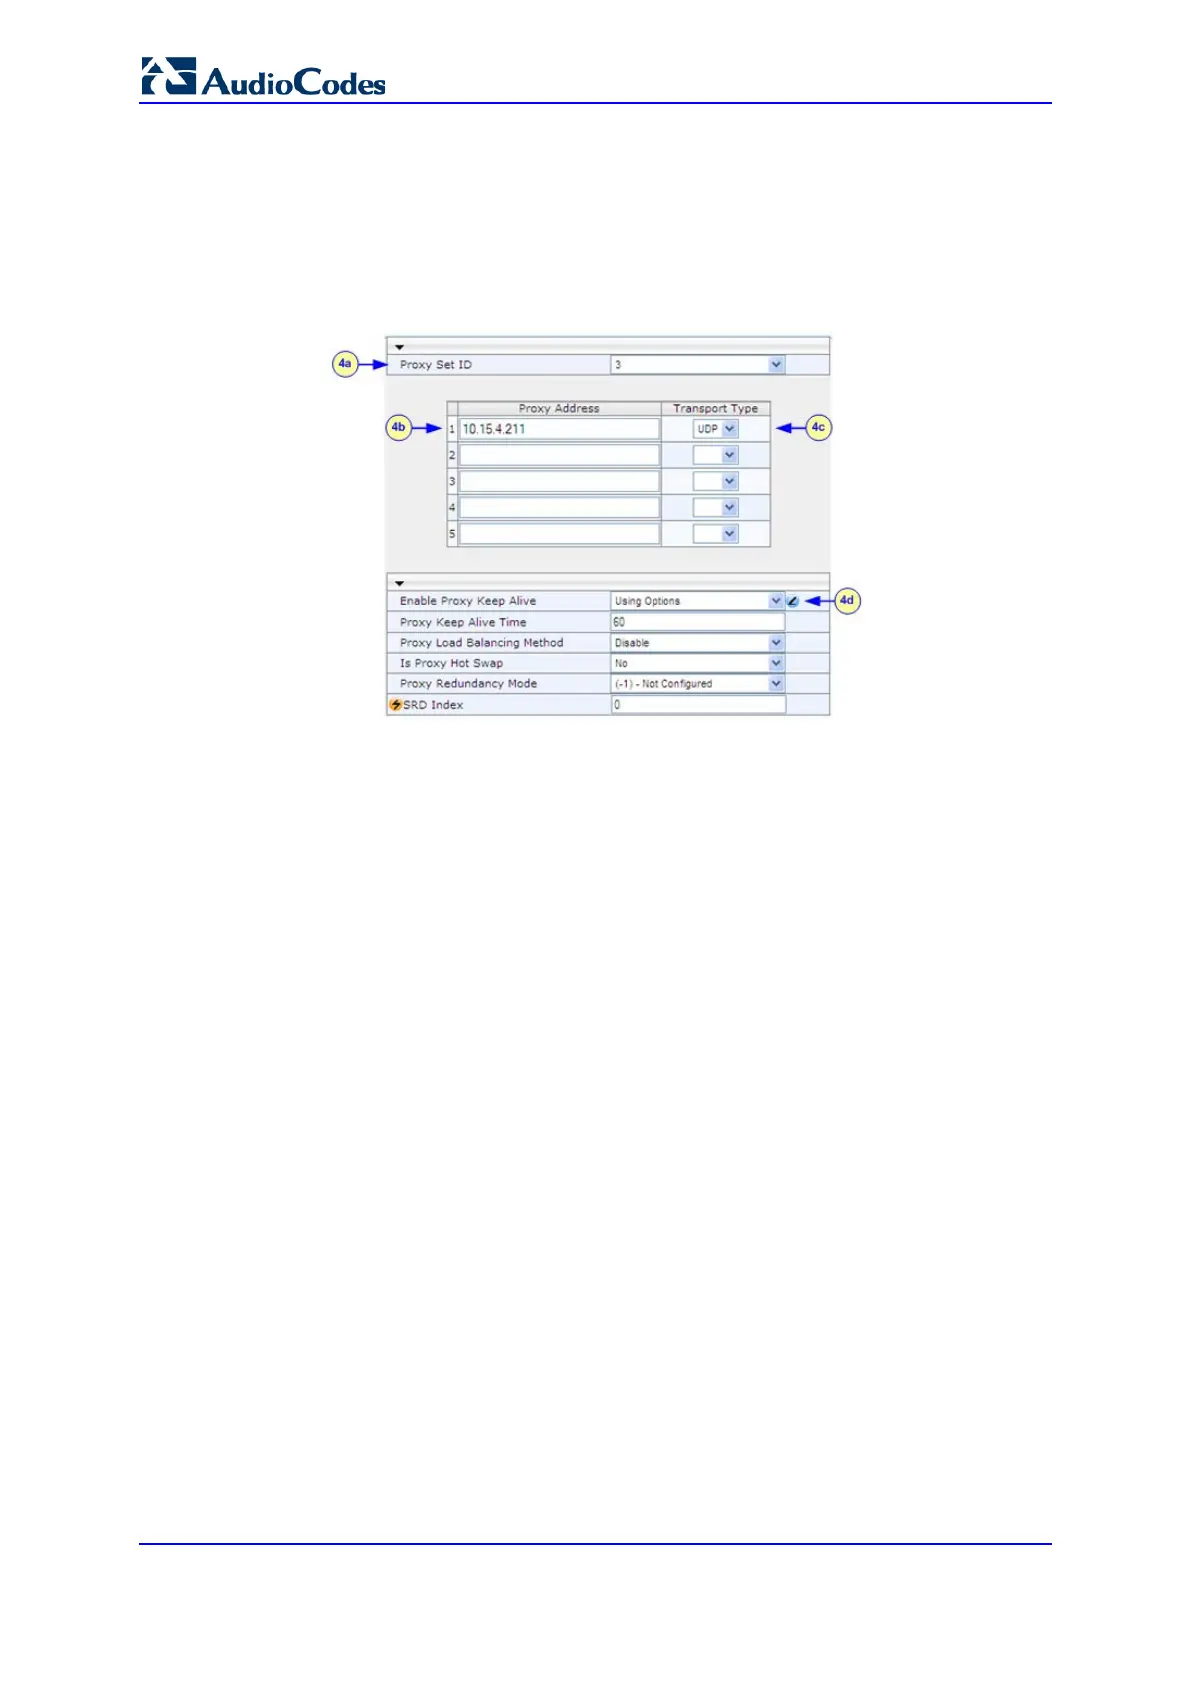
b. In the 'Proxy Address' column, enter the IP address of the IP-PBX (e.g.,
"10.15.4.211").
c. From the 'Transport Type' drop-down list corresponding to the IP address entered
above, select UDP".
d. In the 'Enable Proxy Keep Alive' drop-down list, select Using Options. This is
used in Survivability mode for remote IP-PBX users.
Figure 20-10: Proxy Set ID #3 for the IP-PBX
20.2.5 Step 5: Configure the IP Groups
This step describes how to create the IP Groups for the following entities in the network:
ITSP-A SIP trunk
ITSP-B SIP trunk
IP-PBX server
IP-PBX remote users
These IP Groups are later used by the device for routing calls.
To configure the IP Groups:
1. Open the IP Group Table page (Configuration tab > VoIP menu > Control Network
> IP Group Table).
2. Define IP Group #1 for ITSP-A:
a. From the 'Type' drop-down list, select Server.
b. In the 'Description' field, type an arbitrary name for the IP Group (e.g., ITSP A).
c. From the 'Proxy Set ID' drop-down lists, select 1 (represents the IP addresses,
configured in , for communicating with this IP Group).
d. In the 'SIP Group Name' field, enter the host name sent in the SIP Request
From\To headers for this IP Group, as required by ITSP-A (e.g., RegionA).
e. Contact User = name that is sent in the SIP Request's Contact header for this IP
Group (e.g., ITSP-A).
3. Define IP Group #2 for ITSP-B:
a. From the 'Type' drop-down list, select Server.
b. In the 'Description' field, type an arbitrary name for the IP Group (e.g., ITSP B).
c. From the 'Proxy Set ID' drop-down lists, select 2 (represents the IP addresses,
configured in , for communicating with this IP Group).
d. In the 'SIP Group Name' field, enter the host name sent in SIP Request From\To
headers for this IP Group, as required by ITSP-B (e.g., RegionB).