INSTALLATION AND STARTUP
8-6 Belanger, Inc. ®* PO BOX 5470. * Northville, MI 48167-5470 * Ph (248) 349-7010 * Fax (248) 380-9681 1MANUL220
Chapter 8 MixStir® Options Triple Foam and High-Pressure Wax
High Pressure Wax Option #2
MixStir® Tank Assembly and Installation
9. Locate the supplied 1/4” x 7-foot clear chemical feed and run from the barbed fitting on the E-Gap
Eductor to the field supplied chemical drum.
Note: Make sure there is a siphoning filter on the end of the hose (in the drum).
Note: You will have to remove this hose during the startup procedure after confirming chemical dilution
requirements.
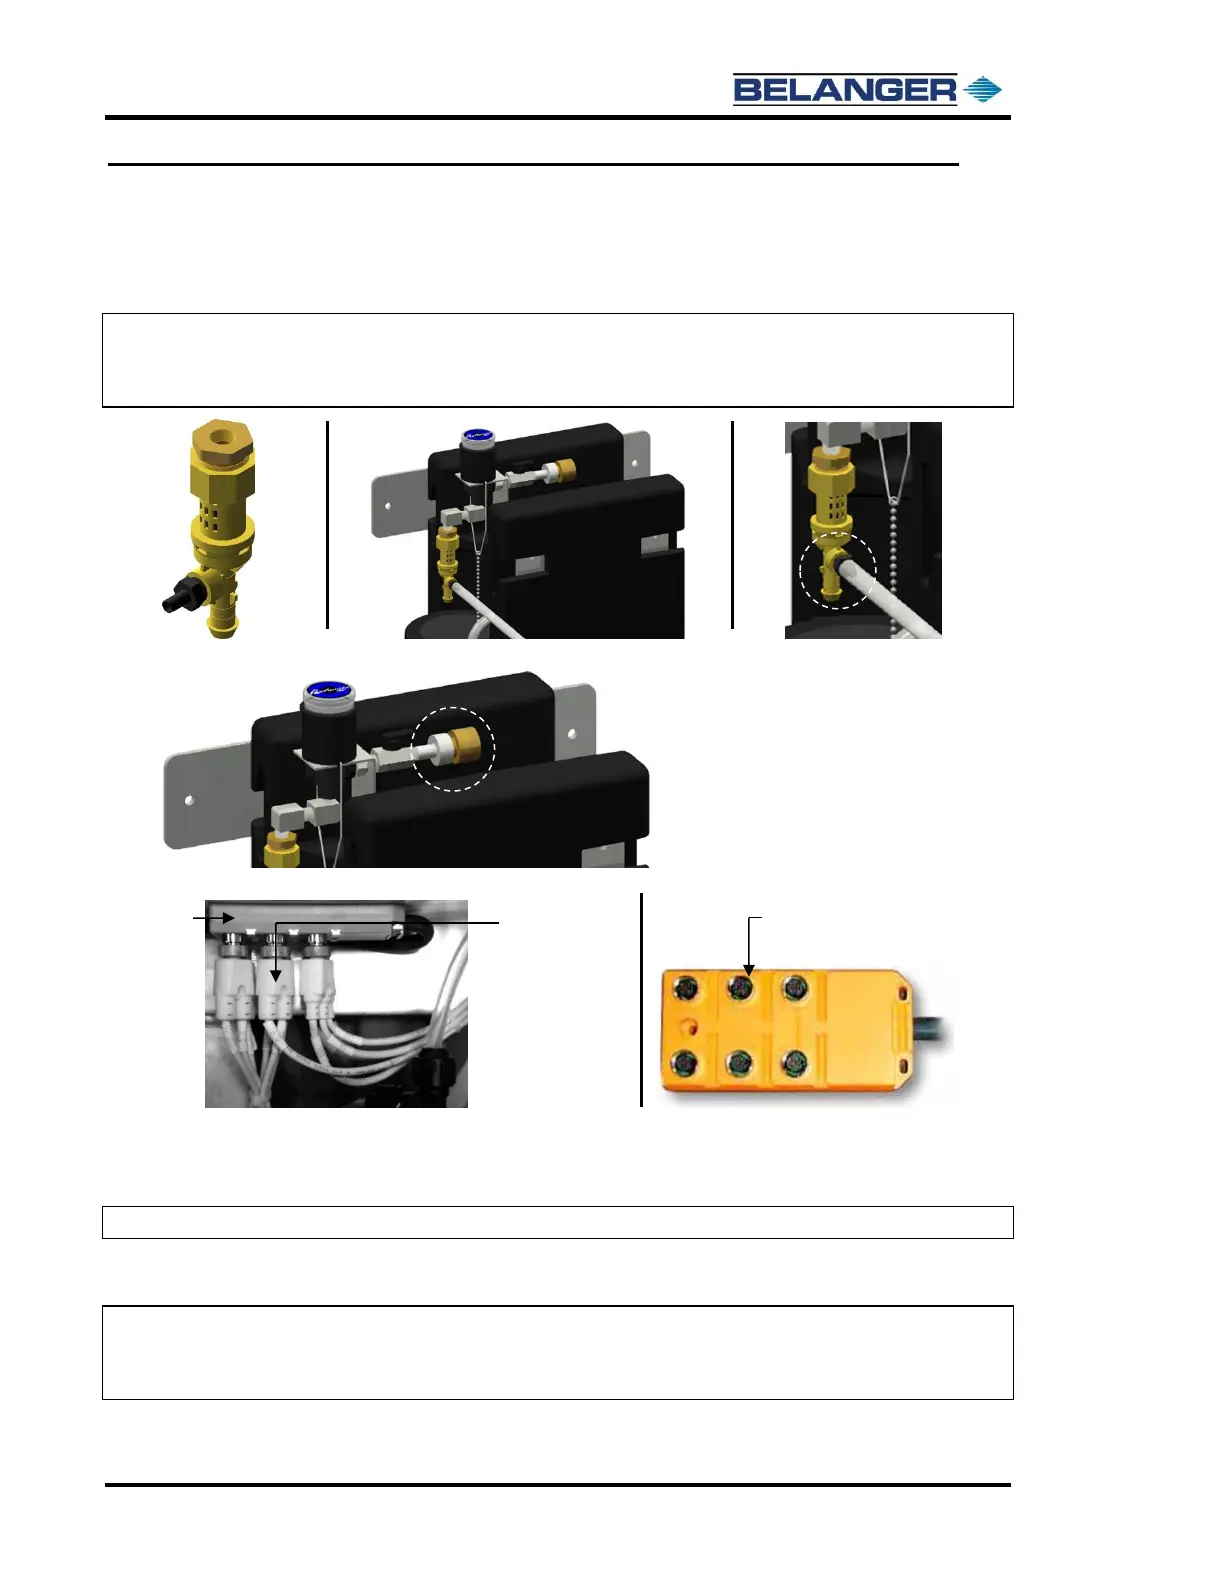
10. Connect a city water feed to the main water inlet. See the image below.
11. Connect the wax solenoid cable to the SDM Electrical Distribution Block. See the images below.
12. Program a Sealer Wax pass with a pump speed of 25% to run a low-pressure wax using the standard
Pulsatron™ pump.
13. For a medium pressure (both arms), program the wax pass with a pump speed of 31-100%.
Note: This pass will use the MixStir® high-pressure wax option and come out of both arms.
14. For a high-pressure pass (1100 PSI, one arm at a time) or a low-pressure pass, see “Application
Configuration” in your Programming Manual.
Note: This pass will also use the MixStir® High-Pressure Wax Option and come out of one arm at a time
Note: This type of pass is used often on an inexpensive base package, to apply presoak, and then rinse and
wax quickly.
In the high-pressure wax #2 configuration, the Drying Agent uses the MixStir® and the Sealer
Wax uses an additional Pulsatron™ pump.