INSTALLATION AND STARTUP
11-4 Belanger, Inc. ®* PO BOX 5470. * Northville, MI 48167-5470 * Ph (248) 349-7010 * Fax (248) 380-9681 1MANUL220
Chapter 11 Bug Spray Applicator Option
Bug Spray Applicator Option
Installation
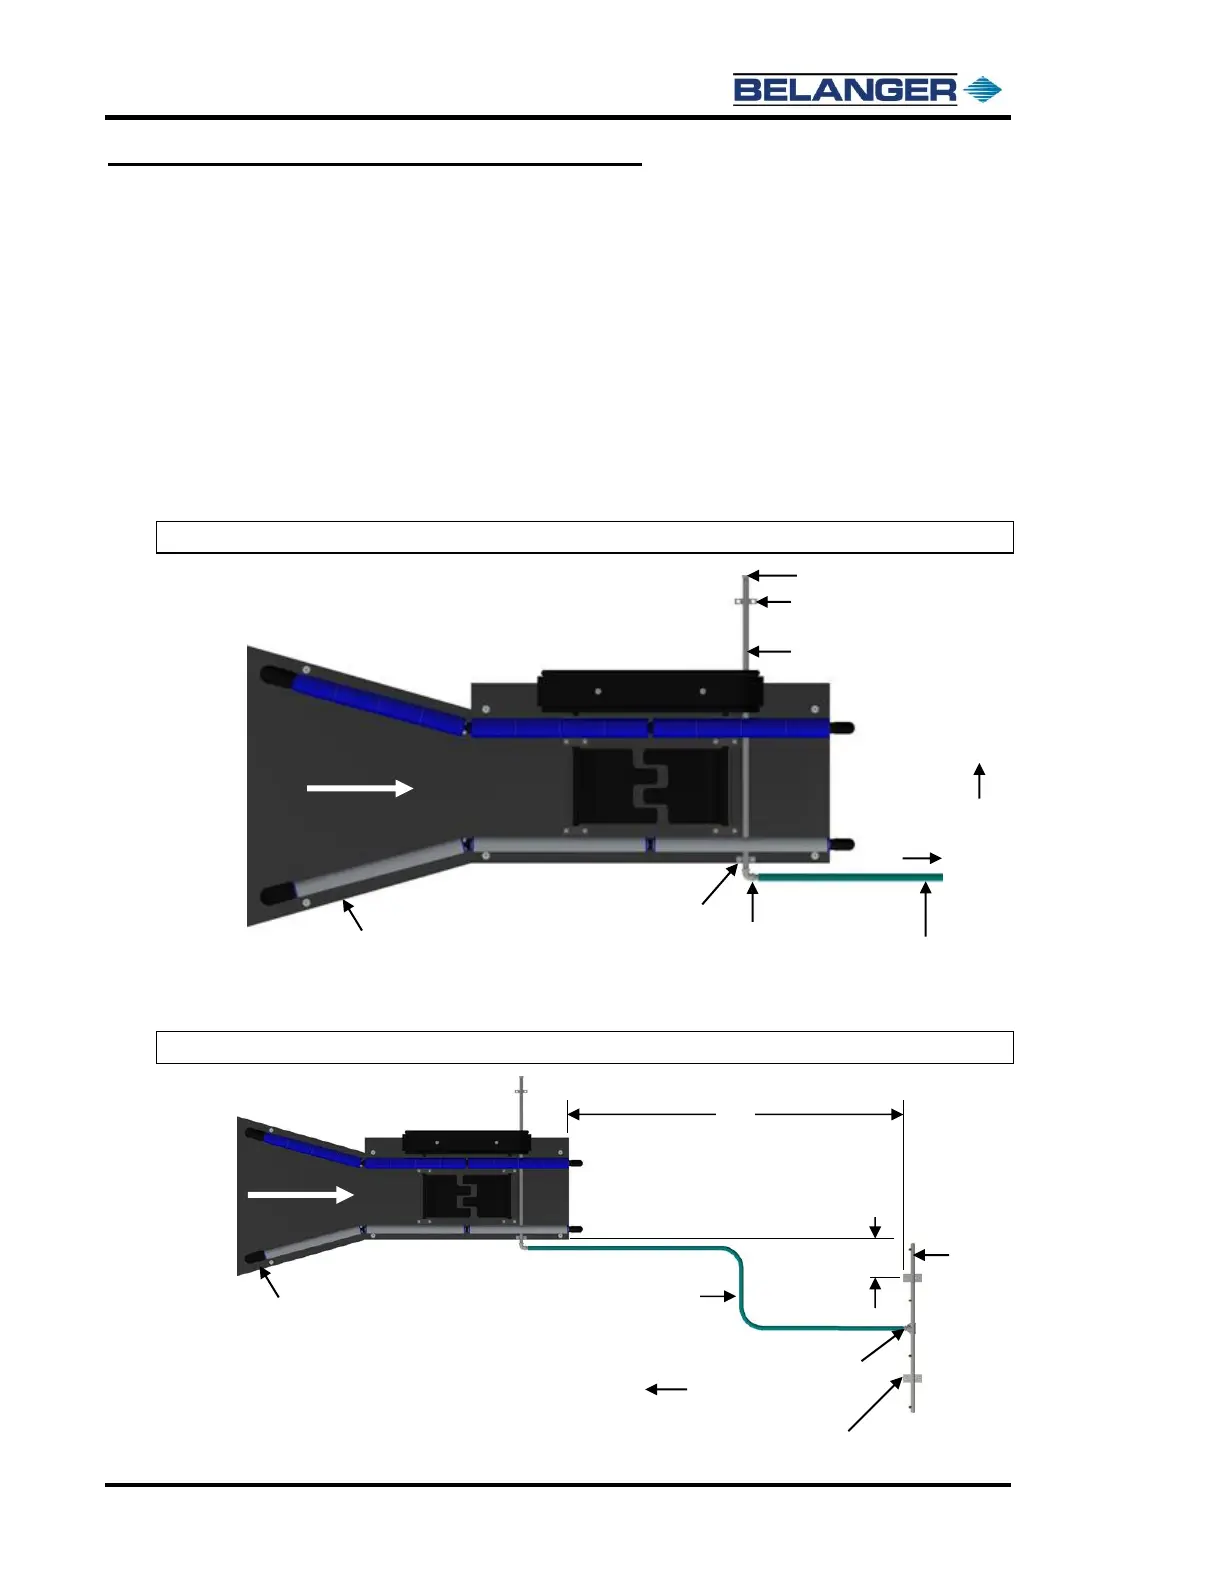
3) Take the Bug Spray Applicator nipple and slide it through the treadle by doing the following:
See the image below.
Slide the straight hose barb from the center of the bay toward the driver’s side wall.
Slide the nipple all the way through the treadle until the barbed hose elbow is near the edge of the
treadle plate.
Anchor the nipple to the floor with the supplied floor lags and clamp it to the treadle plate with the
supplied clamp.
Note: Make sure the elbow is pointing toward the exit of the bay.
4) Lag the Bug Spray Applicator manifold to the floor at the dimensions shown below.
Note: The barbed hose fitting should point toward the entrance of the bay.
CAUTION: BE SURE THIS HOSE “RUN” IS
NOT IN THE PATH OF THE EXIT SIDE WHEELS
BEFORE SECURING IT TO THE FLOOR