INSTALLATION AND STARTUP
12-4 Belanger, Inc. ®* PO BOX 5470. * Northville, MI 48167-5470 * Ph (248) 349-7010 * Fax (248) 380-9681 1MANUL220
Chapter 12 Undercarriage Options
Undercarriage In-Ground Connections
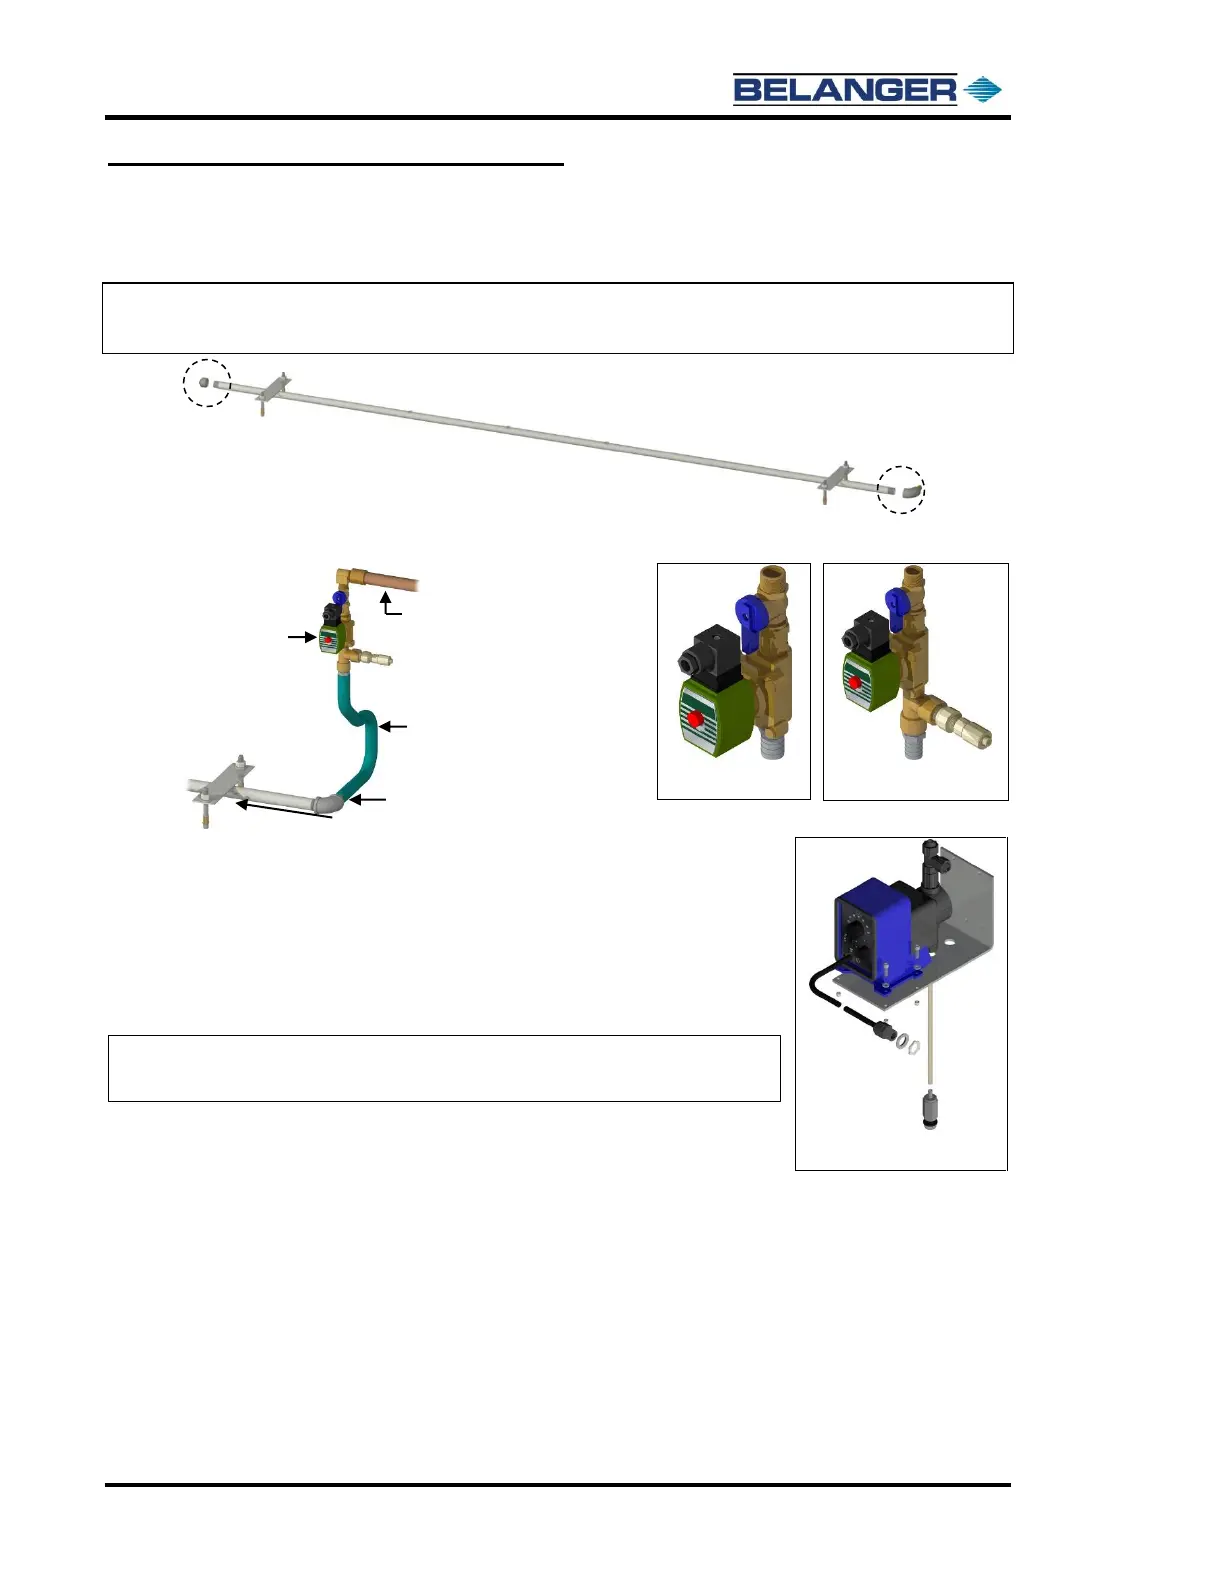
1) Locate the supplied End Cap, stainless steel Elbow and stainless-steel Barbed Hose Fitting. Secure
them to the manifold place as shown below.
Note: A field supplied water hose is required to connect the Barbed Hose Fitting to the Plumbing Assembly.
Note: The Elbow and stainless-steel Barbed Hose Fitting are to be placed on the same side as the utilities.
2) Run a single 3/4” water feed from the 3/4" barbed hose fitting to the Undercarriage Valve Assembly
as shown below.
3) Mount the supplied Undercarriage Valve Assembly to the wall in the
appropriate location.
4) Run a field supplied 3/4" water hose from the Barbed Hose Fitting to the
Plumbing Assembly. See the image above.
5) If you have the Rust Inhibitor option, mount the supplied Chemical Pump
Assembly (see the image to the right) to the wall in an appropriate
location.
6) Supply 110VAC feed to the Chemical Pump.
Note: To prevent air bubbles in the line, mount the Chemical Pump below
the Chemical Injector as shown in the example below.