INSTALLATION AND STARTUP
4-36 Belanger, Inc.® * PO BOX 5470. * Northville, MI 48167-5470 * Ph (248) 349-7010 * Fax (248) 380-9681 1MANUL220
Chapter 4 Frame and Carriage Assembly
Routing Boom Utilities
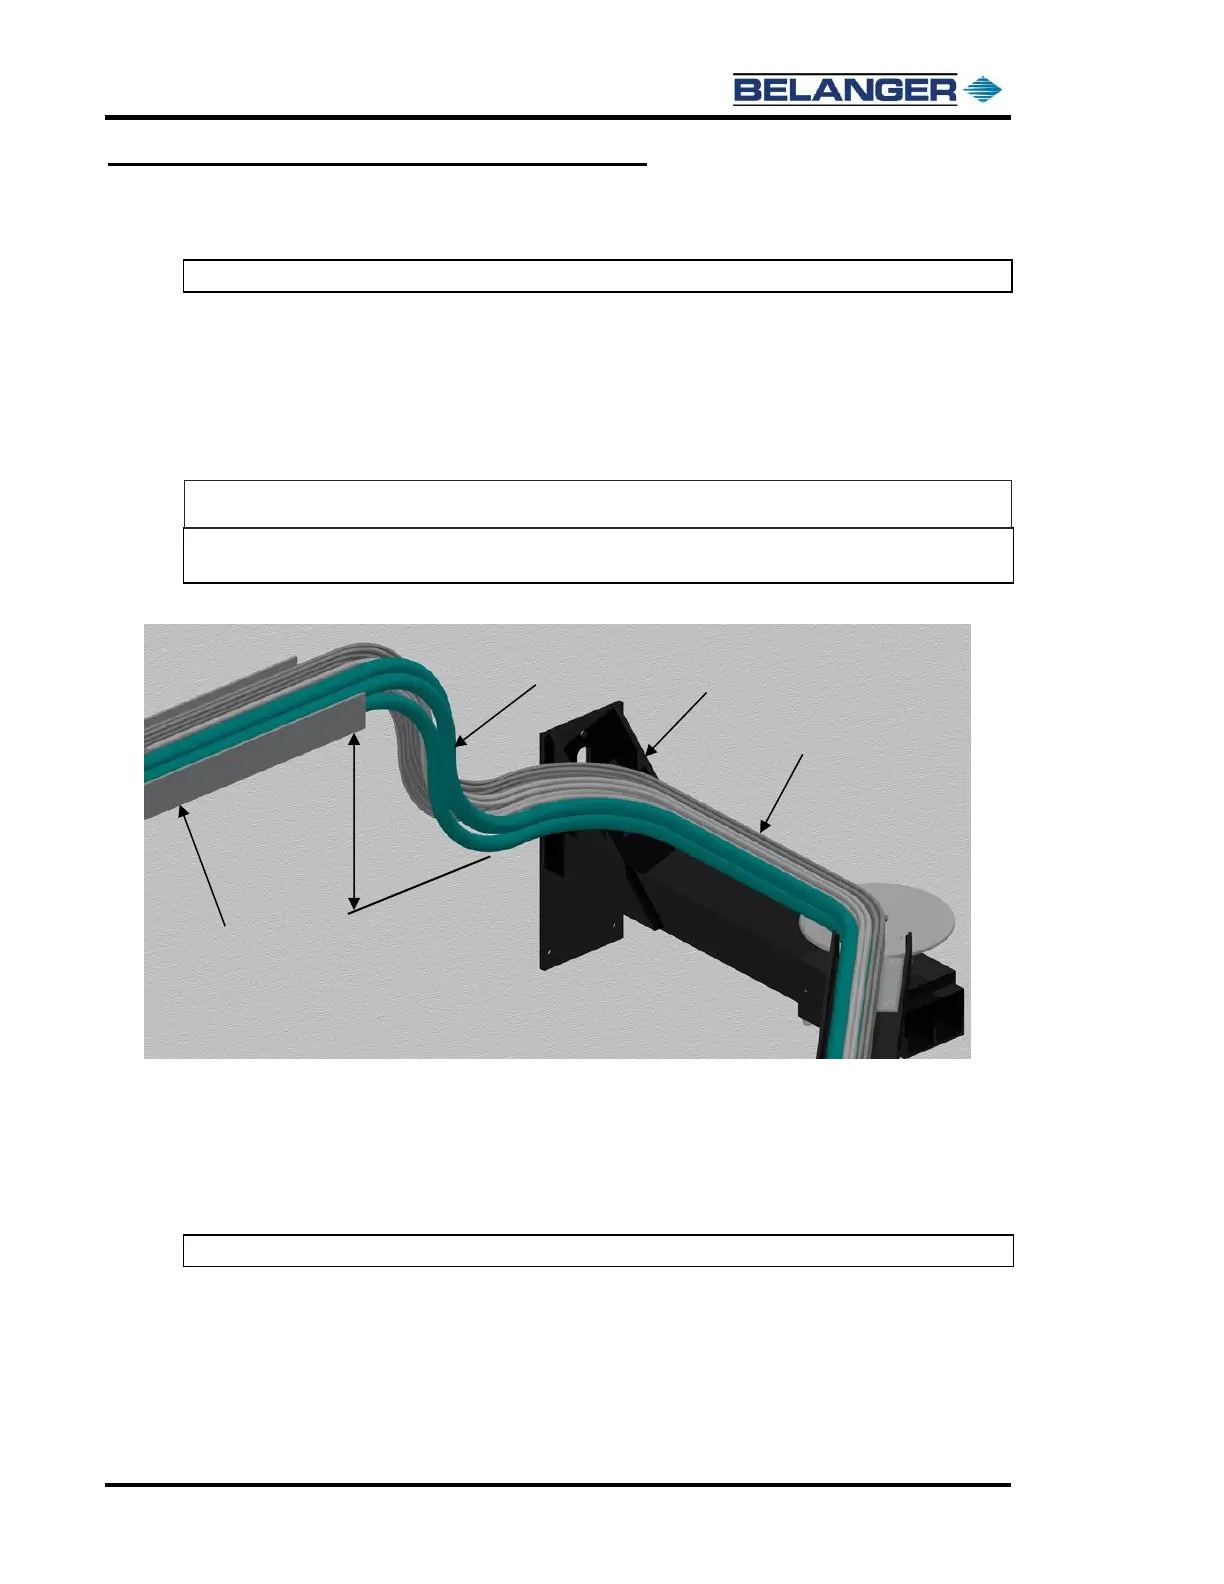
9) After tightening the lines inside the boom channels, set the loop entering the wall mount bracket.
Note: The loop must create enough slack in the lines to allow full boom movement.
There are two possible ways to set the loop. The first and preferred setup method creates the slack in
the lines vertically. The second setup method creates the slack in the lines horizontally if there is no
room to create the slack vertically.
Setting Up Slack Vertically – Preferred Method (if it is possible)
a) Run the lines from 1 to 2 feet above the mount bracket then down onto and along the mount
bracket.
Note: Vertical slack will help with the bend transition from exit to entrance of the bay. A possible
example of this loop set up is shown below.
Setting Up Slack Horizontally – Alternate Method (ONLY if Vertical method is not possible)
b) Run the lines vertically down to the wall mount bracket as available space allows.
Then, run the lines horizontally near and along the wall mount bracket to create an amount of
slack that is like the first setup style.
Note: A possible example of this loop setup is shown on the next page.