INSTALLATION AND STARTUP
1MANUL220 Belanger, Inc.® * PO BOX 5470. * Northville, MI 48167-5470 * Ph (248) 349-7010 * Fax (248) 380-9681 4-43
Chapter 4 Frame and Carriage Assembly
Optional Deluxe Boom
Installing the Wheel Cleaner Accessory Kit
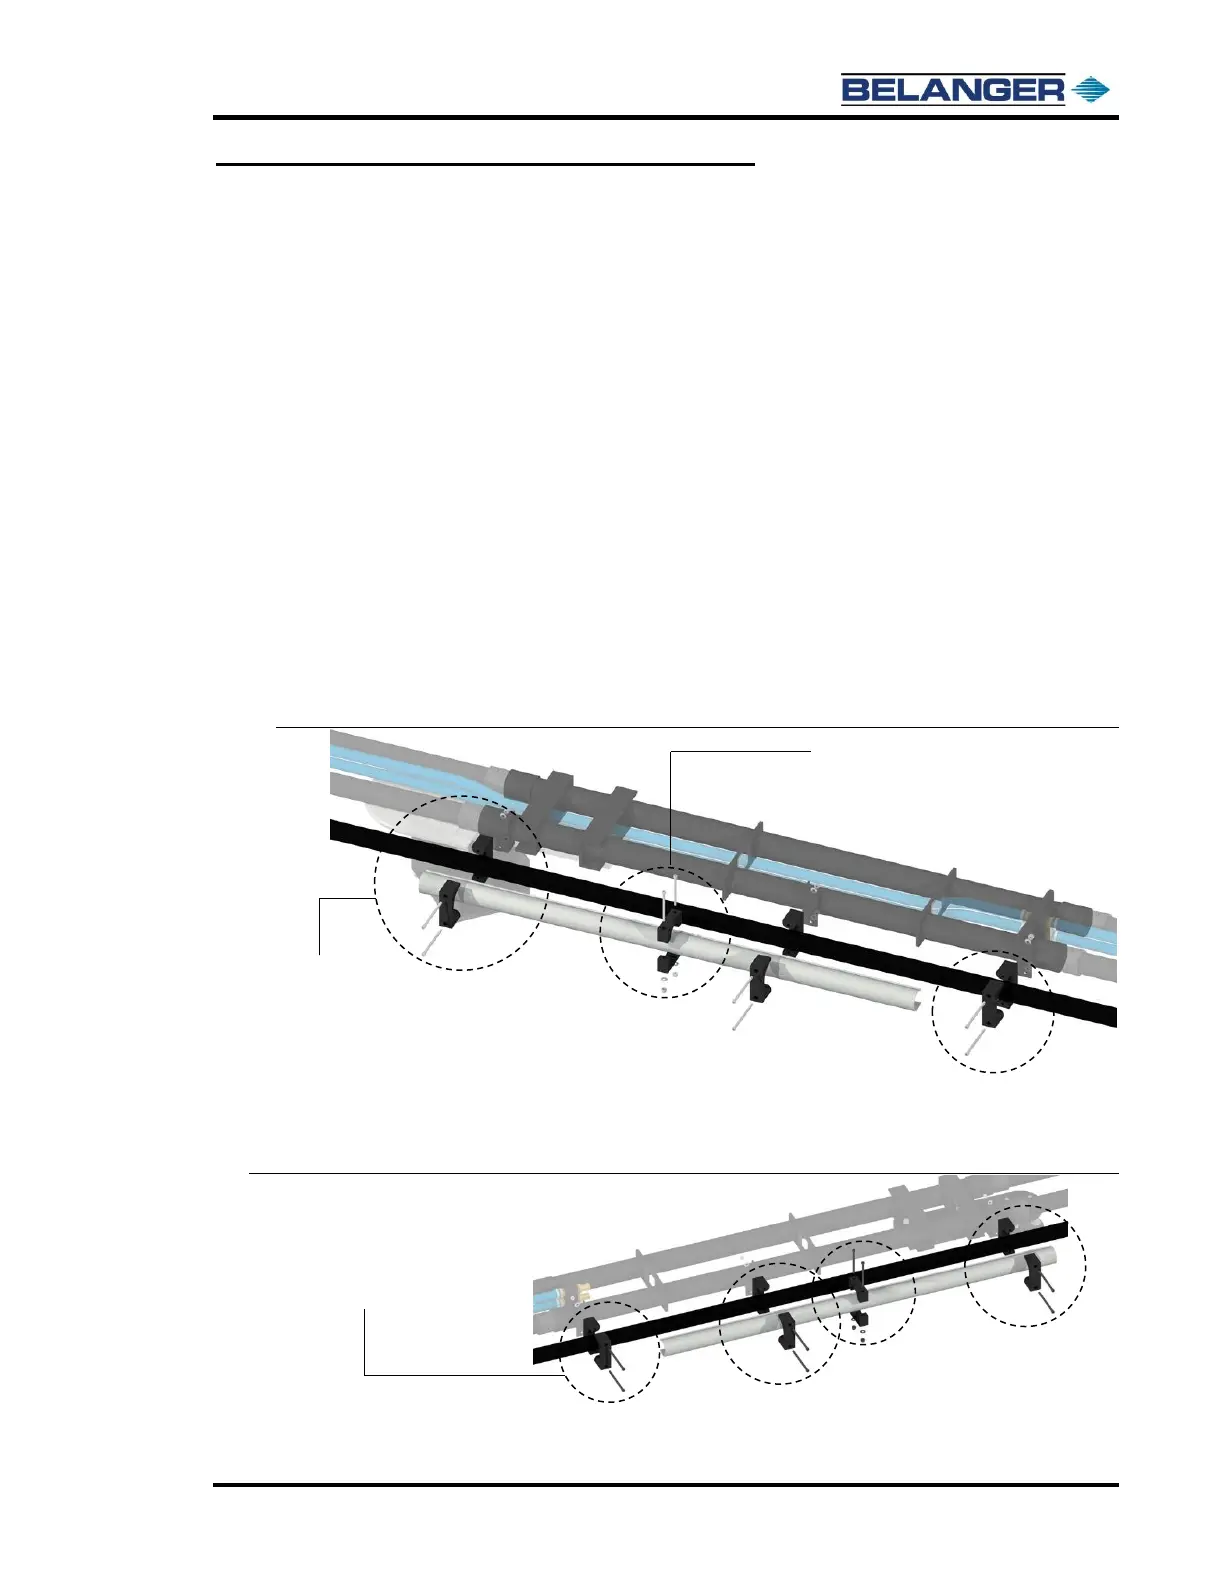
Assembly Notes:
• Three bushings are installed on each boom arm.
• The PVC Snap Clamp limits how far the hose can slide back and forth on the high pressure.
➢ The PVC Snap Clamp should be tightened onto the hose at a distance of 10 inches
from the second slide bushing between the first (the one near the bearing) and second
bushing
➢ Make final adjustments to the PVC Snap Clamp based on test vehicles.
• For each application it is recommended to run hard copper pipes out to the wall in the area
the boom is mounted.
• Take care that the volume running thru the copper pipes is greater or equal to the volume
of the high-pressure line. So, there will be a reduction in the pressure drop thru the line and
improve the performance of the equipment.
• The pipes should run to an area near the end of length for the high-pressure lines, to
prevent any extra length of hose and make sure the hoses do not need to be trimmed and
re-crimped.
• See the images below.
2) Secure the above components to the wall side of the Deluxe Boom as shown below.
3) Repeat the above process on the carriage side of the Deluxe Boom at the locations shown below. Once the
PVC Snap Clamp has been clamped onto the hose, slide it back and forth making sure it never completely
leaves the slide bushings.
2 each
• 1/4-20 x 3” socket head fasteners
• 1/4” flat washers
• 1/4” lock nuts
PVC Snap Clamp fits around the Hydraulic Hose
before Boom Tube Clamp is secured into place