4-11
Confidential
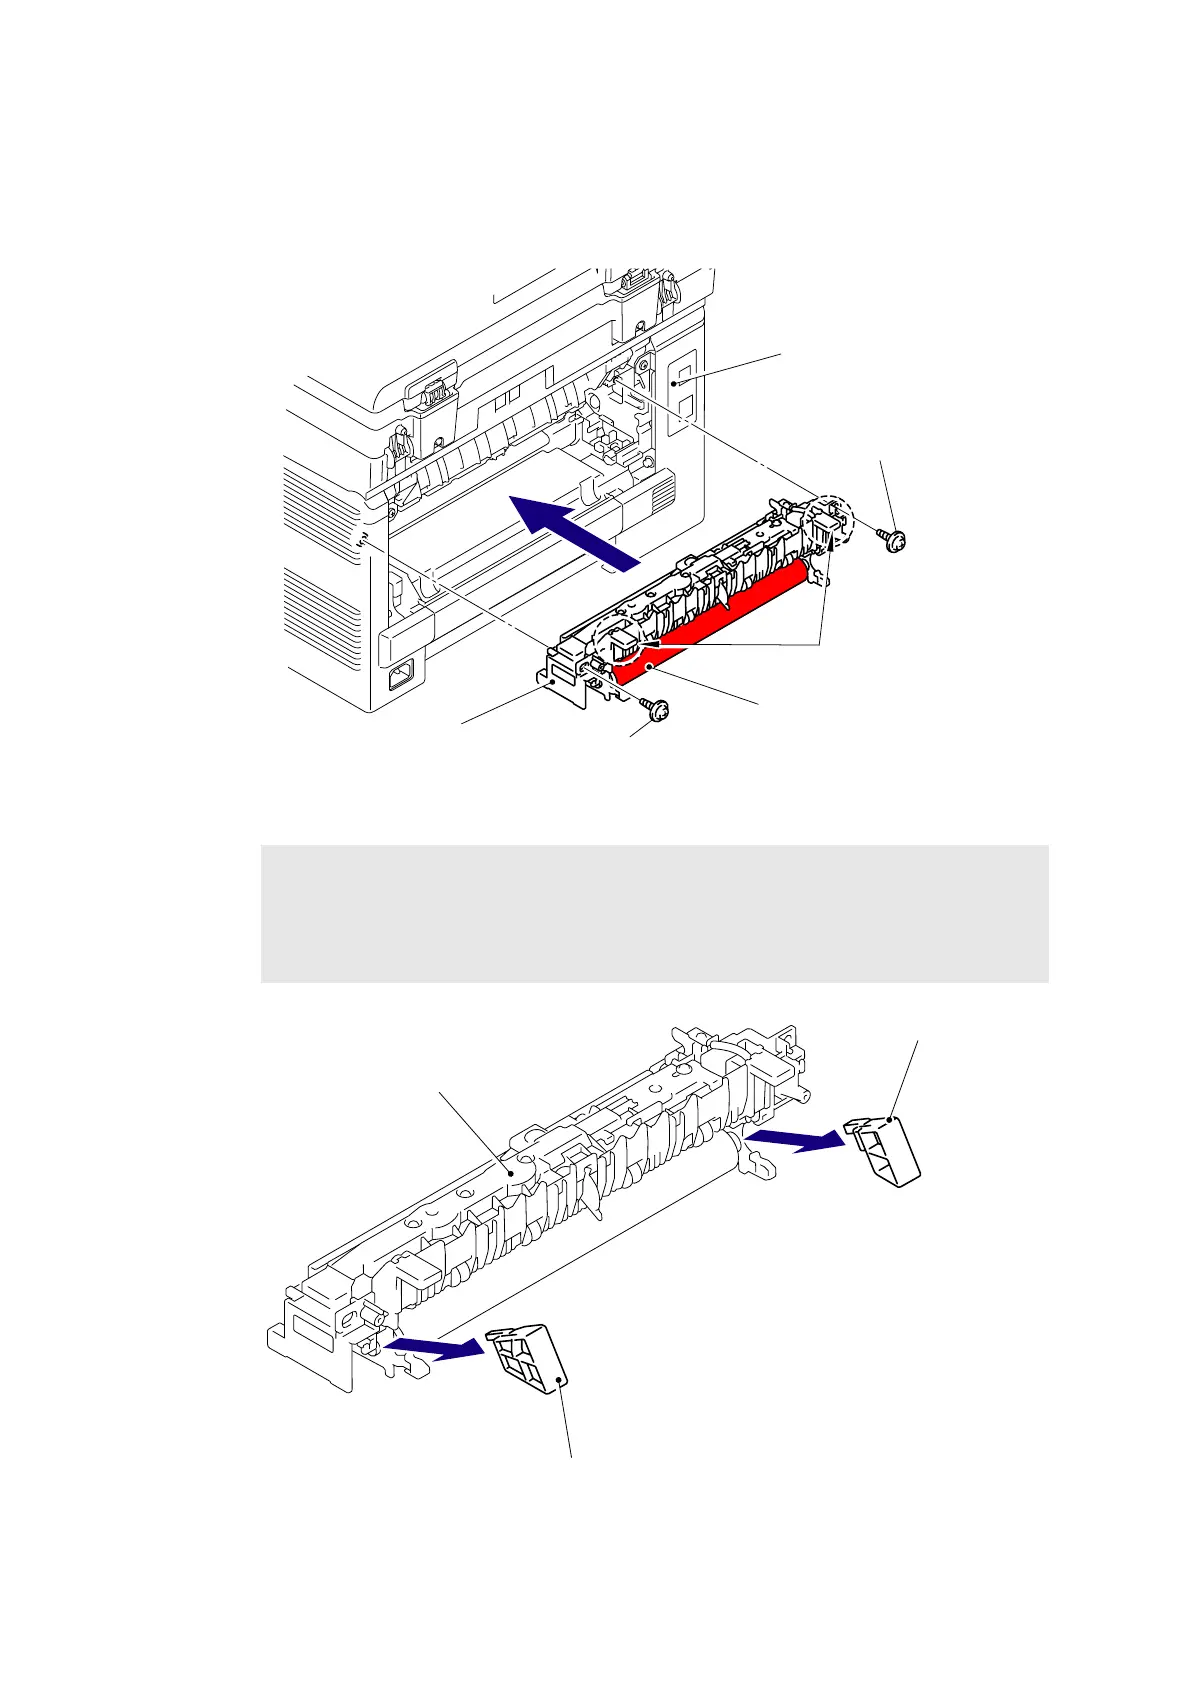
<Installing procedure>
(1) Assemble the Fuser unit while holding the “A”, and then secure it with the two Taptite pan
B M4x14 screws.
Fig. 4-13
Fig. 4-14
Note:
The Fuser unit for replacement is transported while the pressure roller is held lightly to
prevent deformation of the pressure roller. When assembling the Fuser unit, make
sure to assemble the Fuser unit to the product first, and then remove the Spacer in the
direction of the arrow from the Fuser unit.
Taptite pan B M4x14
Taptite pan B M4x14
Fuser unit
Main body
“A”
Pressure roller ASSY
<Back side>
Fuser unit
Spacer
Spacer

 Loading...