5-83
Confidential
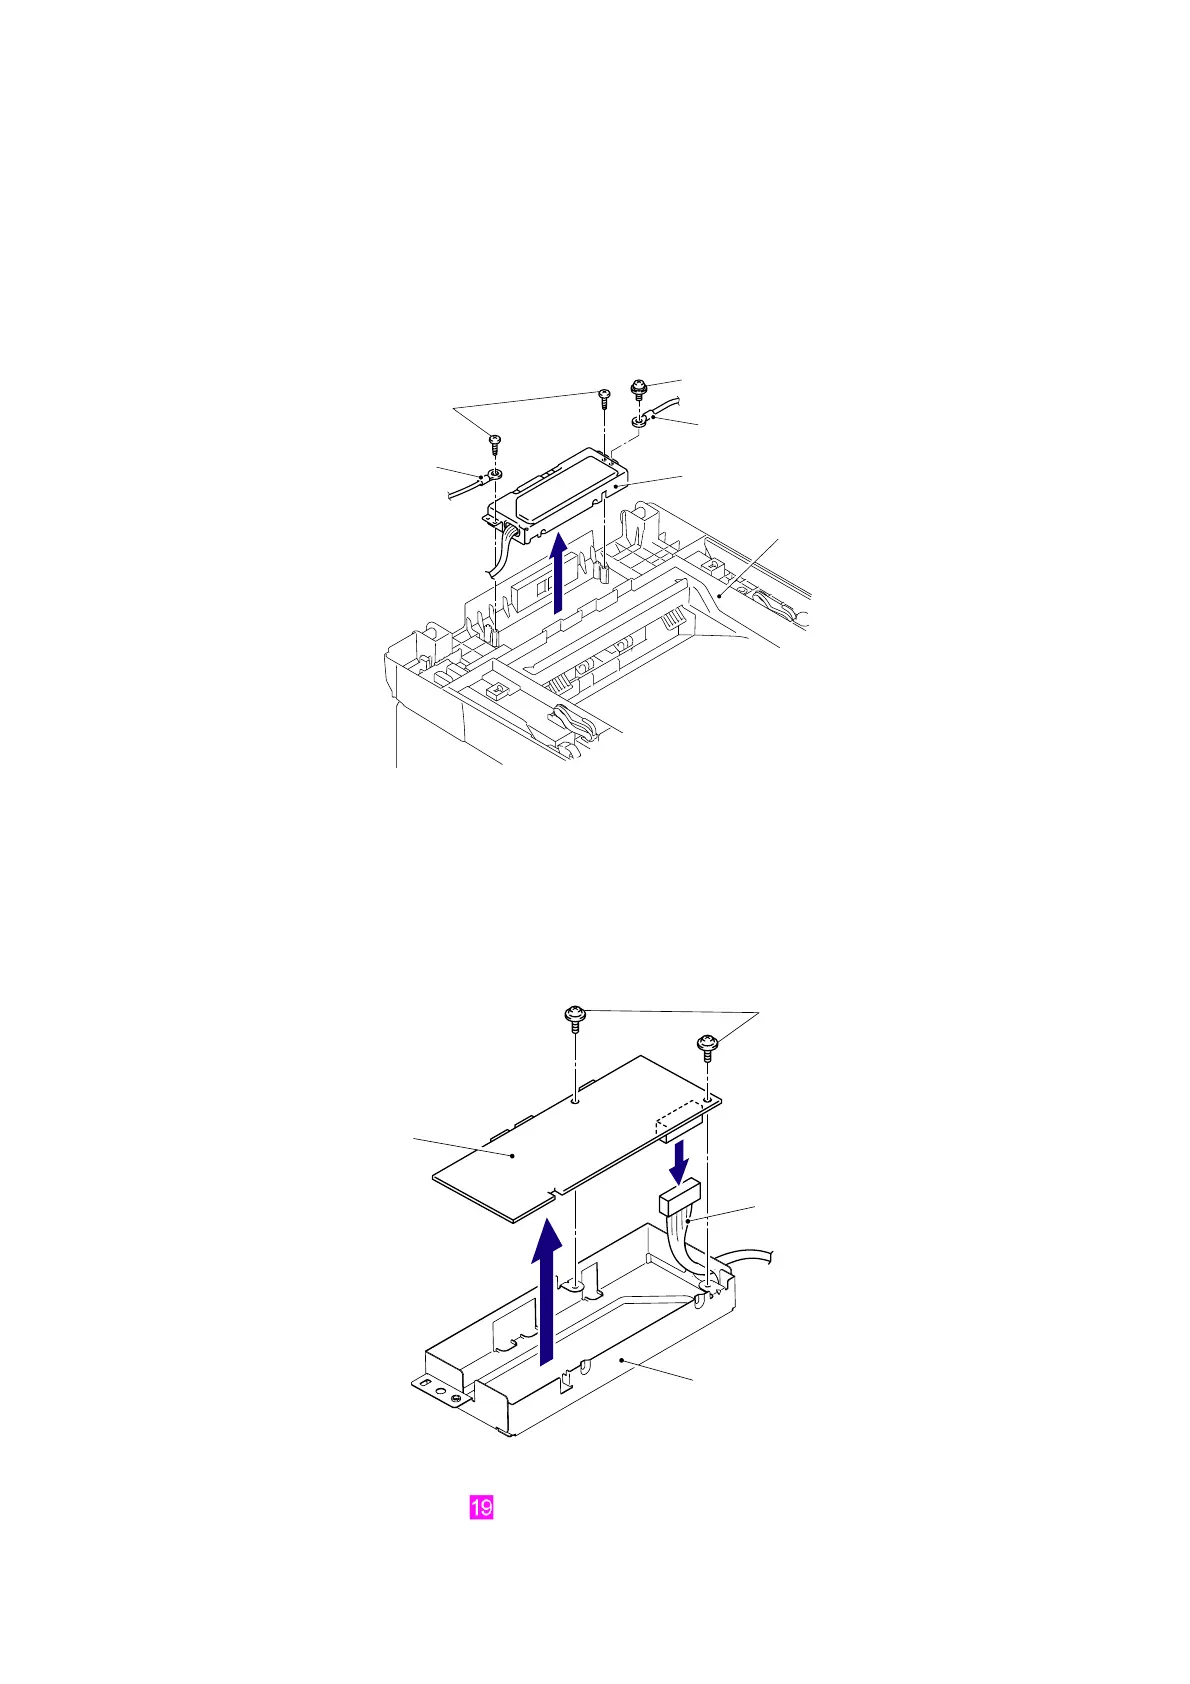
8.30 NCU PCB ASSY (NCU model only)
(1) Remove the two Taptite pan (washer) B M4x12 DA screws, and then remove NCU FG
harness ASSY 2 from the NCU shield.
(2) Remove the Screw PAN (S/P washer) M3.5x6 screw, and then remove the NCU FG
harness ASSY 1 from the NCU shield.
(3) Lift the NCU shield from the Joint cover sub ASSY.
Fig. 5-76
(4) Turn the NCU shield upside down.
(5) Remove the two
Taptite cup S M3x6 SR
screws, and then remove the
NCU PCB ASSY
from the
NCU shield
.
(6)
Disconnect
the NCU harness ASSY from the NCU PCB ASSY.
Fig. 5-77
Harness routing: Refer to “ NCU Shield.”
NCU shield
Taptite pan (washer) B M4x12 DA
Screw PAN (S/P washer) M3.5x6
NCU FG harness ASSY 1
Joint cover sub ASSY
NCU FG harness ASSY 2
Taptite cup S M3x6 SR
NCU shield
NCU PCB ASSY
NCU harness ASSY
6
5
 Loading...