135
Troubleshooting
E
E
E Troubleshooting
For technical support, the Roche Service representative will require at least the following files:
c
Diagnosis (see Section E, Chapter 1)
c The System Audit Trail (see Section E, Chapter 2)
c The complete, exported measurement file packages generated with the Data Exchange function
(see “Data Exchange”) that show the issue.
1 Diagnosis
For technical support purposes, the user is able to run a diagnosis of the Cedex HiRes Analyzer at the request of
an authorized Roche Service representative. The diagnosis of the System provides a file containing information
about the System Software and hardware. It contains a system, hardware, and software descriptions, as well as
information about parameters and settings, for example, focus position and white/black balance.
To create the diagnosis file
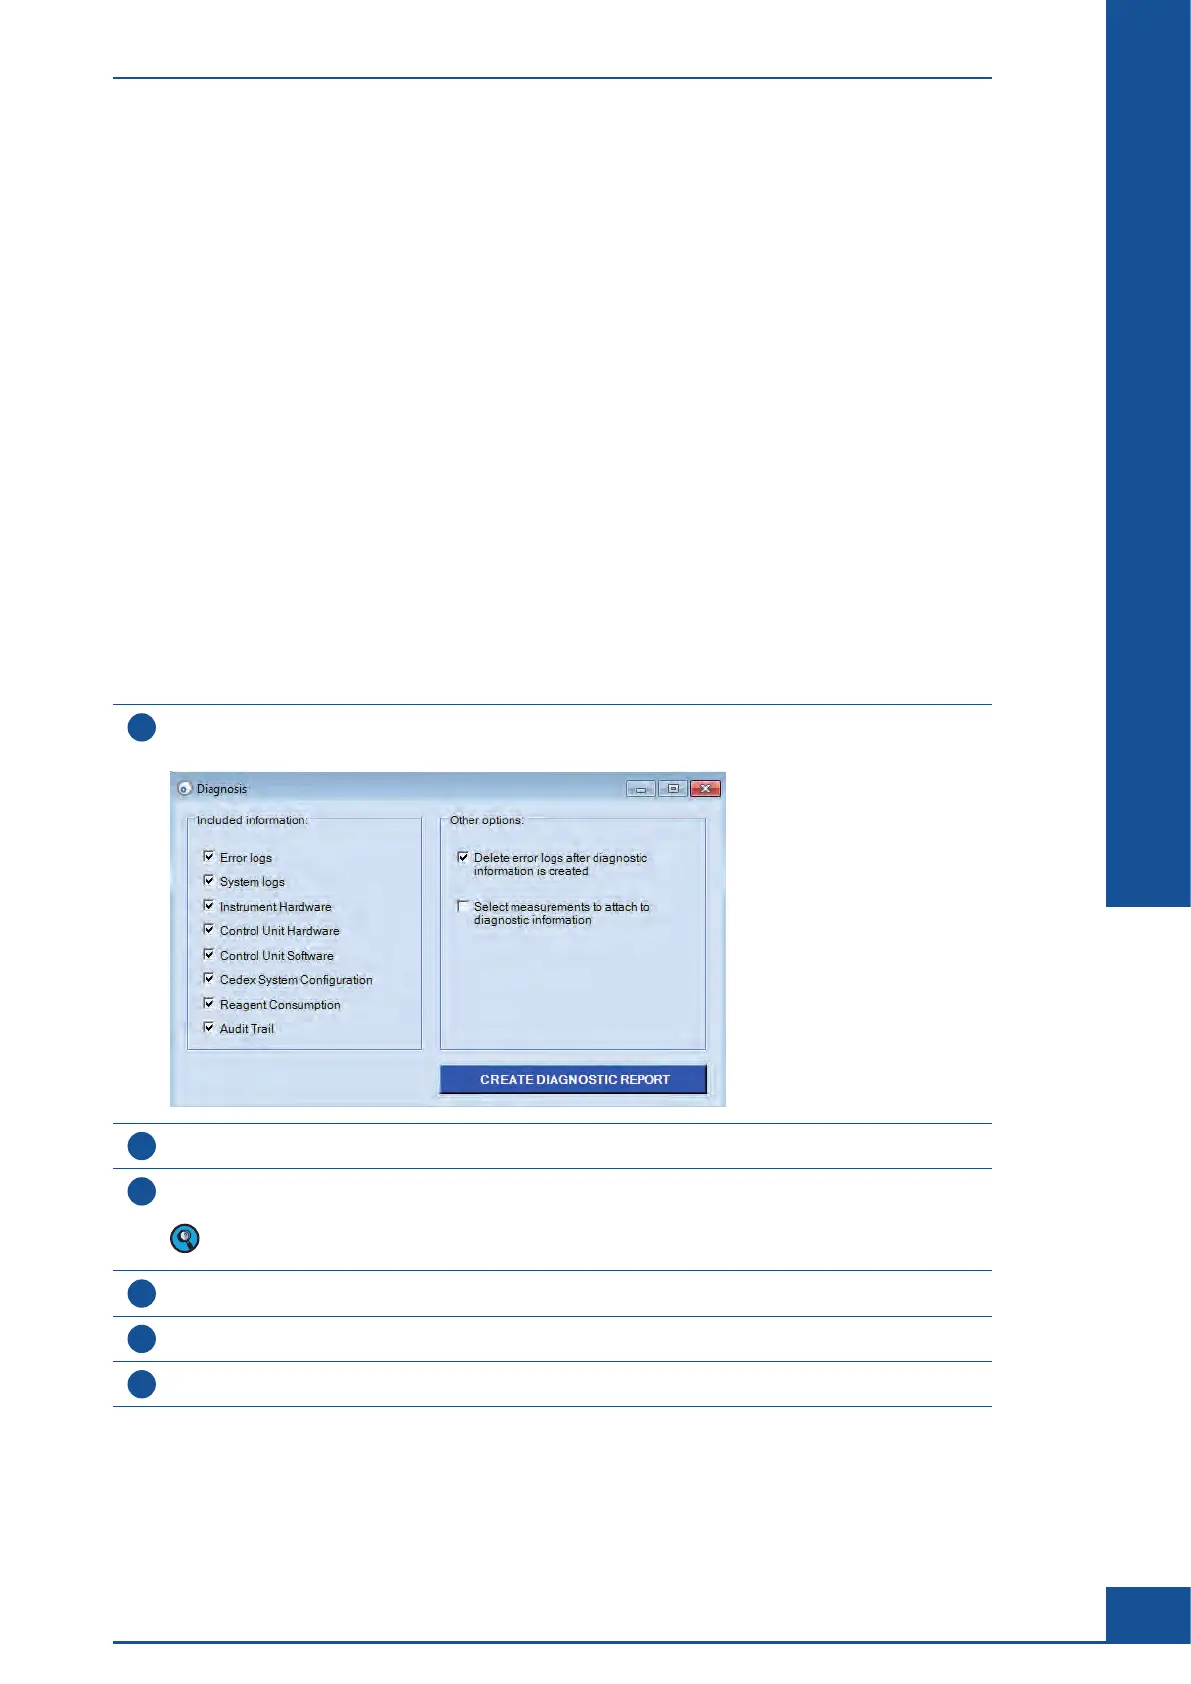
1
Choose Setup>Diagnosis in the Cedex Control Center.
A Diagnosis dialog box is displayed:
2
Ensure all options are selected in the Included information area.
3
If measurements need to be attached to the diagnostic report, select the checkbox for
Select measurements to attach to diagnostic information.
Selecting the checkbox will immediately open a Measurement List dialog box.
Select the measurements to be attached and then close the dialog box.
4
Click on CREATE DIAGNOSTIC REPORT.
5
Windows Explorer opens. Select the path under which the diagnostic report should be stored.
6
Click on Save. The diagnostics report is saved as a zip file in the location selected in Step 5.
■
Diagnosis of the Cedex HiRes Analyzer