35
Software
C
C
2 The Measurement Dialog Box
2.1 Preparing Samples for Measurement
1
Transfer 300 µL of a well-mixed cell suspension to a clean Cedex Sample Cup.
The Cedex HiRes Analyzer tolerates volume variations of +/- 10%. Any greater variation in sample volume
will lead to inaccurate results. The Cedex HiRes Analyzer can determine cell concentrations in the range
of 5 × 10
4
– 1 × 10
7
cells/mL. Any higher concentration requires a manual dilution. Cells with a diameter
range of between 2 μm – 40 μm can be assessed accurately. Object recognition performance lies
between 1 μm and 90 μm.
2
Place the prepared Cedex Sample Cup containing the cell suspension into the appropriate cup position on
the Multi Sample Tray or attach to the single sample port.
■
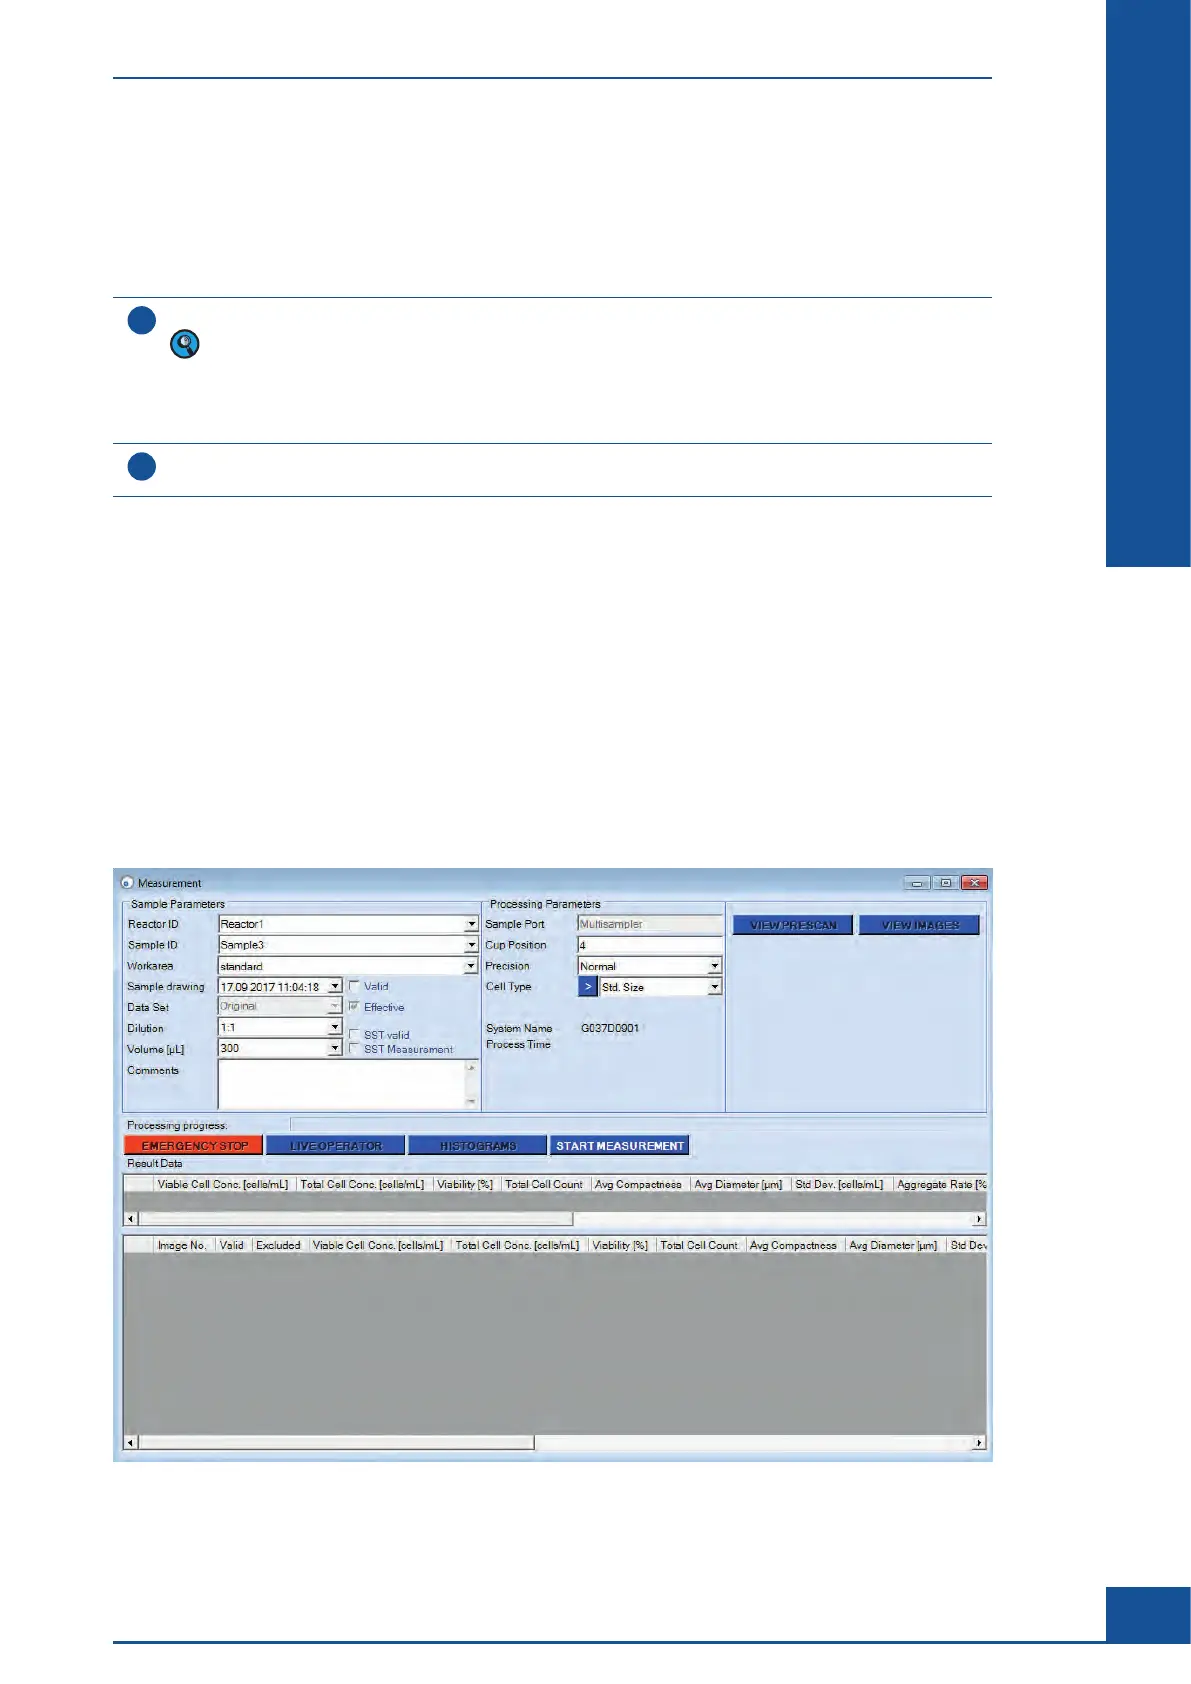
2.2 Setting up a Single Measurement in the Measurement Dialog Box
Once samples are prepared, set up a measurement in the Measurement dialog box of the Cedex Control Center
as follows:
c
In the Cedex Control Center Shortcuts area, click on the MEASURE button to open the Measurement dialog
box.
c Define the Sample Parameters in the Sample Parameters group.
c
Define the Measurement and Analysis Parameters in the Processing Parameters group.
c
Click on the START MEASUREMENT button to start the measurement process.
Figure 6
The Measurement Dialog Box
Preparing Samples for Measurement