25
Main Application: Counting Cells and Determining Viability
B
B
7.3 Schedule Samples and Start the Measurement
After all sample information has been entered into the Multi Run preparation area, activate the samples to add
them to the process queue.
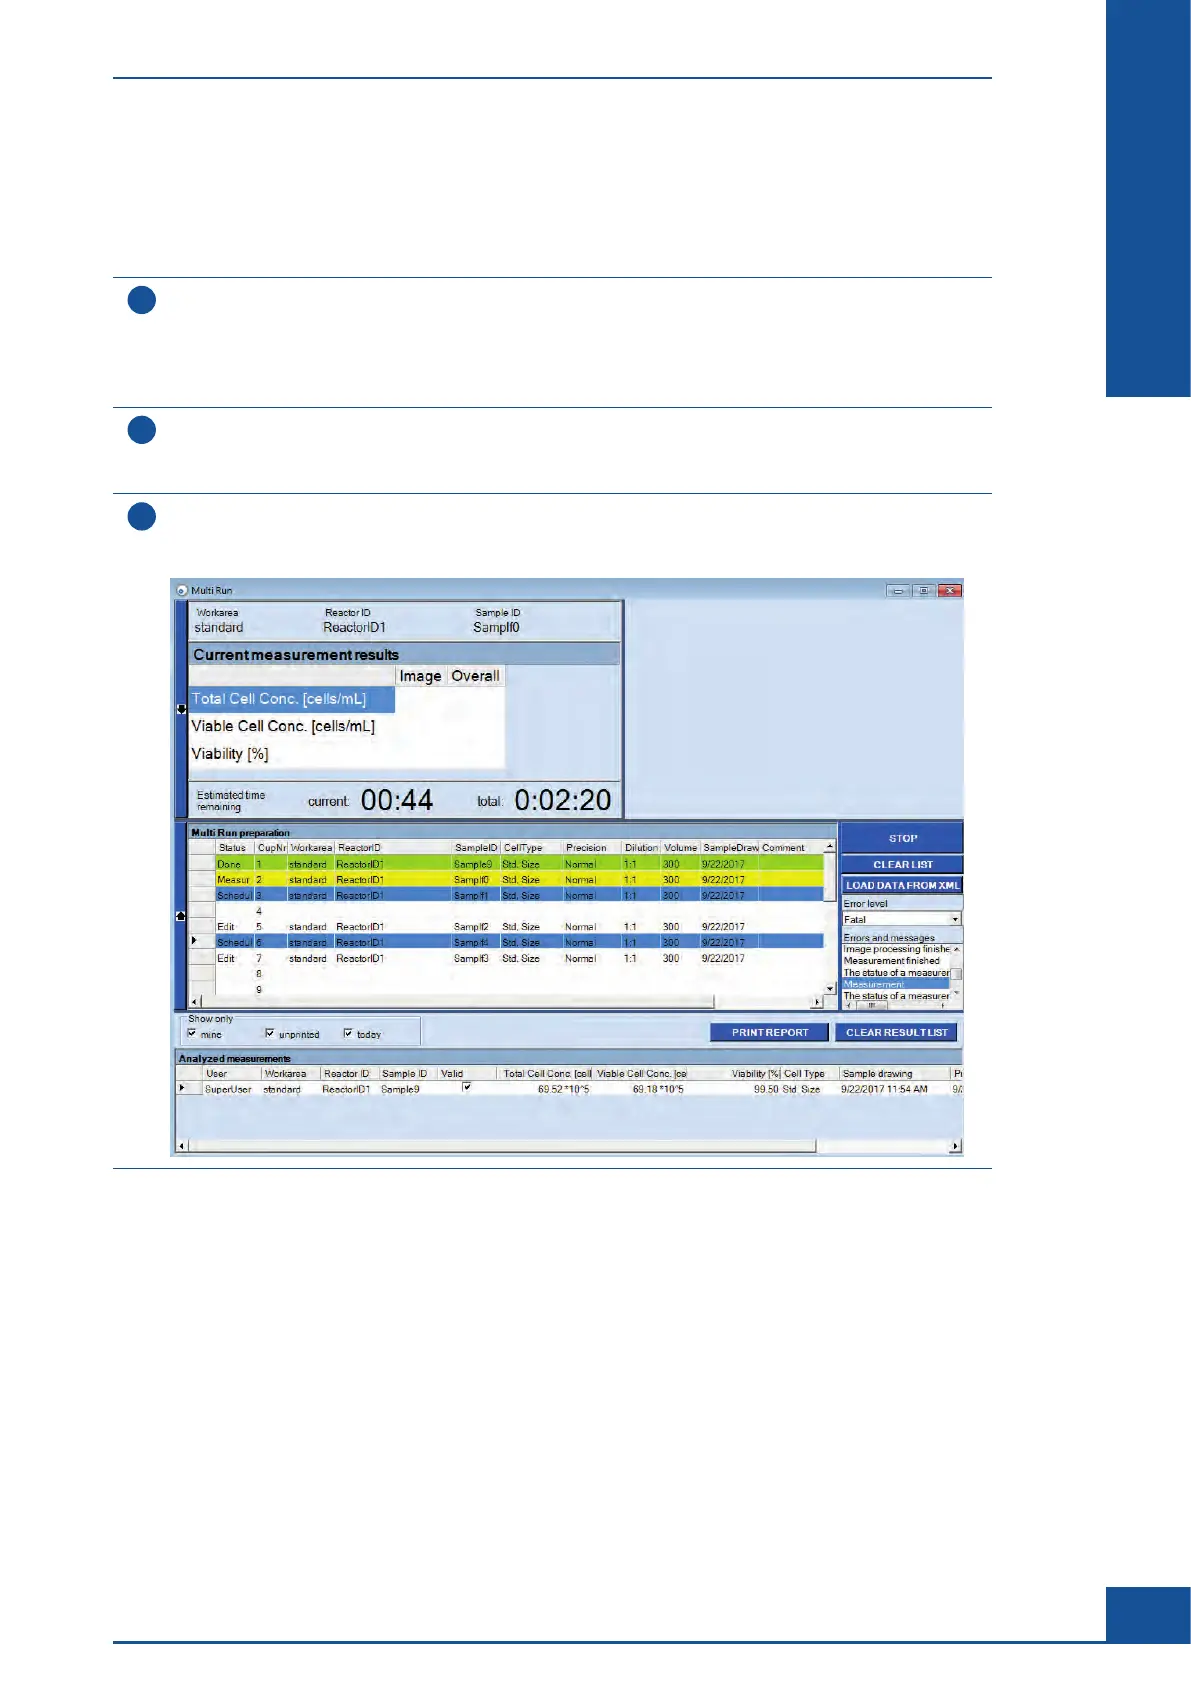
1
Activate each sample row by double-clicking in the Status field of the row to be scheduled.
The status of the row changes to scheduled and the row appears blue.
Additional modifications of sample information are not possible.
Return to the edit status by double-clicking on the Status field of the sample row to allow for further
changes, if required.
2
Alternatively, double-click on the word Status in the column heading at the top of the
Multi Run preparation area to activate or deactivate all samples simultaneously.
Confirm the safety query with YES to accept the modification.
3
After at least one row has the status scheduled, click on the START button on the right-hand side of the
Multi Run dialog box.
The analysis of scheduled measurements starts.
n
When measuring begins, the row of the sample being measured is highlighted in yellow, and the progress of the
measurement is tracked in the status column. After a measurement finishes, the row is highlighted in green and
the status column indicates Done. The estimated time required for the measurement is shown in the Estimated
time remaining field.
The Multi Run dialog box displays images taken of the sample in the upper-right-hand corner during
measurement. In addition, the dialog box displays results for Total Cell Concentration, Viable Cell Concentration,
and Viability in the upper-left-hand corner of the Multi Run dialog box during and after a measurement has
finished.
Setting up Multiple Measurements Using the Multi Run Dialog Box
Schedule Samples and Start the Measurement