46
Cedex HiRes Analyzer Software Version 2.4 - Training Guide
C
C
5
Make the desired modifications using the sliders.
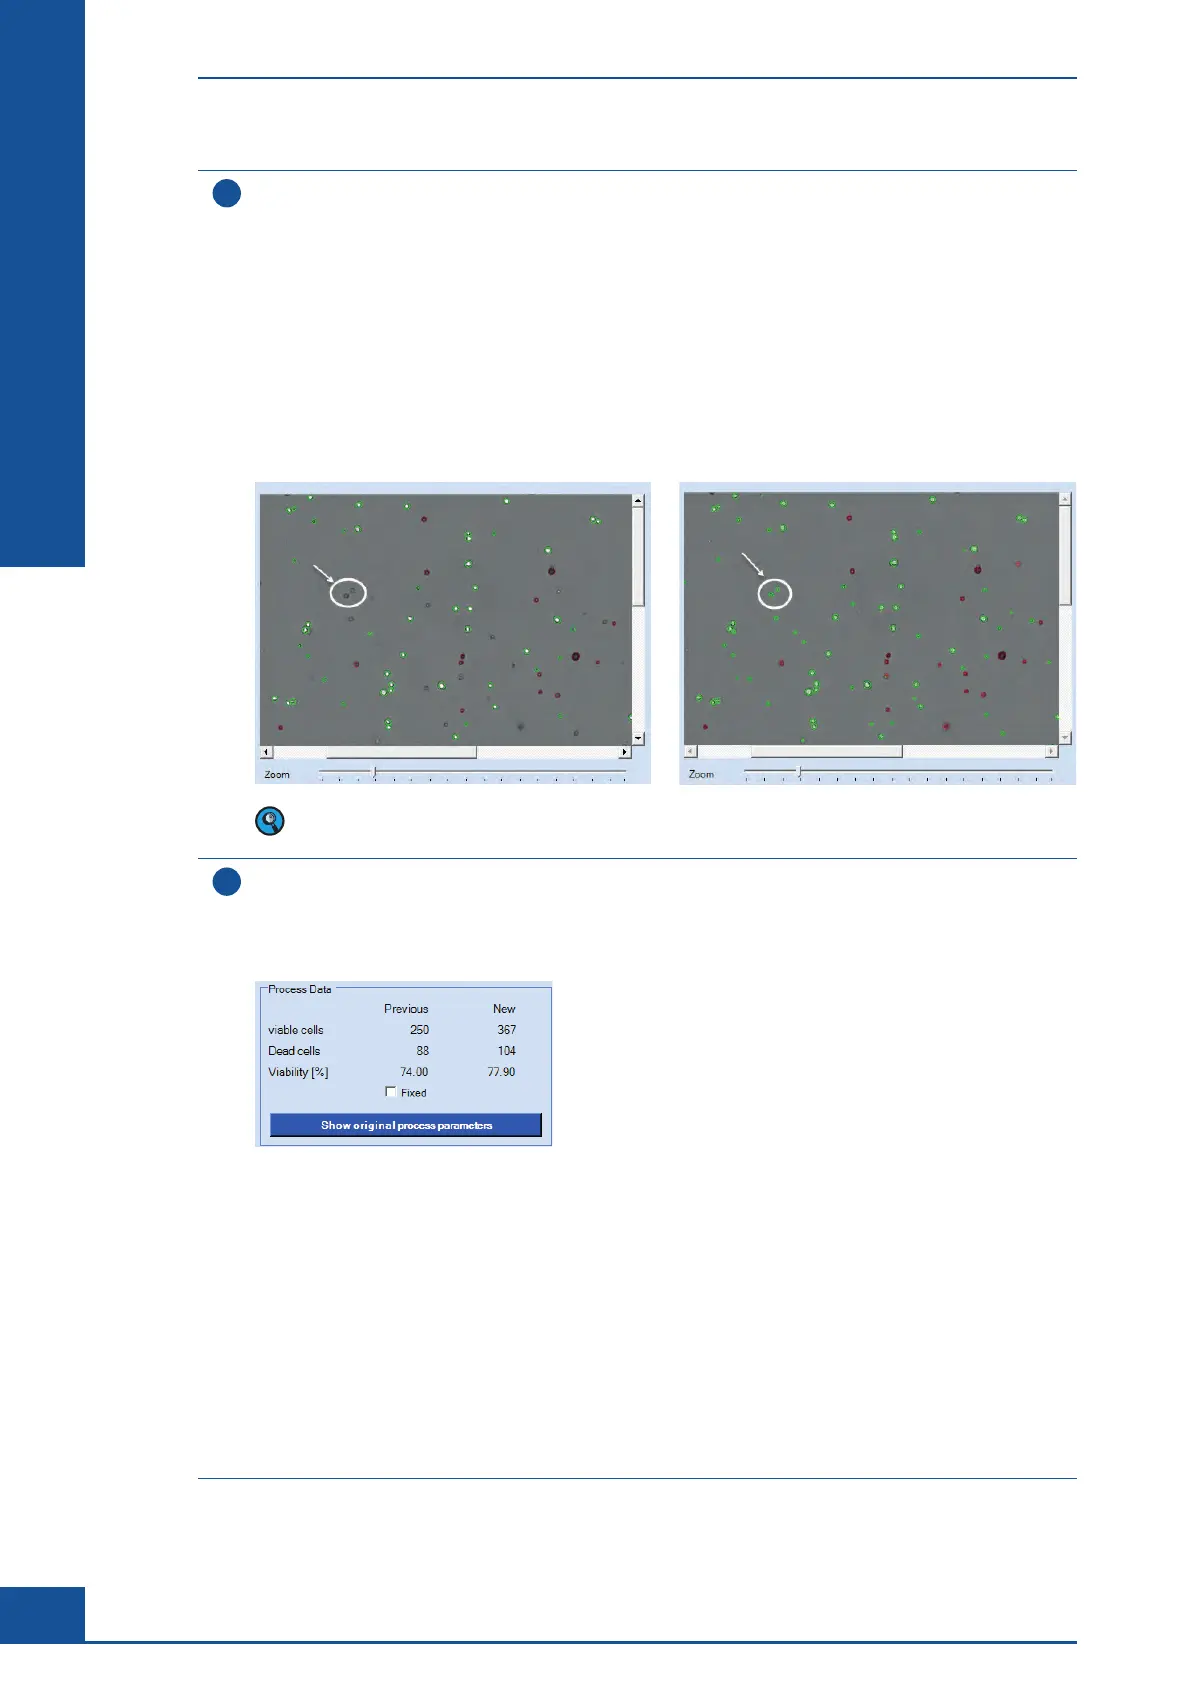
In the example shown in the previous screenshot, some live and dead cells were not recognized. This is most
likely due to the fact that some of the cells fell below the cutoff for minimum size and also had an unusually
weak contrast against the background.
For this particular cell culture, the following changes were made to the Cell Type New Cell Type (for more
detailed information about available parameters, see the Cedex HiRes Analyzer Operator’s Guide):
c CMinSize set to: 4
c LCAppearance set to: 10
c DCAppearance set to: 10
Image analysis with Std. Size before parameter
adjustments.
Image analysis with New Cell Type after parameter
adjustments.
The labeling of the cells can be switched on and off using the checkboxes in the upper-right-hand corner
in order to allow for better evaluation of the results from changes in parameter settings.
6
As soon as each parameter is changed, the data is automatically reprocessed. If multiple parameter changes
are made at the same time, remove the checkmark in the Automatic process box by clicking on it. When
the checkmark is removed, the button Process now becomes active. Make all changes, and then click on
the Process now button for an analysis based on the new parameter settings. The image display shows the
reprocessed image, as well as changes in the number of live and dead cells identified by the new Cell Type:
c The values New Viable Cells (the number of living cells in the current image) and New Dead cells (the
number of dead cells in the current image) are displayed in the New column of the Process Data area.
c If an Operator parameter is modified, the newest values will appear in the New column after the
automatic reprocessing of the selected image is finished.
c The values of the previous processing are displayed in the Previous column.
c In addition, Viability [%] in the New column shows the viability of the last processing of the image, while
Viability [%] in the Previous column shows the viability of the second-to-last processing of the image.
Thus, it is possible to directly compare the evaluation with each previous evaluation. By activating the Fixed
checkbox in the Process Data area, the values currently displayed in the Previous column will not be changed
after further adjustments of operator parameters. This allows, for example, the comparison of evaluations
with the original evaluation when activating the checkbox after the first parameter adjustment. By clicking
the Show original process parameters button you can see the process parameters originally used.
ccc
Analyzing Unusual Cells
Example of Cells Not Recognized by the Cell Type Std. Size