Recording Audio
25
The system can also record audio for up to 2 channels (D3312), 4 channels (D3304 or
D3216), 8 channels (D3308), or 16-channels (D3316/D3332). You must have audio-capa-
ble cameras (not included) or self-powered microphones (not included) in order to record
audio on the system.
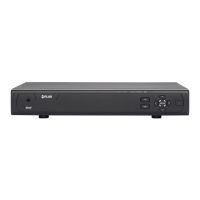
8-channel model shown.
Connect a BNC audio cable from the camera into the corresponding Audio INPUT port (1)
Note
On D3316 and D3332, connect the included octopus cable to the Audio In and then connect BNC audio
cables from the cameras to the corresponding connectors on the octopus cable.
To enable audio recording:
1. Connect the BNC video cable from the camera to one of the BNC Video INPUT ports
on the rear panel of the DVR.
2. Connect the RCA audio cable from the camera to the corresponding Audio INPUT.
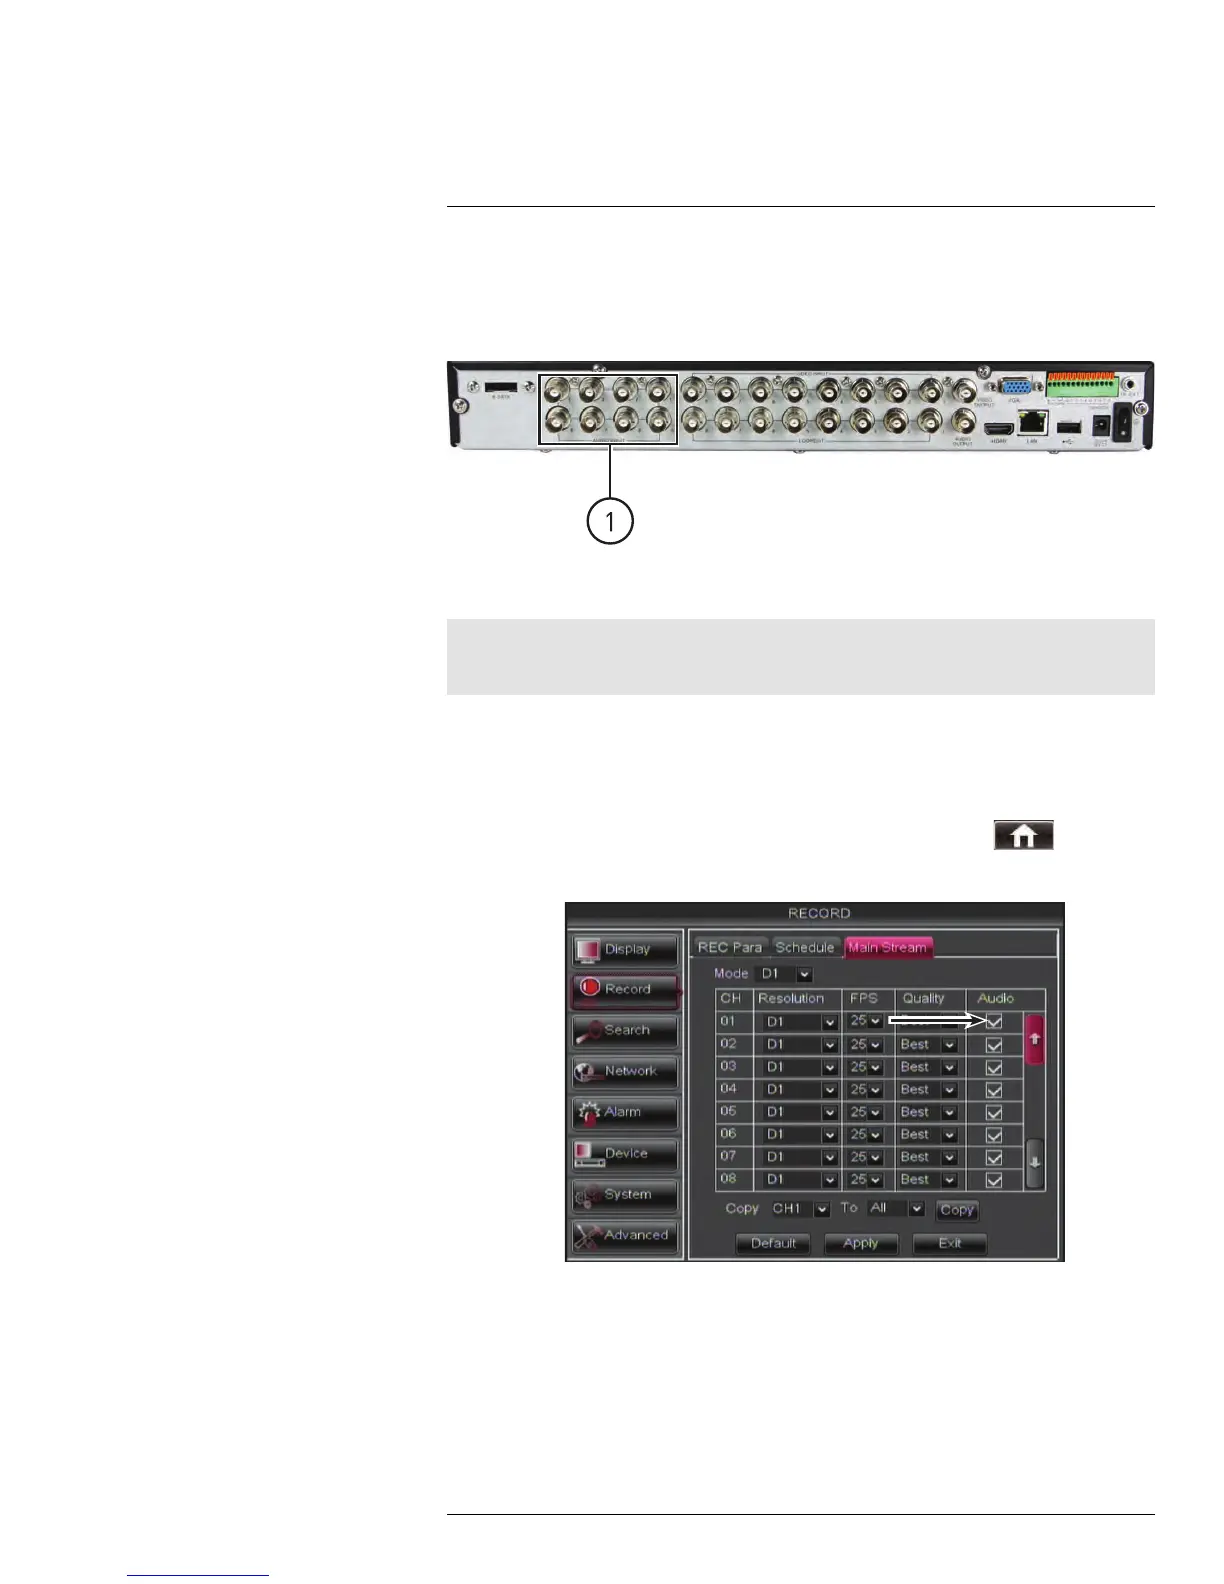
3. Right-click to open the Menu Bar and click the Main Menu button (
).
4. Click Record and select the MainStream tab.
Check Audio to enable audio recording on each channel
5. Ensure the Audio checkbox is checked next to the channel the audio-enabled camera
is connected to.
6. Click Apply to save your changes.
#LX400005; r. 1.0/13714/13883; en-US
172
 Loading...