Setting up Your DVR for Remote Connectivity
15
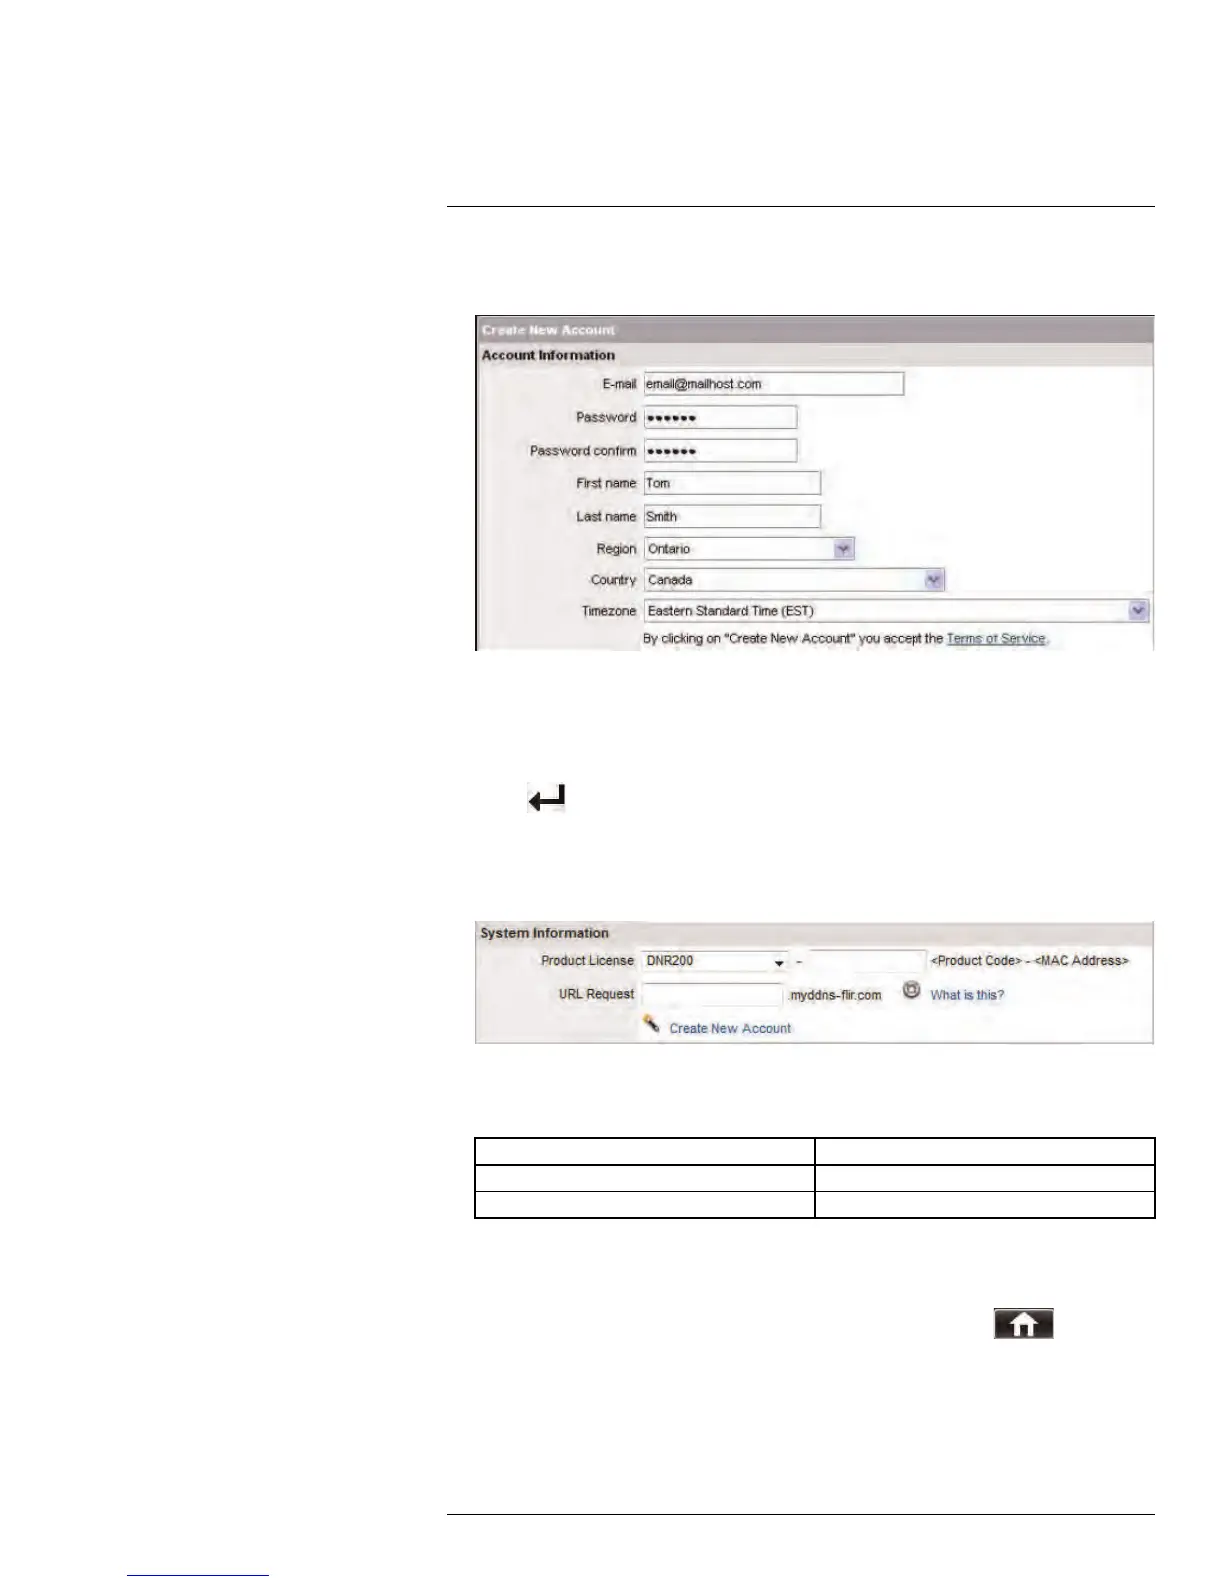
2. Complete the Account Information fields with your personal information. Complete the
Warranty Information with your purchase details (optional).
3. Complete the System Information fields:
• Product License: Select your product model from the Product License drop down
menu (i.e. D3200 or D3300).
• <Product Code> - <MAC Address>: Locate the MAC address of your DVR (press
the
button on the remote control or front panel to find the MAC address.
• URL Request: Choose a URL for your DDNS connection (i.e. your name, your com-
pany or business name, or anything of your choice).
4. Once the information has been entered, click Create New Account.
5. Your Account information will be sent to you at the email Address you used in Step 2 .
You will need this information for remote access to your system. Record your informa-
tion below:
User name:
Domain name:
Password:
15.3.3 Step 3 of 4: Enable DDNS on the DVR
To enable DDNS in your DVR:
1. Right-click to open the Menu Bar and click the Main Menu button (
).
2. Click Network and select the DDNS tab.
#LX400005; r. 1.0/13714/13883; en-US
73

 Loading...