Setting up Your DVR for Remote Connectivity
15
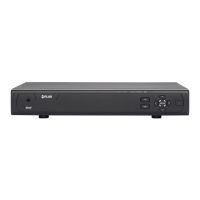
15.2.2 Step 2 of 3: Obtain the DVR’s Local IP Address
1. Press the PTZ /
button on the front panel of the DVR to open the System Informa-
tion window.
2. Write down the IP Address and HTTP Port number of the DVR.
• A local IP looks something like this: 192.168.5.118. Note that single digit numbers
appear as three digits. For example, "005" is the same as "5".
• Write down the port number beside HTTP Port.
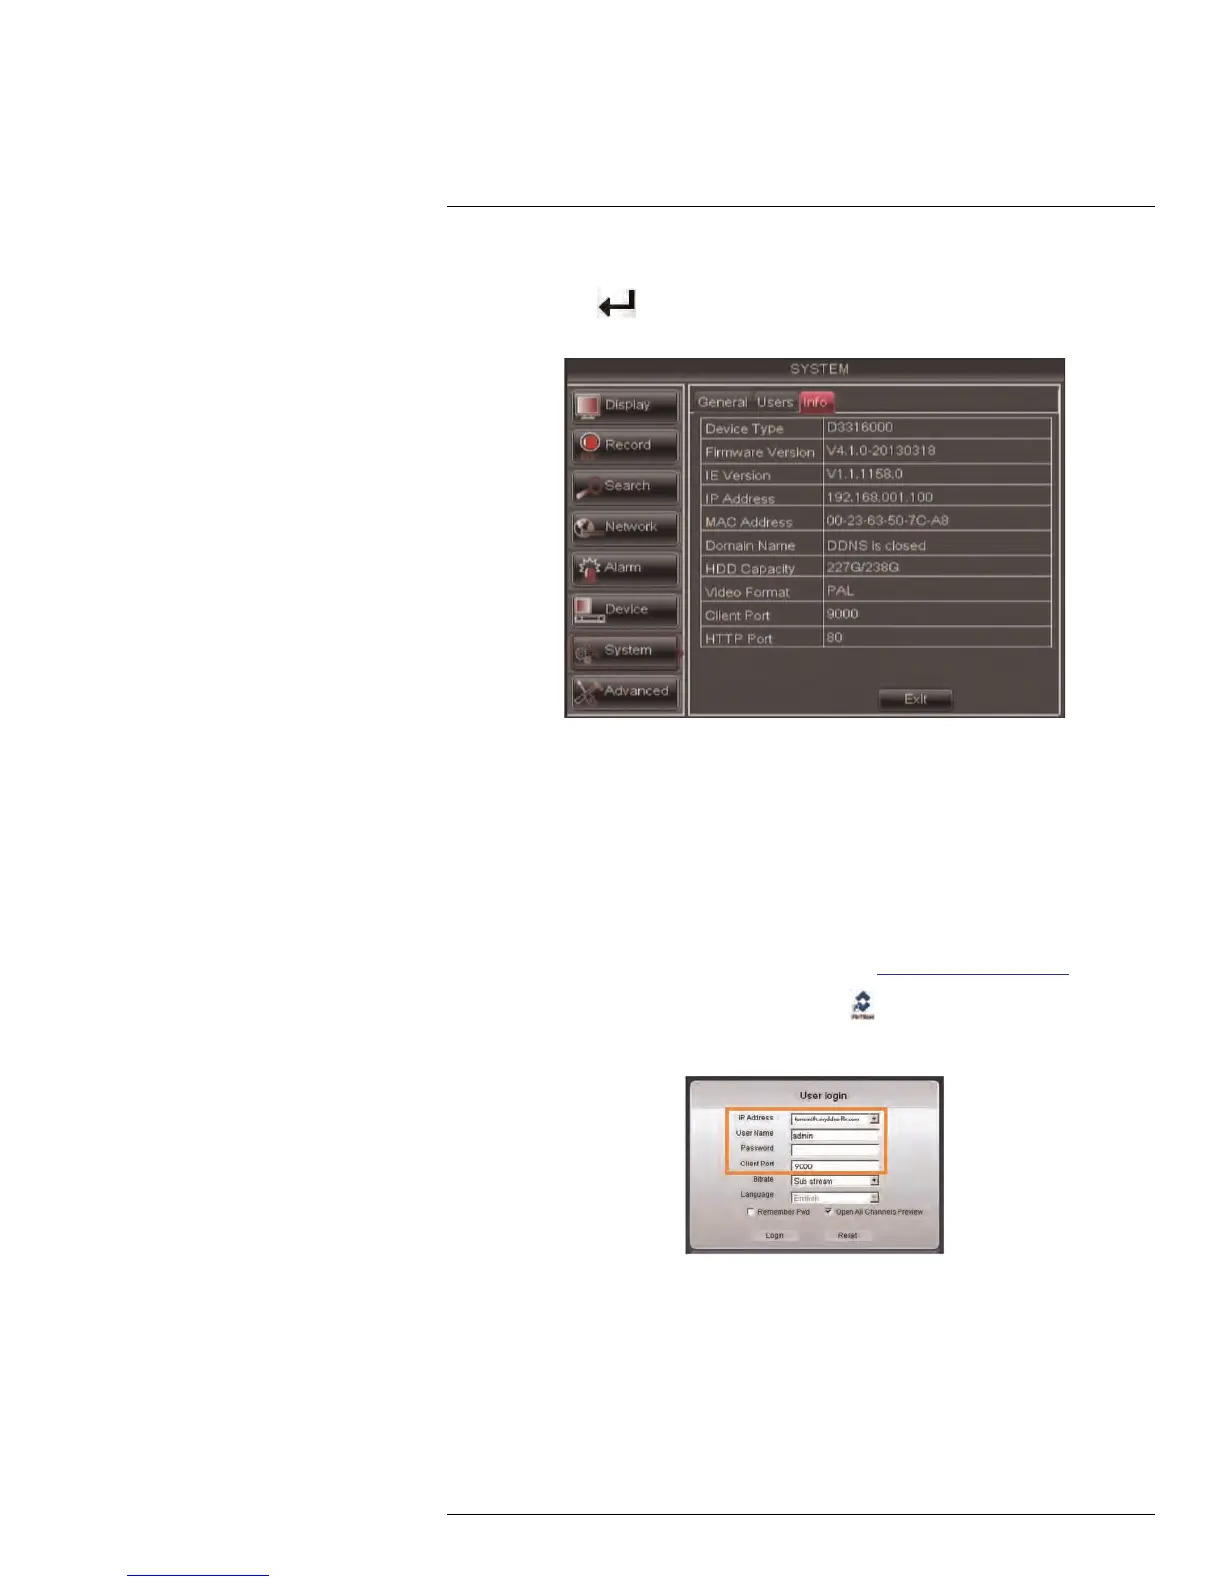
15.2.3 Step 3 of 3: Connect to the DVR’s Local IP Address
Follow the steps below to confirm connectivity over a local network on a PC or Mac.
To connect using the DVR’s local IP address on a PC:
1. Install Client software for PC from the CD or from www.flirsecurity.com/pro.
2. Double-click on the Client software for PC icon (
) on your desktop.
3. Enter the following information:
• IP Address: Enter the IP Address of your DVR.
• User Name: The default user name is admin.
• Password: By default, the password is 000000.
• Client Port: By default, this is 9000.
4. Click Login to access your DVR. You will be prompted to change the password for
your system.
5. Enter a new 6 character password and click OK.
#LX400005; r. 1.0/13714/13883; en-US
70

 Loading...