Setting up Your DVR for Remote Connectivity
15
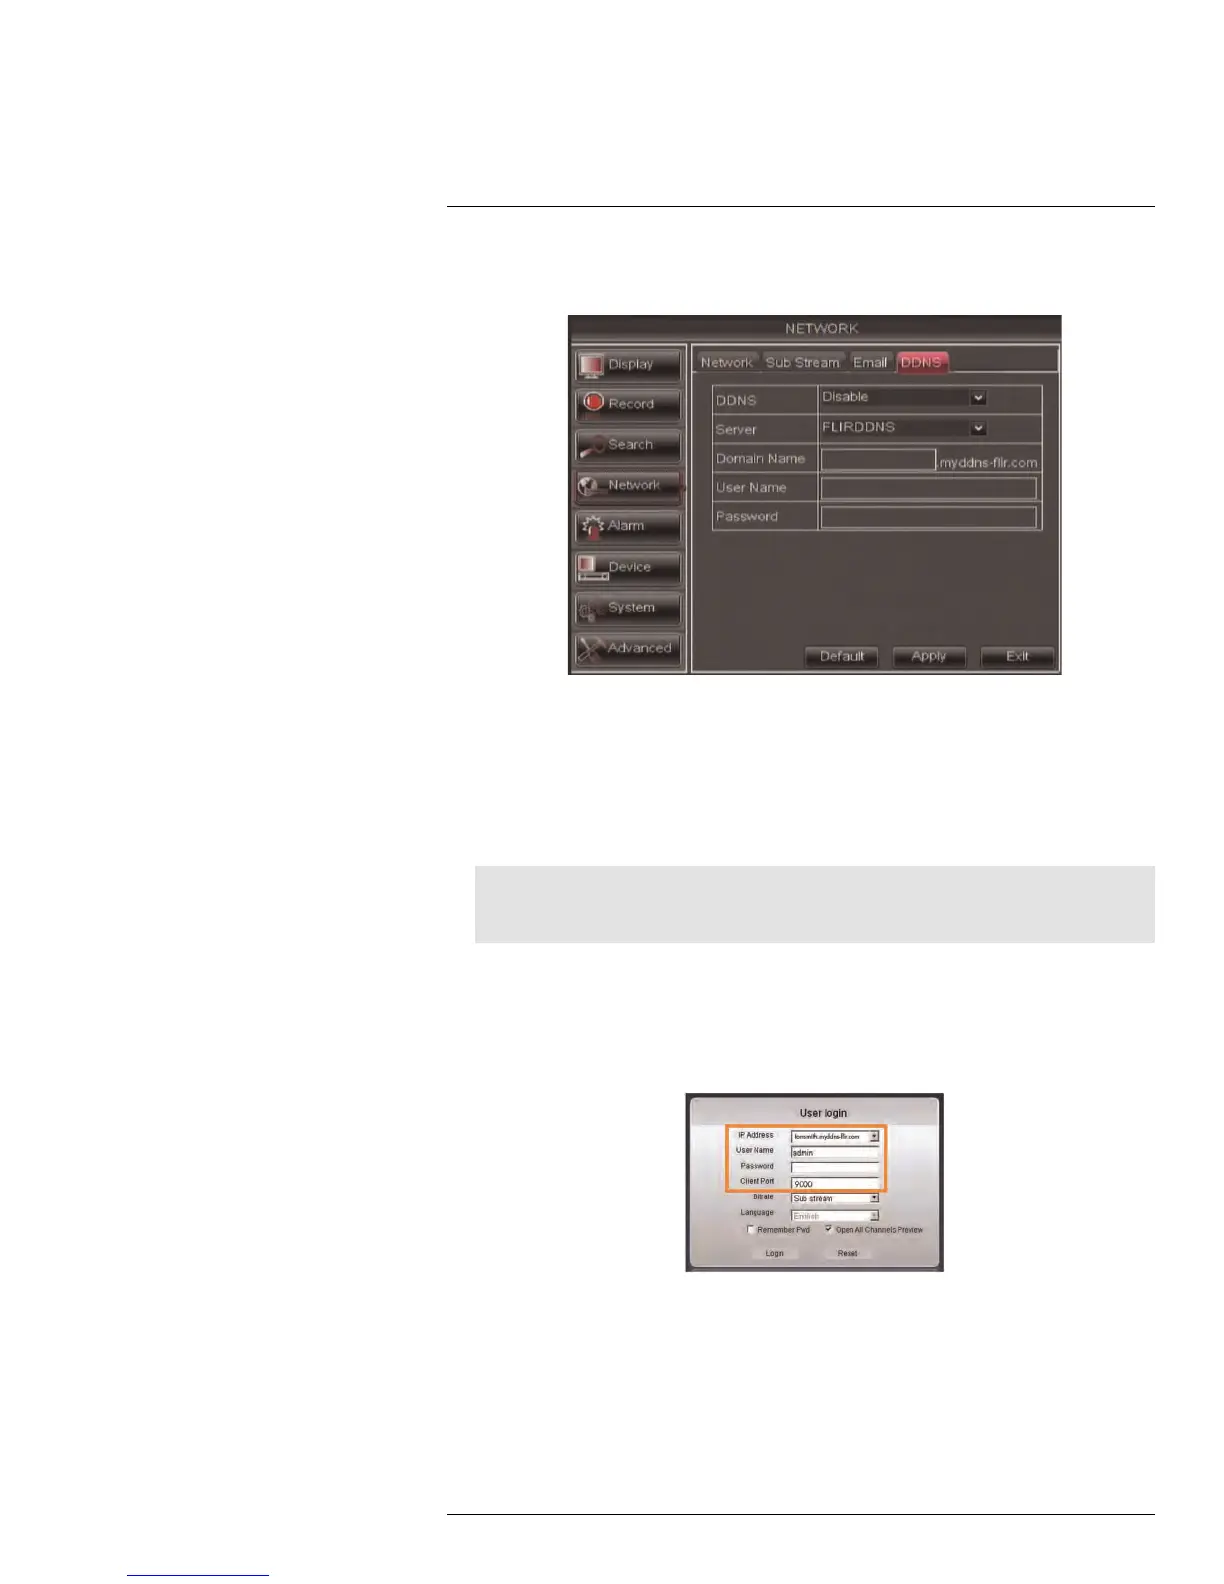
3. In the DDNS drop-down menu, select Enable. Beside Server, select FLIRDDNS
(default).
4. Under Domain Name, enter your Domain name/URL Request from the confirmation
email that was sent after you created your DDNS account.
5. Under User Name, enter your DDNS User Name that was emailed to you after DDNS
registration.
6. Under Password, enter your DDNS Device password that was emailed to you after
DDNS registration.
7. Click Apply to save your settings.
Note
Please allow 10~15 minutes for the DDNS servers to update with your new DDNS address before at-
tempting to connect.
15.3.4 Step 4 of 4: Connect to the DDNS Address
To connect to the DDNS address using the client software on PC:
1. Install and run the Client software for PC on a remote computer.
2. Enter the following information:
• IP Address: Enter the URL Request followed by .myddns-flir.com. For example, if
your URL Request is tomsmith, enter tomsmith.myddns-flir.com
• User Name: The default user name is admin.
• Password: Enter the DVR password you created earlier.
• Client Port: By default, this is 9000.
3. Click Login to access your DVR. Client software for PC connects to your DVR and
streams live video from your cameras.
#LX400005; r. 1.0/13714/13883; en-US
74

 Loading...


