2.6 Connecting an Interface
34
Be sure to read the "Input modules (option)" (p. 8) before connecting mea-
surement cables, probes or test fixture.
Read this section before installing or replacing an optional interface or removing the interface and using the
instrument without it.
You will need: A Phillips head screwdriver
You can check information about the interface installed in the instrument on the screen.
See "10.1 Setting the Interface" (p. 263), "10.2 Checking the Version of the Instrument" (p. 264)
2.6 Connecting an Interface
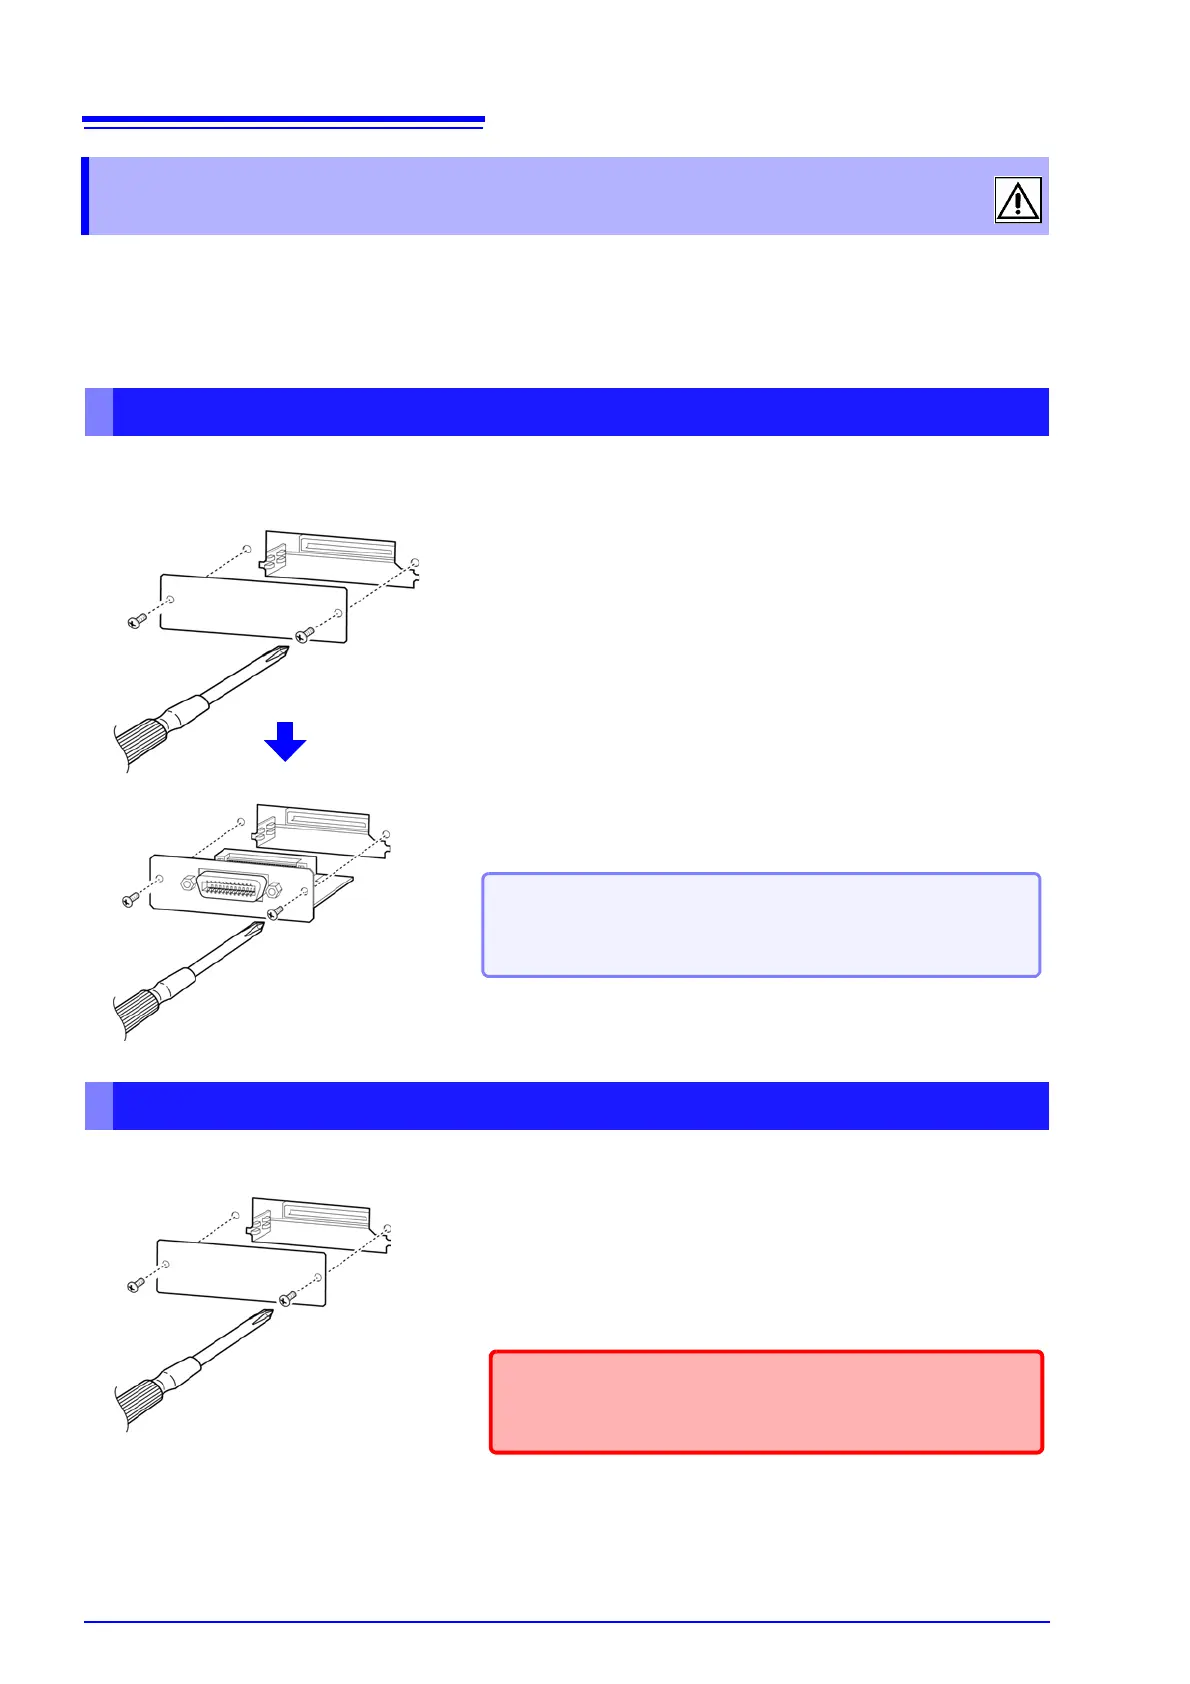
Installing an interface
When a removed interface will not be used
1
Unplug the instrument's power cord from the wall outlet.
Disconnect connection cords.
2
Remove the blank panel.
3
Paying attention to the orientation of the interface,
inset it firmly into place.
Rear
4
Secure the interface in place by tightening the two fix-
ing screws with a Phillips head screwdriver.
When removing the interface:
Unplug the power cord from the wall outlet and perform the above
procedure in reverse to remove the interface.
1
Unplug the instrument's power cord from the wall outlet.
Disconnect connection cords.
2
Attach the blank panel and secure it in place by tight-
ening the two fixing screws with a Phillips head
screwdriver.
Rear
Making measurements without reattaching the blank
panel will prevent the instrument from performing to its
specifications.