3. Remove the Top Cover See Cover, Top on page 219.
4. Remove the Service Station
See Service Station on page 233.
5. Remove the Rear Door
See Rear Door on page 333.
6. Remove the Entry Platen
See Entry Platen on page 338.
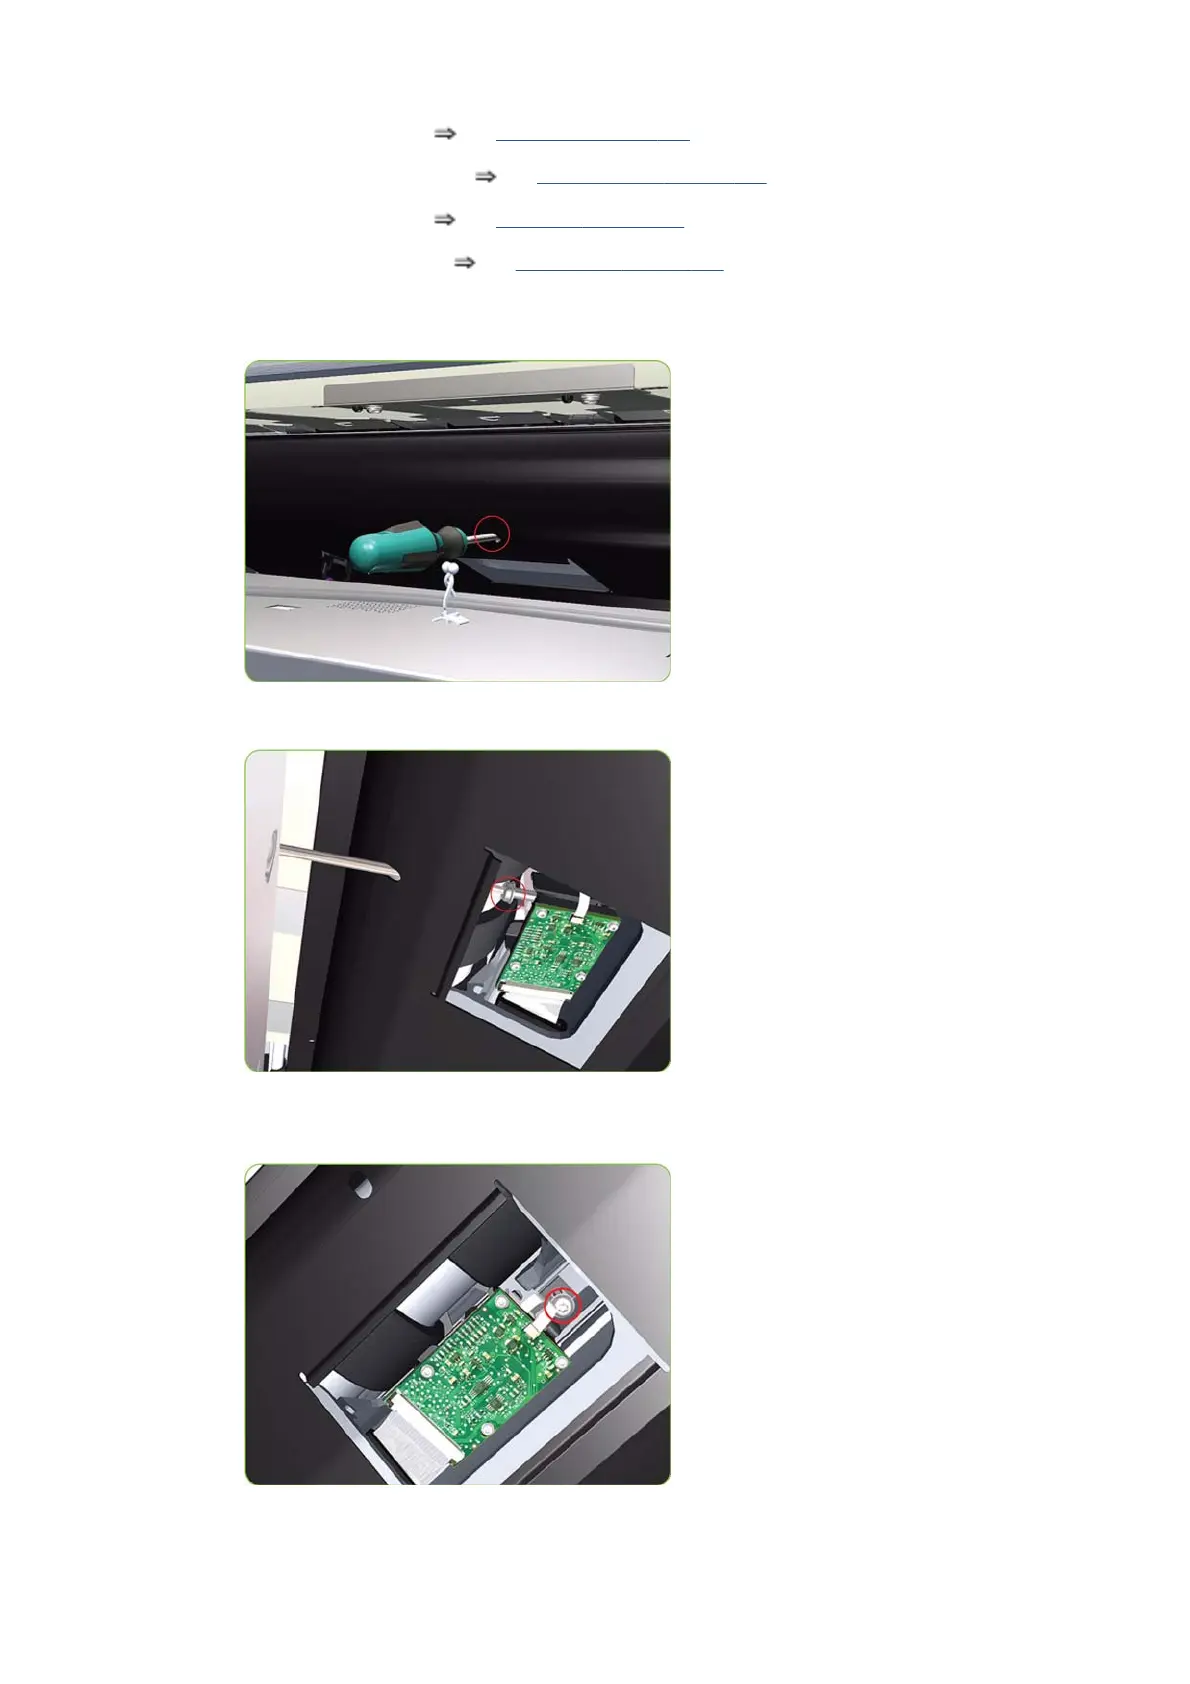
7. Insert the T-20 thin bladed torx screwdriver (supplied with the replacement OMAS) into the access hole
at the rear of the printer.
8. Loosen approximately two turns the T-20 screw which secures the OMAS horizontally to the printer.
9. From the bottom of the printer, loosen approximately two turns the T-20 screw which secures the
OMAS vertically to the printer.
ENWW Disassembly order 377
 Loading...