because of safety agency requirements. These unused parts are removed from the replacement library
enclosure and returned to IBM in the defective library. The old parts in your defective library are
removed, and installed into the replacement library enclosure.
Note: To reduce the risk of personal injury or damage to equipment:
v Observe local health and safety requirements and guidelines for manual material handling
v Obtain adequate assistance to lift and stabilize the library during installation or removal
Minimum Installation Time: 1 hr.
Minimum Number of Persons Required: 2
Recommended Tools: #2 Phillips screwdriver, paper clip, blank (or scratch) data cartridge
Preparing the defective library for replacement
Procedure
1. If possible, use the Operator Control Panel to unload any drives that contain a cartridge (Control >
Move Cartridges).
2. Power OFF the defective library.
3. Disconnect all cables from the rear panel of the defective library.
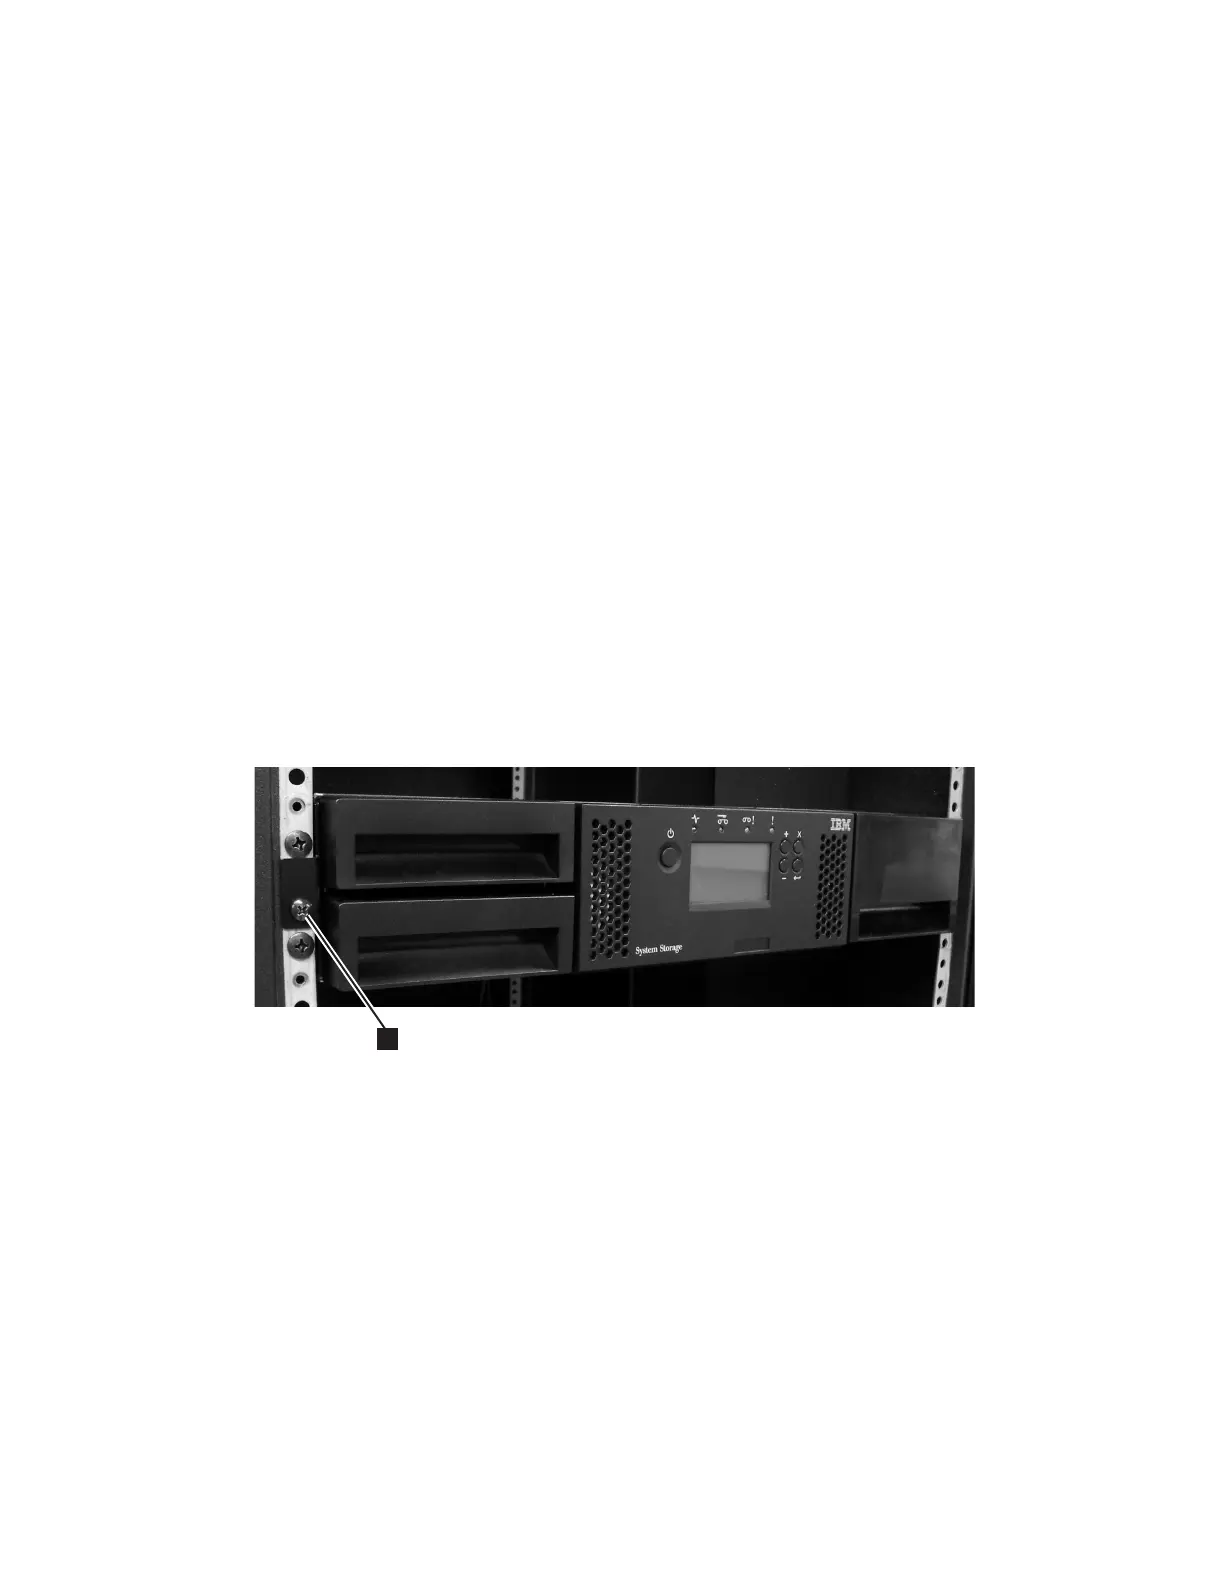
4. If the defective library is rackmounted, remove the two screws (▌1▐ in Figure 178) from the front of
the defective library anchoring the mounting brackets on the library to the rack. With assistance,
remove the defective library from the rack.
5. Place the defective library on a clean and sturdy work surface.
6. Proceed to “Unpacking and preparing the replacement library enclosure.”
Unpacking and preparing the replacement library enclosure
About this task
Before the replacement library enclosure is installed, it is important to verify that the enclosure is
functioning properly.
Procedure
1. Unpack the replacement library enclosure and place it on a sturdy and clean work surface near the
defective library. Save all packaging materials for returning the failing parts to IBM.
2. Choose one of these options for installing the foot pads.
Figure 178. Removing the two mounting bracket screws anchoring the library to the rack (one screw on each side of
the library)
Check, adjust, remove, and replace 235