LANDING GEAR / MAIN LANDING GEAR 14-43
CHANGE C2 ICON A5 / MAINTENANCE MANUAL
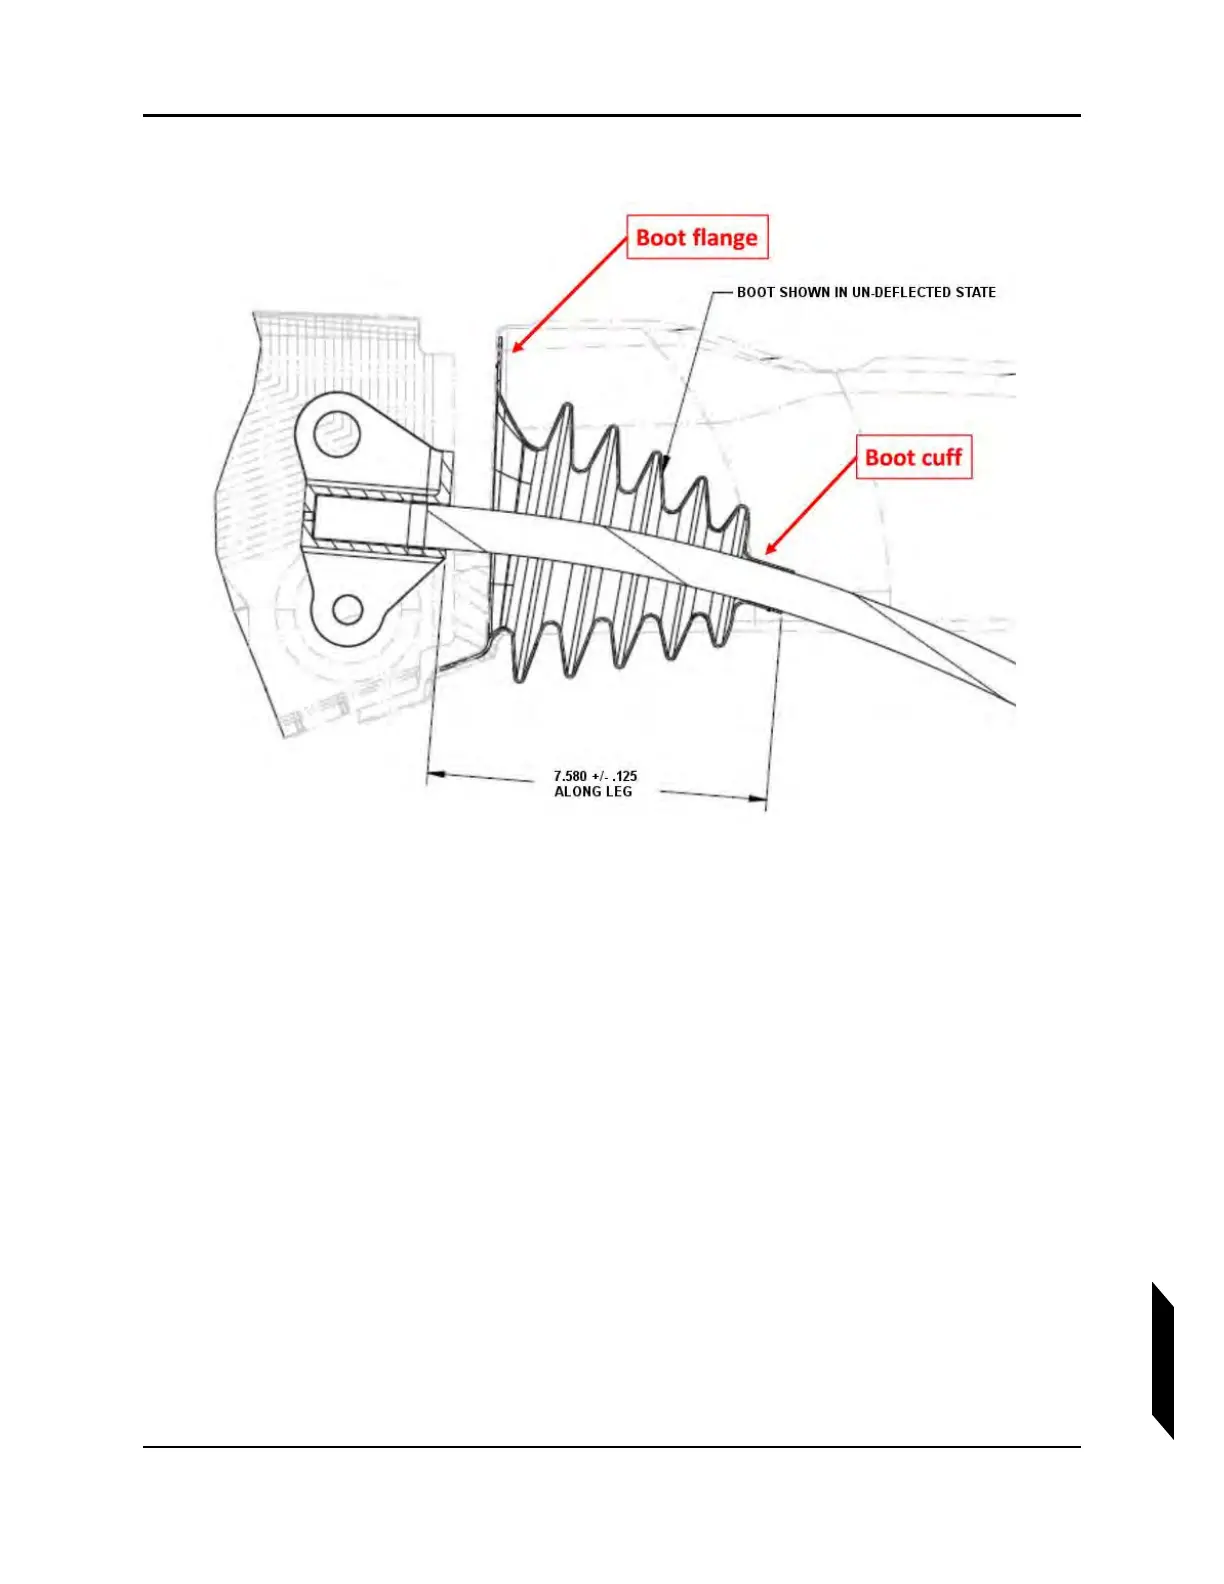
figure below shows the proper location of the boot flange and boot cuff. Take care to locate the
boot cuff at the distance shown from the trunnion.
4. Bond the boot cuff to the landing gear leg by injecting or by lifting and troweling Sil-Poxy
®
adhe-
sive into the joint. Be careful to get a good seal all around. Ensure that the boot cuff is located as
shown above. Wipe off excess adhesive with a paper towel.
NOTE:The working time of Sil-Poxy
®
is five minutes. Each bonding opera-
tion must be completed in this time or the strength of the joint may
be reduced. The initial cure time is 15 minutes with full strength
achieved in 24 hours at room temperature (73°F).
5. Use adhesive tape to secure the boot cuff to the gear leg so that it does not shift and disturb the
bond while the subsequent bond operations are performed. An alternate and safer approach is
to let the boot cuff bond to the gear leg fully cure (24 hours) before the boot flange bond to the
Seawings™ is performed.
6. Apply Sil-Poxy
®
adhesive to the boot flange and press against Seawings™. Wipe off excess
adhesive with a paper towel. The viscosity of the adhesive is adequate to hold the boot flange in
place during the curing process.
7. Install the axle and wheel assemblies using the MLG Wheel and Axle procedure. (See “Main
Landing Gear (MLG) Wheel and Axle Installation” on page 14-48.) Leave the aircraft on the jacks