16-82 PROPULSION / ENGINE
ICON A5 / MAINTENANCE MANUAL CHANGE C2
4. If the P6-H-190 thermostat does not have the four AN816-8D fittings installed, install them by
applying LOCTITE
®
243™ to the first two threads, then torquing to finger tight then 1.5-2.5 turns
additional.
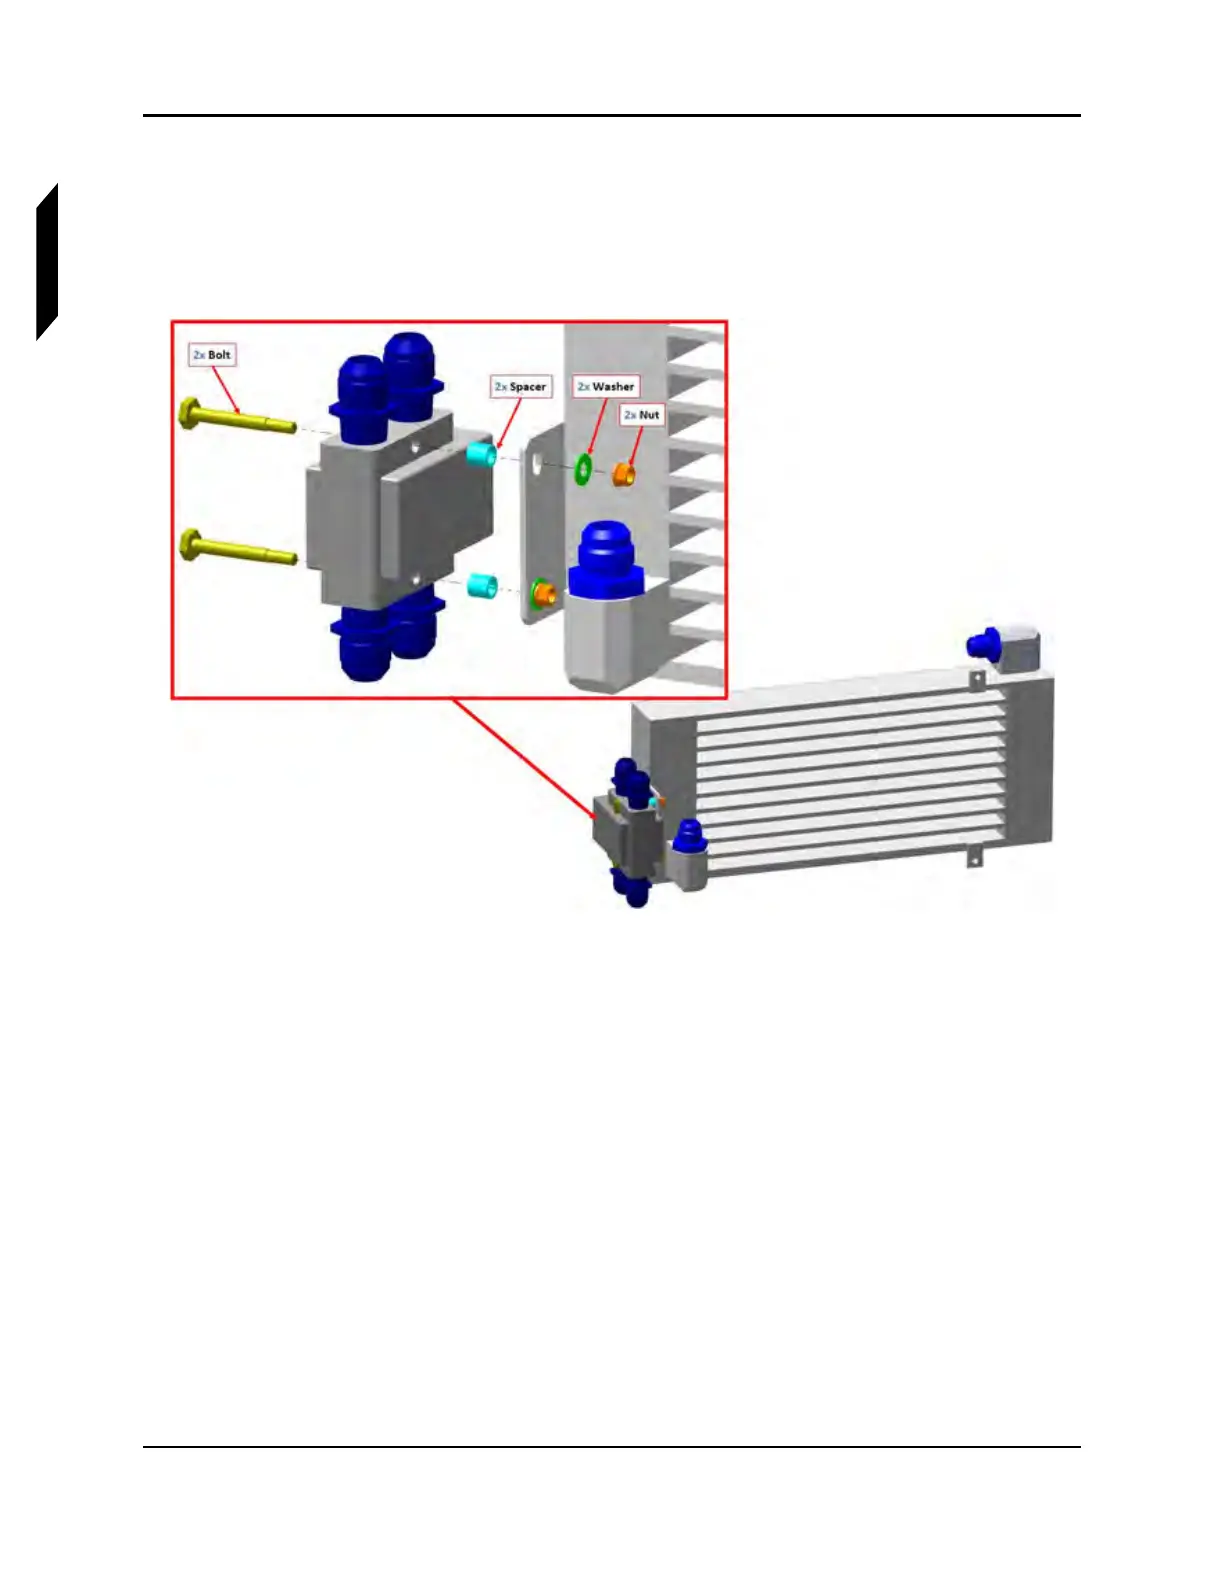
5. Install the thermostat onto the oil cooler as shown. Use 3/8 and 1/4 wrenches to torque the two
fasteners to 20 in-lb
f
.
6. Install the two aluminum oil lines between oil cooler and thermostat using a 1 inch wrench to hold
the union on the cooler, a 13/16 to hold the union on the thermostat and a 7/8 wrench to turn the
B-nuts. Torque the B-nuts to 200±50 in-lb
f
.
7. Install the P-clamp that attaches the oil cooler outlet line to the oil cooler using the 10-32 screw,
nut and washer and torquing to 20 in-lb
f
.
8. Ensure the bulb seal on the plenum box is in good condition, then attach the oil cooler assembly
to the plenum box with four MS21043-3 nuts and NAS1149C033 2R washers. Torque each nut
to 20 in-lb
f
.
9. Connect the two hoses at the lower-aft side of the oil thermostat, using a 13/16 wrench to hold
the union fitting in the thermostat and a 7/8 wrench to turn the B-nut. The lower hose runs aft to
the oil pump and should be installed first. The upper hose connects to the top of the oil tank and
should be installed second. Torque the B-nuts to 200±50 in-lb
f
.
10. Purge the oil system per the procedure in the Rotax 912iS Installation Manual.