BASIC SYSTEM
U–11
U
7. Install in the reverse order of removal.
8. Perform the refrigerant system performance test.
A/C Unit Installation Note
1. When installing a new A/C unit or evaporator, add a supplemental amount of ATMOS GU10 compressor oil into
the refrigerant cycle.
Supplemental amount (approximate quantity)
40 ml {40 cc, 1.4 fl oz}
End Of Sie
A/C COMPRESSOR REMOVAL/INSTALLATION
A6E851661450201
1. Disconnect the negative battery cable.
2. Discharge the refrigerant from the system.
3. Remove the right side splash shield.
4. Loosen the drive belt and remove it.
Caution
• If moisture or foreign material enters the refrigeration cycle, cooling ability will be lowered and
abnormal noise will occur. Always immediately plug open fittings after removing any refrigeration
cycle parts to keep moisture or foreign material out of the cycle.
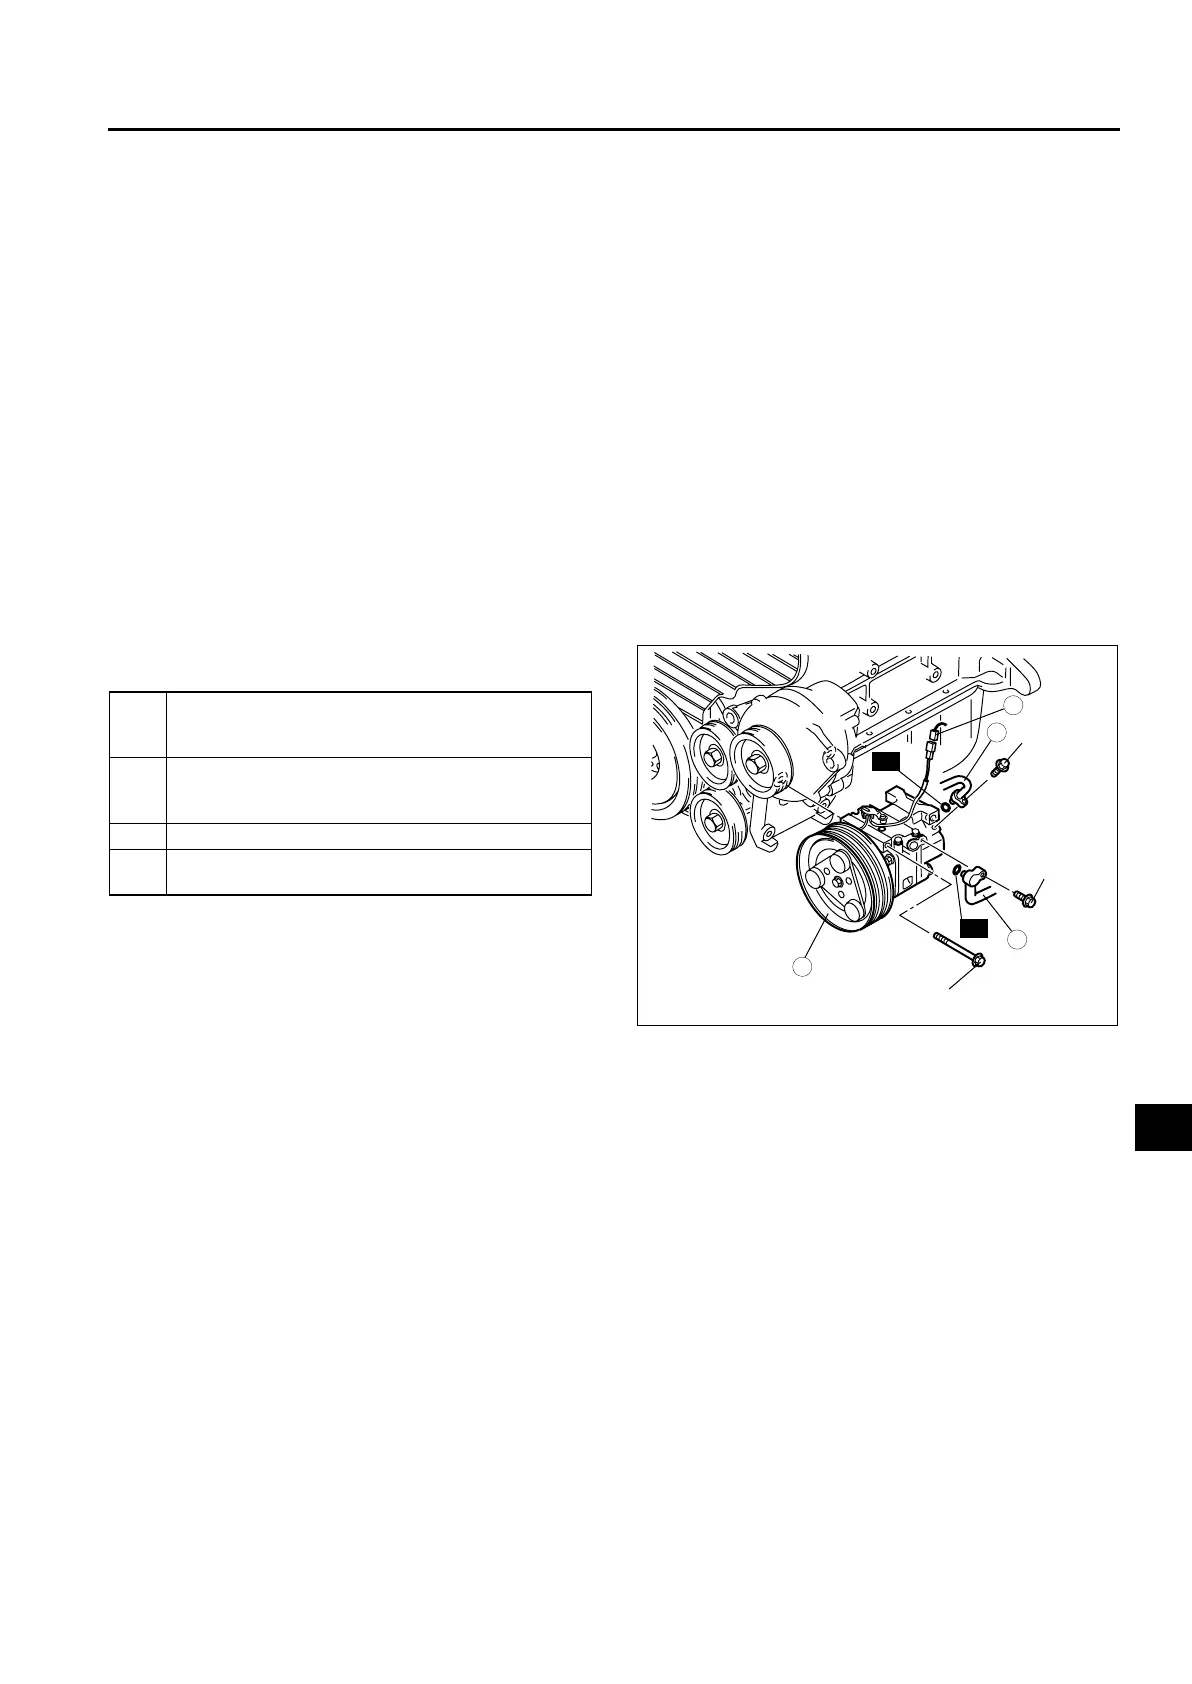
5. Remove in the order indicated in the table. Do not
allow compressor oil to spill.
.
6. Install in the reverse order of removal.
7. Adjust the drive belt.
8. Perform the refrigerant system performance test.
A/C Compressor Installation Note
1. Remove the following amount of compressor oil from the new A/C compressor when replacing the A/C
compressor.
Compressor oil to be removed (approximate quantity)
150 ml {150 cc, 5.07 fl oz} – [compressor oil from old A/C compressor + 15 ml {15 cc, 0.5 fl oz}]
End Of Sie
1 Cooler hose (HI)
(See U–13 REFRIGERANT LINES REMOVAL/
INSTALLATION)
2 Cooler hose (LO)
(See U–13 REFRIGERANT LINES REMOVAL/
INSTALLATION)
3 Magnetic clutch connector
4A/C compressor
(See U–11 A/C Compressor Installation Note)
4
3
1
2
N·m {kgf·cm, in·lbf}
6.86—9.80
{70.0—99.9,
60.8—86.7}
R
R
6.86—9.80
{70.0—99.9,
60.8—86.7}
17.6—26.5 N·m
{1.80—2.70 kgf·m,
13.0—19.5 ft·lbf}
A6E85162005
 Loading...