186 FRONT COVER AND RELAT ED COMPONENTS
Generation 2 (Mounting Bolts)
NOTE: Generation 2 front cover assemblies have
additional bolts to secure the front cover half to the
rear half.
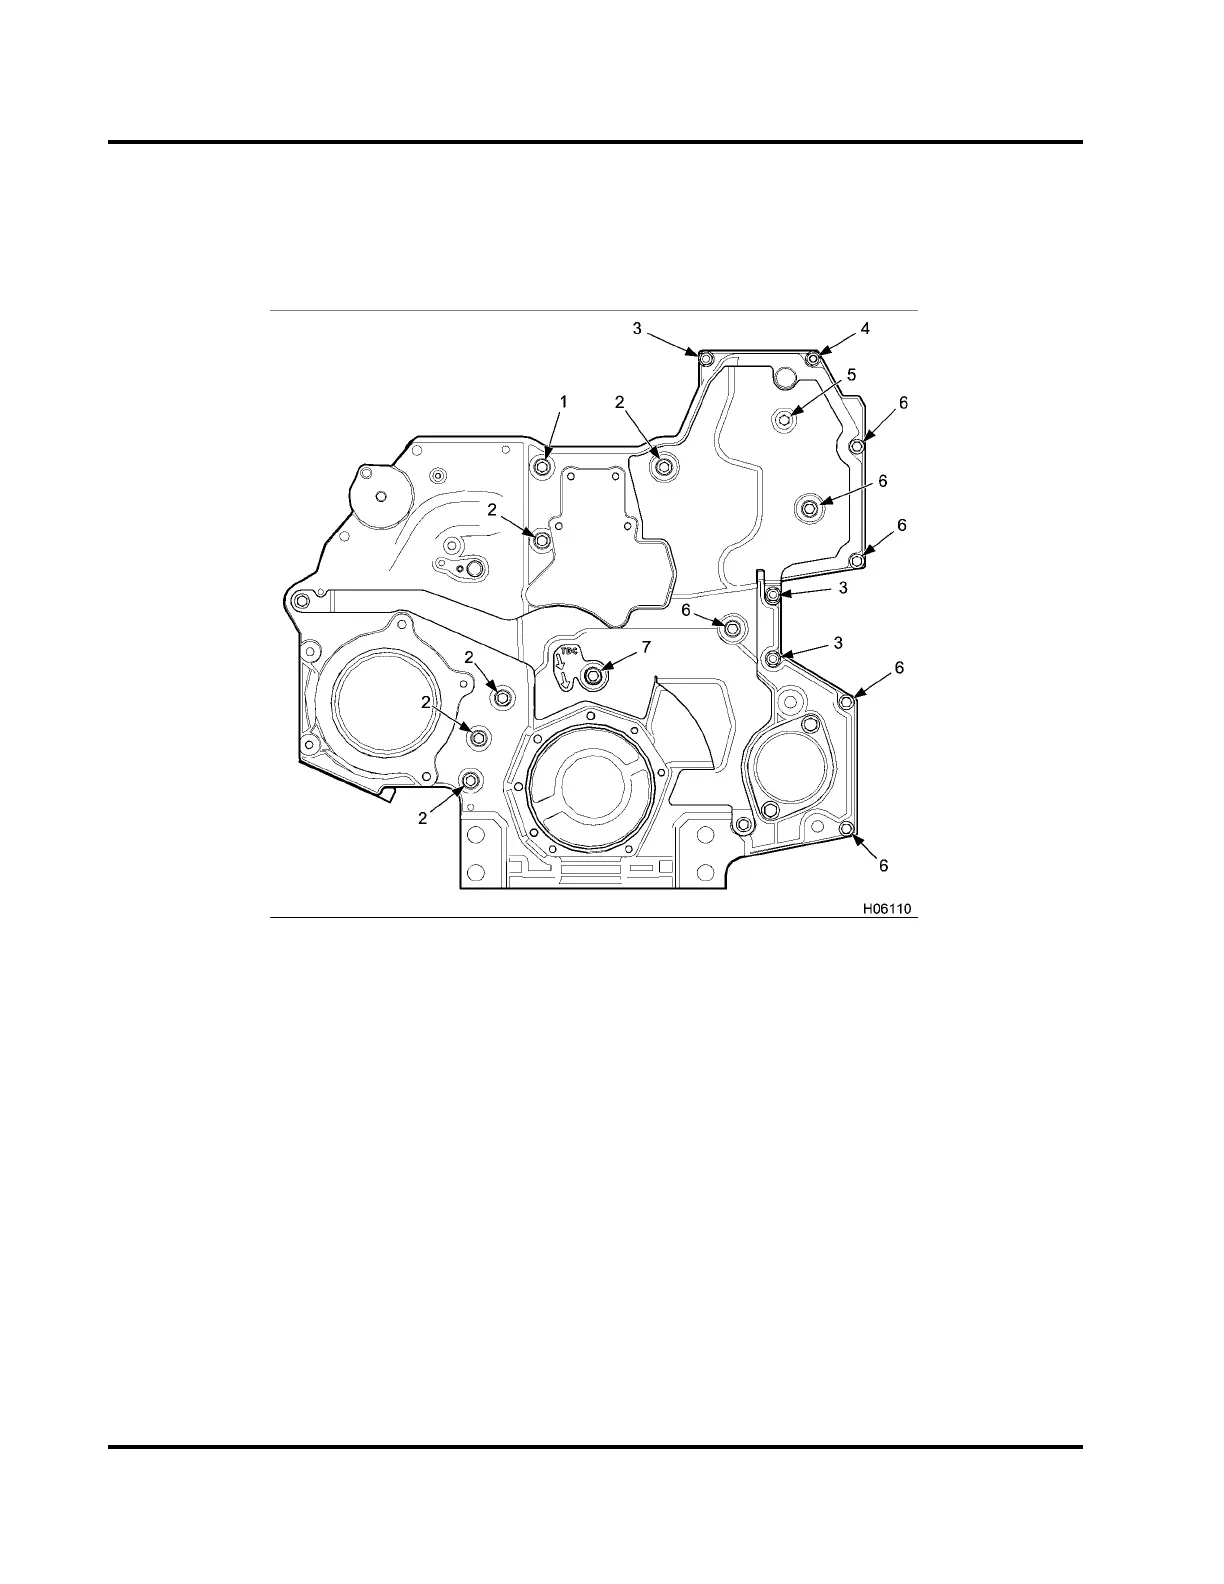
Figure 253 Front cover mounting bolts – front half (Generation 2)
1. M8 x 45 hex flange bolt (patch
bolt)
2. M8 x 45 bolt (5)
3. M8 x 50 special bolt (nut on
front) (3)
4. M8 x 73 stud bolt (nut on back)
5. M8 x 75 bolt – dog point (nut on
back)
6. M8 x 50 bolt (nut on back) (6)
7. Seal assembly – M8 x 50 bolt
and seal washer
8. Dowel hole
1. Align dowel holes in front cover (front half) with
dowel pins in rear half of front cover, and install
front cover (front half).
2. Install new M8 x 75 bolt – dog point and nut (nut
on back) finger tight.
3. Install new Seal Assembly – M8 x 50 bolt and seal
washer finger tight.
4. Install six M8 x 50 special bolts and nuts finger
tight.
5. Install M8 x 73 stud bolt and nut (nut on back)
finger tight.
6. Install new M8 x 45 mm hex flange patch bolt
finger tight.
7. Install five M8 x 45 bolts finger tight.
8. Tighten all mounting bolts to the standard torque
value (General Torque Guidelines, page445).
EGES-265-2
Read all safety instructions in the "Safety Information" section of this manual before doing any procedures.
Follow all warnings, cautions, and notes.
© 2009 Navistar, Inc.
 Loading...


