POWER CYLINDERS 219
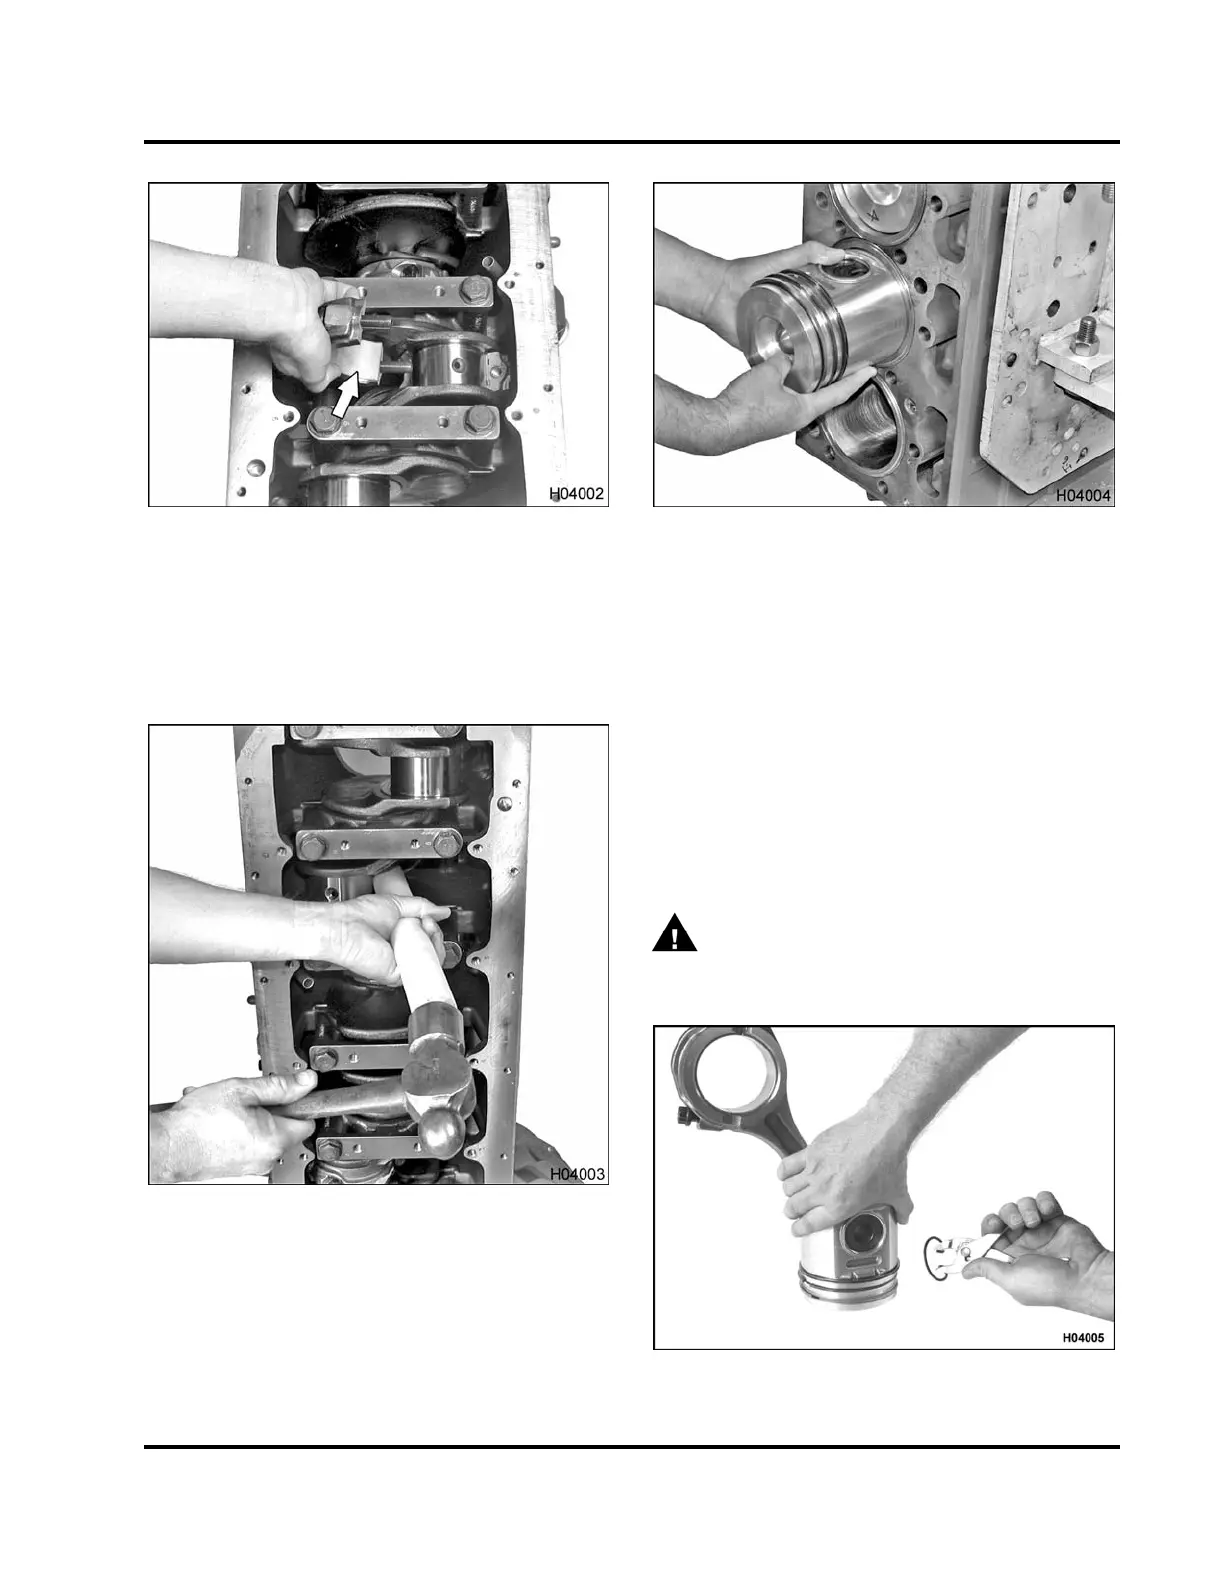
Figure 302 Removing connecting rod cap and
bolts
5. Unscrew the bolts completely. Remove the cap
and bolts as a unit.
6. Discard connecting rod cap bolts.
Figure 303 Pushing out piston and connecting
rod assembly
7. Do not push on rod fractured surface. Use a
hammer with a plastic or wooden handle or a
non-marring punch to push the piston out of the
cylinder sleeve.
Figure 304 Removing piston and connecting
rod assembly from cylinder sleeve
8. Once the piston rings are free of the cylinder
sleeve, remove the assembly from the top of the
crankcase.
9. For installation purposes, mark each piston,
connecting rod, and cap with the cylinder number
from which it was removed. Also mark the front
of each piston as it was installed in the engine.
Disassembling P iston and Connecting Rod
Assembly
WARNING: To prevent serious pe
rsonal
injury or possible death, wea
r safety glasses
when removing piston pin ret
aining rings.
Figure 305 Removing piston pin retaining rings
EGES-265-2
Read all safety instructions in the "Safety Information" section of this manual before doing any procedures.
Follow all warnings, cautions, and notes.
© 2009 Navistar, Inc.
 Loading...


