380 FLYWHEEL A ND F LYWHEEL HOUSING
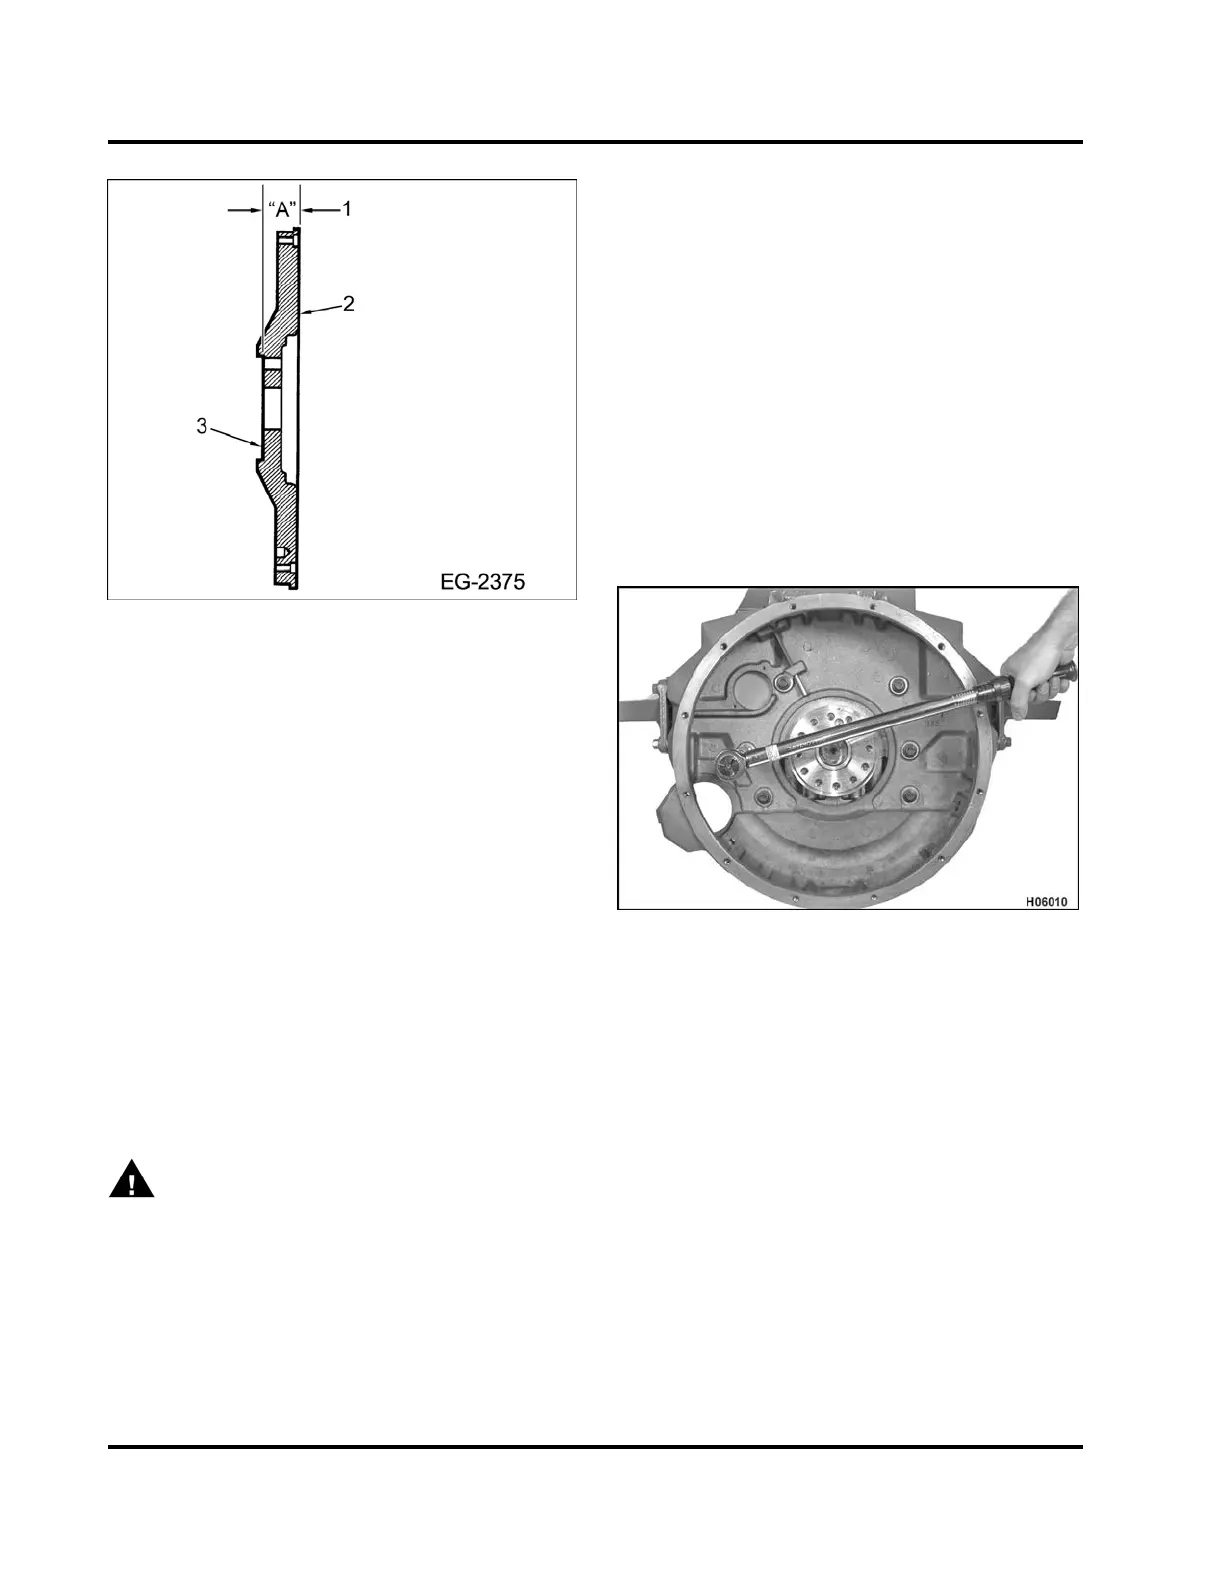
Figure 601 Flywheel reconditioning
1. Dimension “A”: New flywheel: 38 + 0.025 mm
(1.500 in + 0.010 in). Minimum permissible after
resurfacing: 36 mm (1.430 in).
2. Clutch disc mounting face
3. Crankshaft flange mounting face
NOTE: If the dimensions depicted in the figure above
cannot be maintained, the flywheel must be replaced.
Ring Gear Replacement
1. Remove any damaged ring gear from the flywheel
as follows:
A. Heat ring gear with a torch to expand
gear.
B. Once heated, knock the ring gear off
flywheel. Do not hit the flywheel when
removing gear.
WARNING: To prevent serious personal
injury or possi ble death, wear heat resistant
gloves when handling heated components.
2. Install a new ring gear as follows:
A. Heat the new ring gear evenly until the
gear expands enough to slip onto the
flywheel.
B. Make sure the ring gear is seated
properly against the flywheel shoulder.
NOTE: Do not heat ring gear to a temperature
higher than 278 °C (500 °F). Heating beyond this
temperature will adversely affect the ring gear
hardness.
Installation
Flywheel Housing
NOTE: Make sure the camshaft seal (page 266)is
installed in the crankcase.
NOTE: Verify that the two hollow dowels and the
flywheel housing seal are in place before installing
the flywheel housing (Figure 583).
Figure 602 Torquing flywheel hou
sing mounting
bolts
1. Use an assistant to help lif
ttheflywheel housing
into position.
2. Install all eight flywheel h
ousing mounting bolts
(M12 x 50) finger tight. The
n tighten the bolts to
the special torque value (
Table 51).
3. Install rear engine mount
ing brackets and bolts
(M12 x 40). Tighten brac
ket bolts to the special
torquevalue(Table51
).
NOTE: On engines with a 1
48–tooth ring gear, leave
the lowest, rear most m
ounting bracket bolt loose (2
or 3 threads) on each si
de of the fl ywheel housing
(SAE #1A). This will p
rovide enough clearance for
installation of th
e flywheel and ring gear assembly.
EGES-265-2
Read all safety instructions in the "Safety Information" section of this manual before doing any procedures.
Follow all warnings, cautions, and notes.
© 2009 Navistar, Inc.
 Loading...


