274 CRANKCASE, C RAN KSHAFT, AND CAMSHAFT
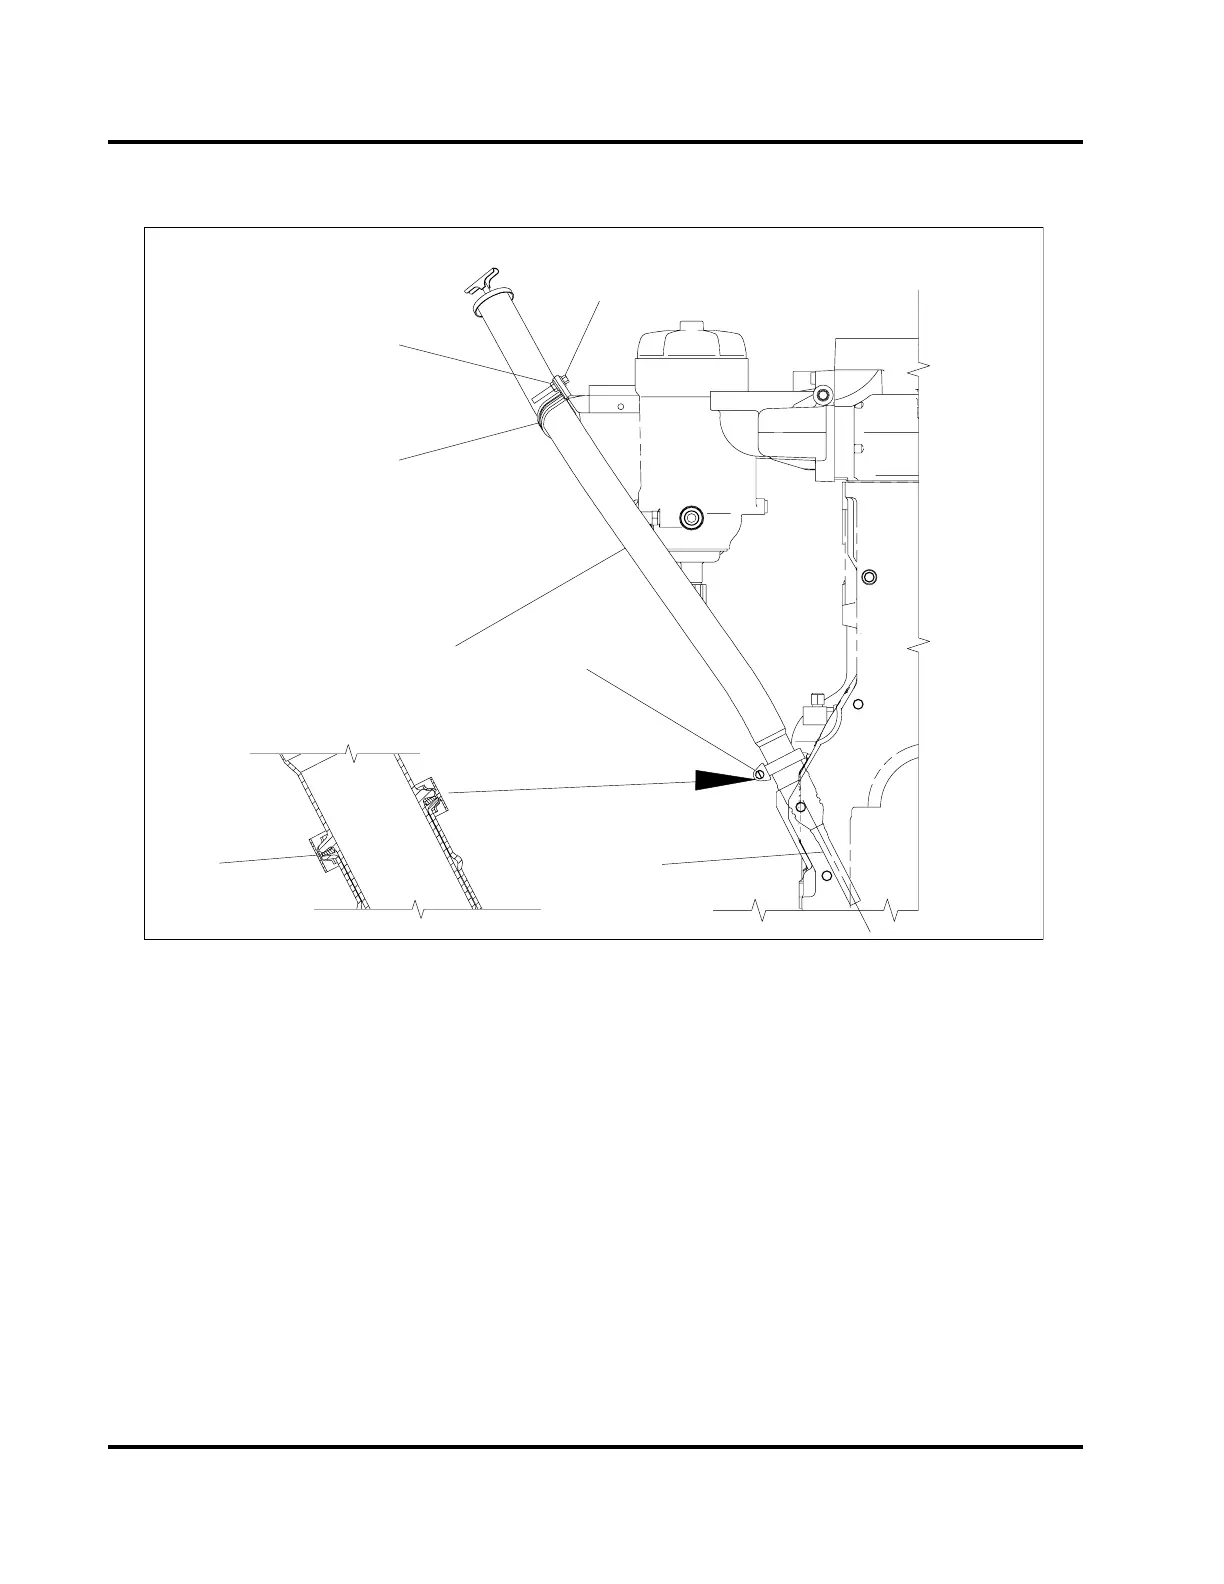
Oil Level Gauge
1
2
3
4
5
6
7
H06082
Figure 402 Oil level gauge assembly
1. Bolt, M6 x 40
2. Nut, M6
3. Cushioned clamp
4. Oil filler tube
5. Tube clamp
6. Oil level gauge tube
7. Oil dipstick tube seal
1. If removed earlier, install the oil level gauge tube
by fi rst applying Loctite® #277 around entire
circumference of tube and casting. Drive tube
into crankcase until bead of tube is seated in
chamfer of crankcase boss.
2. Install a new oil dipstick tube seal between oil filler
tube and crankcase oil tube flange.
3. Install the tube clamp at the crankcase.
4. Install the oil filler tube bolt (M6 x 40) and nut (M6)
at the fuel filter bracket.
Crankcase Ventilation System
1. If fitting assembly (M12) was leaking at the
crankcase, replace O-ring. Tighten fitting to
the standard torque value (General Torque
Guidelines, page445).
CAUTION: To prevent engine damage, do not use
any type of impact tools to seat the (M8 x 35) bolts.
Using impact tools will cause thread damage.
2. Install a new O-ring onto breather assembly and
push into valve cover grommet.
EGES-265-2
Read all safety instructions in the "Safety Information" section of this manual before doing any procedures.
Follow all warnings, cautions, and notes.
© 2009 Navistar, Inc.
 Loading...


