FLYWHEEL AND FLYWHEEL HOUSING 383
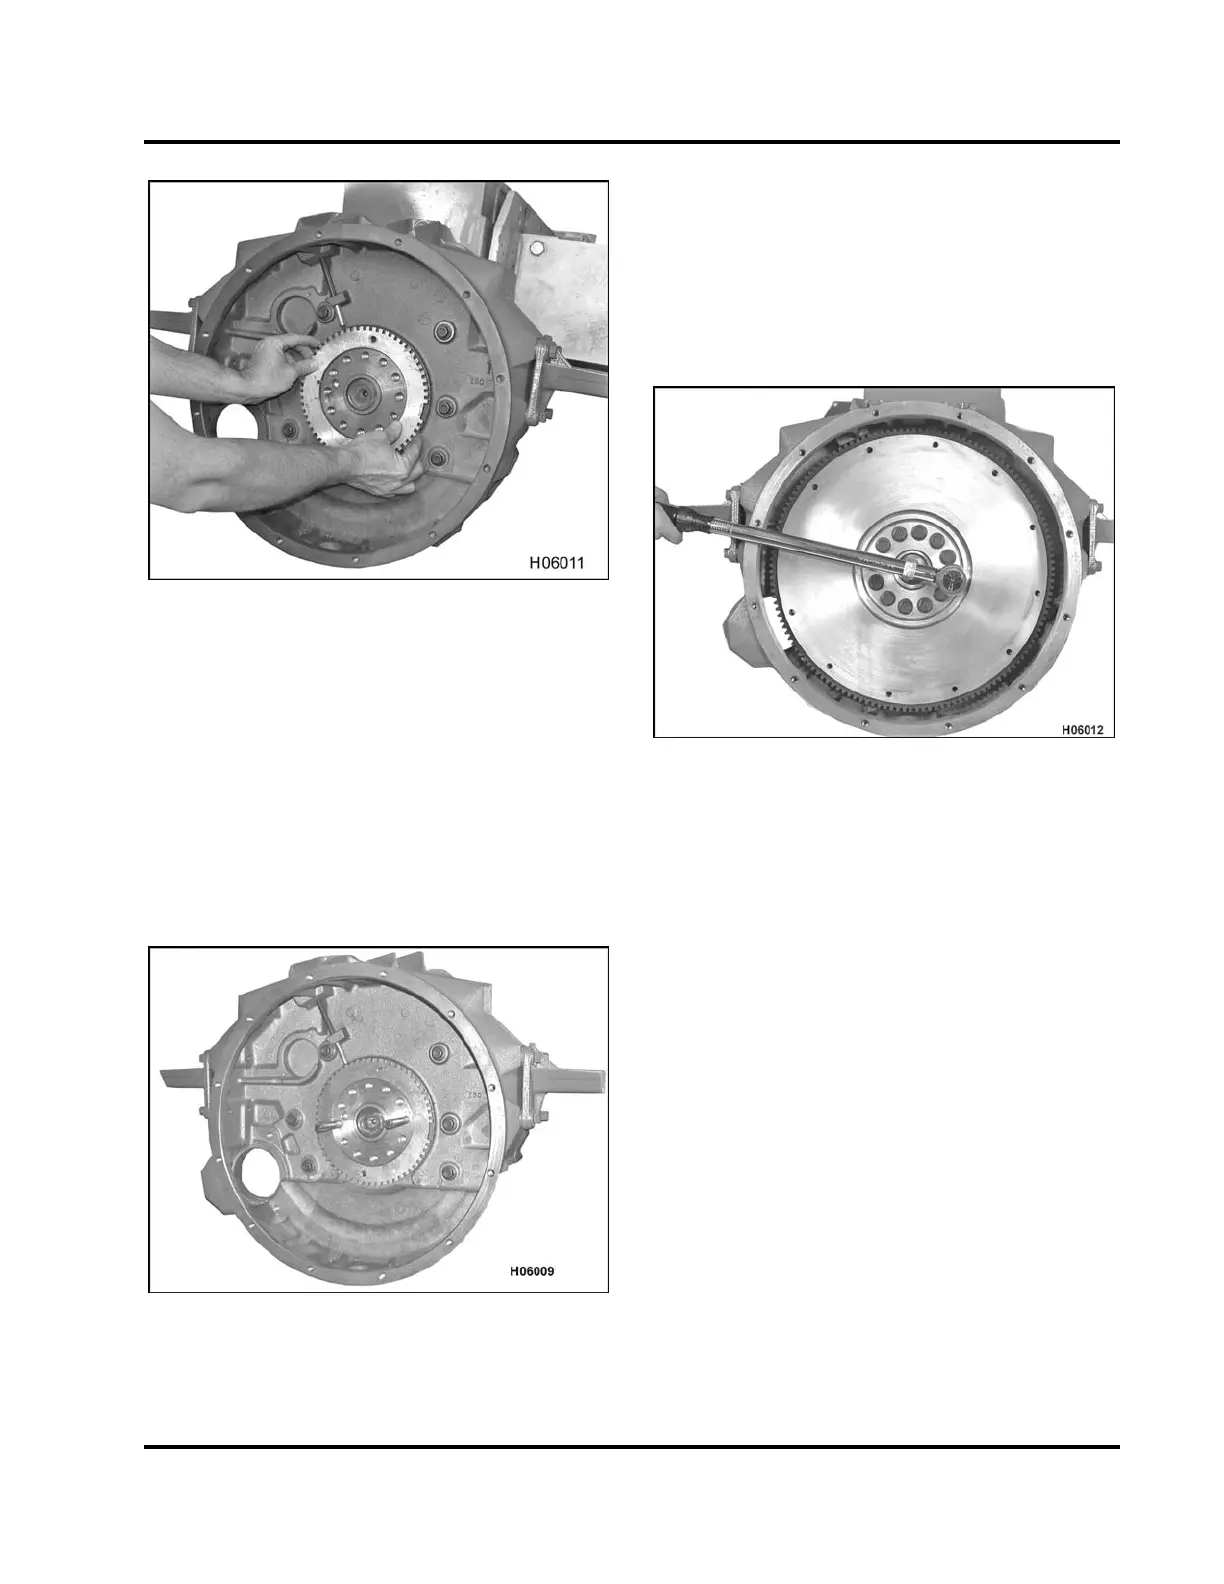
Figure 611 Installing the crankshaf t timin g disk
NOTE: Crankshaft timing disk can be installed with
either side out.
1. Align index notch of the crankshaft timing disk with
alignment dowel. Use a rubber mallet to tap the
crankshaft timing disk onto the crankshaft. Tap
evenly around the crankshaft timing disk to ensure
a flush fit against the end of the crankshaft.
Flywheel Assembly
Figure 612 Installing guide pins
1. Install two guide pins in the flywheel mounting bolt
holes at the 3 o’clock and 9 o’clock positions.
2. Install the flywheel onto the guide pins.
3. Install ten flywheel mounting bolts finger tight.
4. Remove the guide pins and install the remaining
two flywheel mounting bolts finger tight.
Figure 613 Torquing the flywheel mounting
bolts
5. Tighten the flywheel mounting bolts to the special
torque value (Table 51).
6. Tighten two remaining rear engine mounting
bracket bolts on manual transmission applications
with 148 tooth ring gears to the special torque
value(Table51).
EGES-265-2
Read all safety instructions in the "Safety Information" section of this manual before doing any procedures.
Follow all warnings, cautions, and notes.
© 2009 Navistar, Inc.
 Loading...


