135
Settin
Checkers
Cha
ter 6
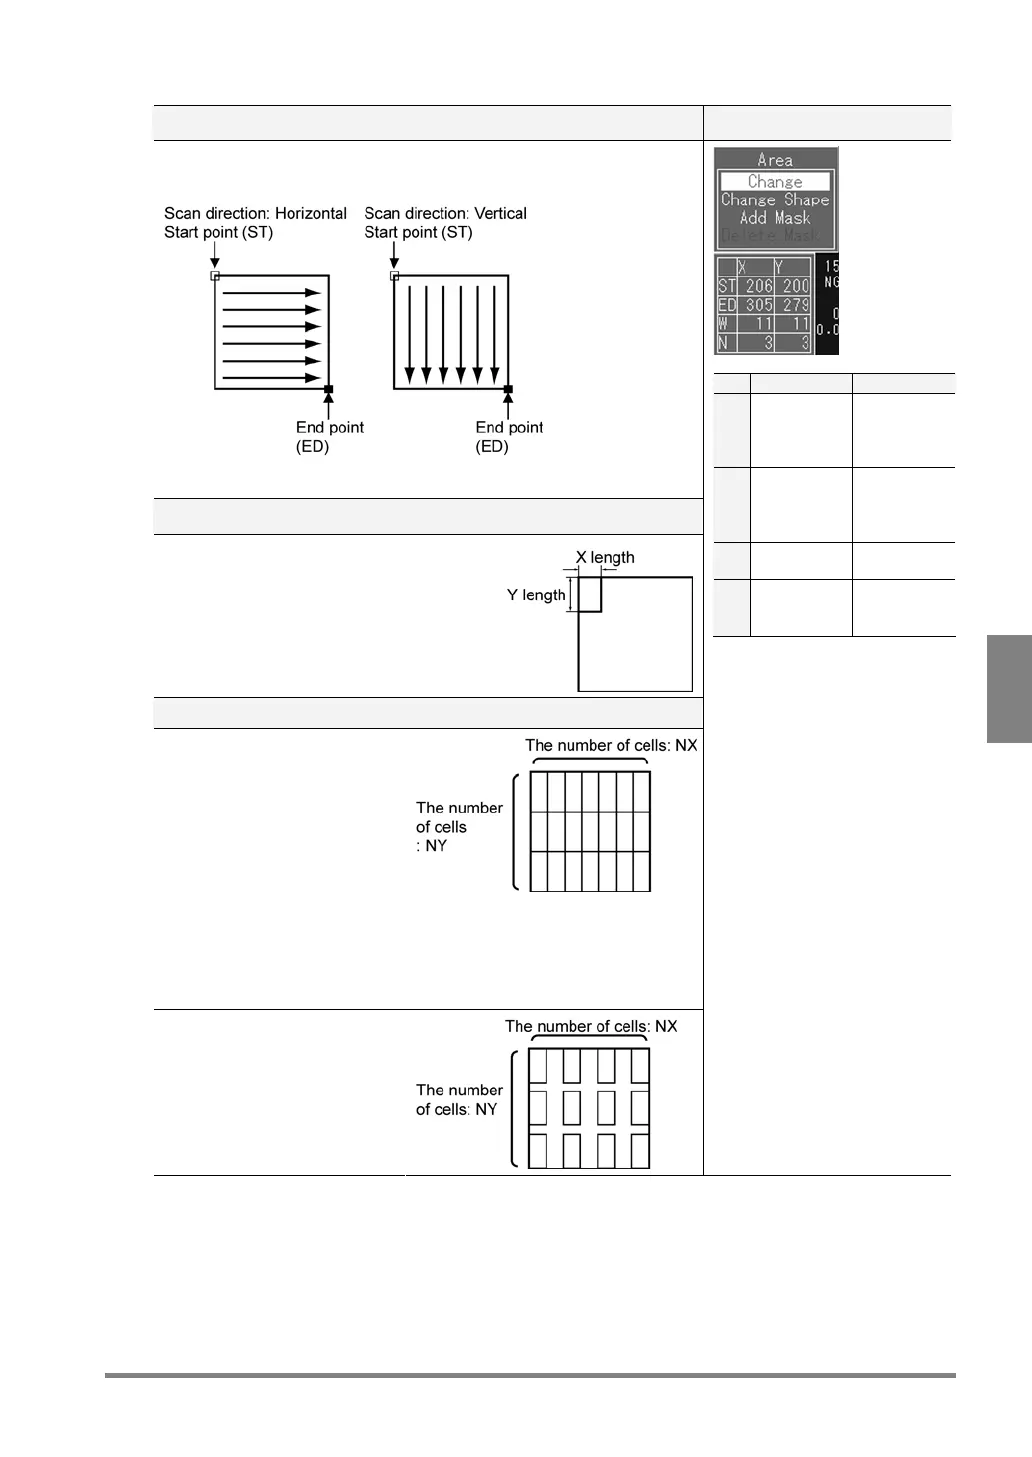
If Area Shape = “Plane”
To set a start point (SP) and end point (ED) Setting Dialog
Set a start point (STX, STY) and end point (EDX, EDY). The PV310 scans
from the start point toward the end point.
If the scan direction is set to “Horizontal/Vertical”, the PV310 scans in both
directions.
To set the size of a cell (WX, WY)
Set the size of a cell to calculate the
average brightness of the cells.
To set the number of cells
Set the number of cells aligned
from start point to end point in
an area properly as the figure
shown below. If the cells are
fully or partly covered with other
cells, the PV310 repeatedly
scans the parts where the cells
are covered with other cells,
resulting in increasing inspection
time.
Since there are not enough cells
in the area, the PV310 cannot
inspect the area thoroughly
X Y
ST X
coordinate
of start
point
Y
coordinate
of start
point
ED X
coordinate
of end
point
Y
coordinate
of end
point
W Width of
cell X
Width of
cell Y
N Number of
cells in the
X direction
Number of
cells in the
Y direction
Set STX, EDX, WX and NX by
tilting the ENTER key left or
right.
Set STY, EDY, WY and NY by
tilting the ENTER key up or
down.
For the Area Size Adjustment
function, the number of cells in
the inspection area does not
depend on its size. Therefore,
specify enough cells for
executing inspection throughout
even a bigger area.