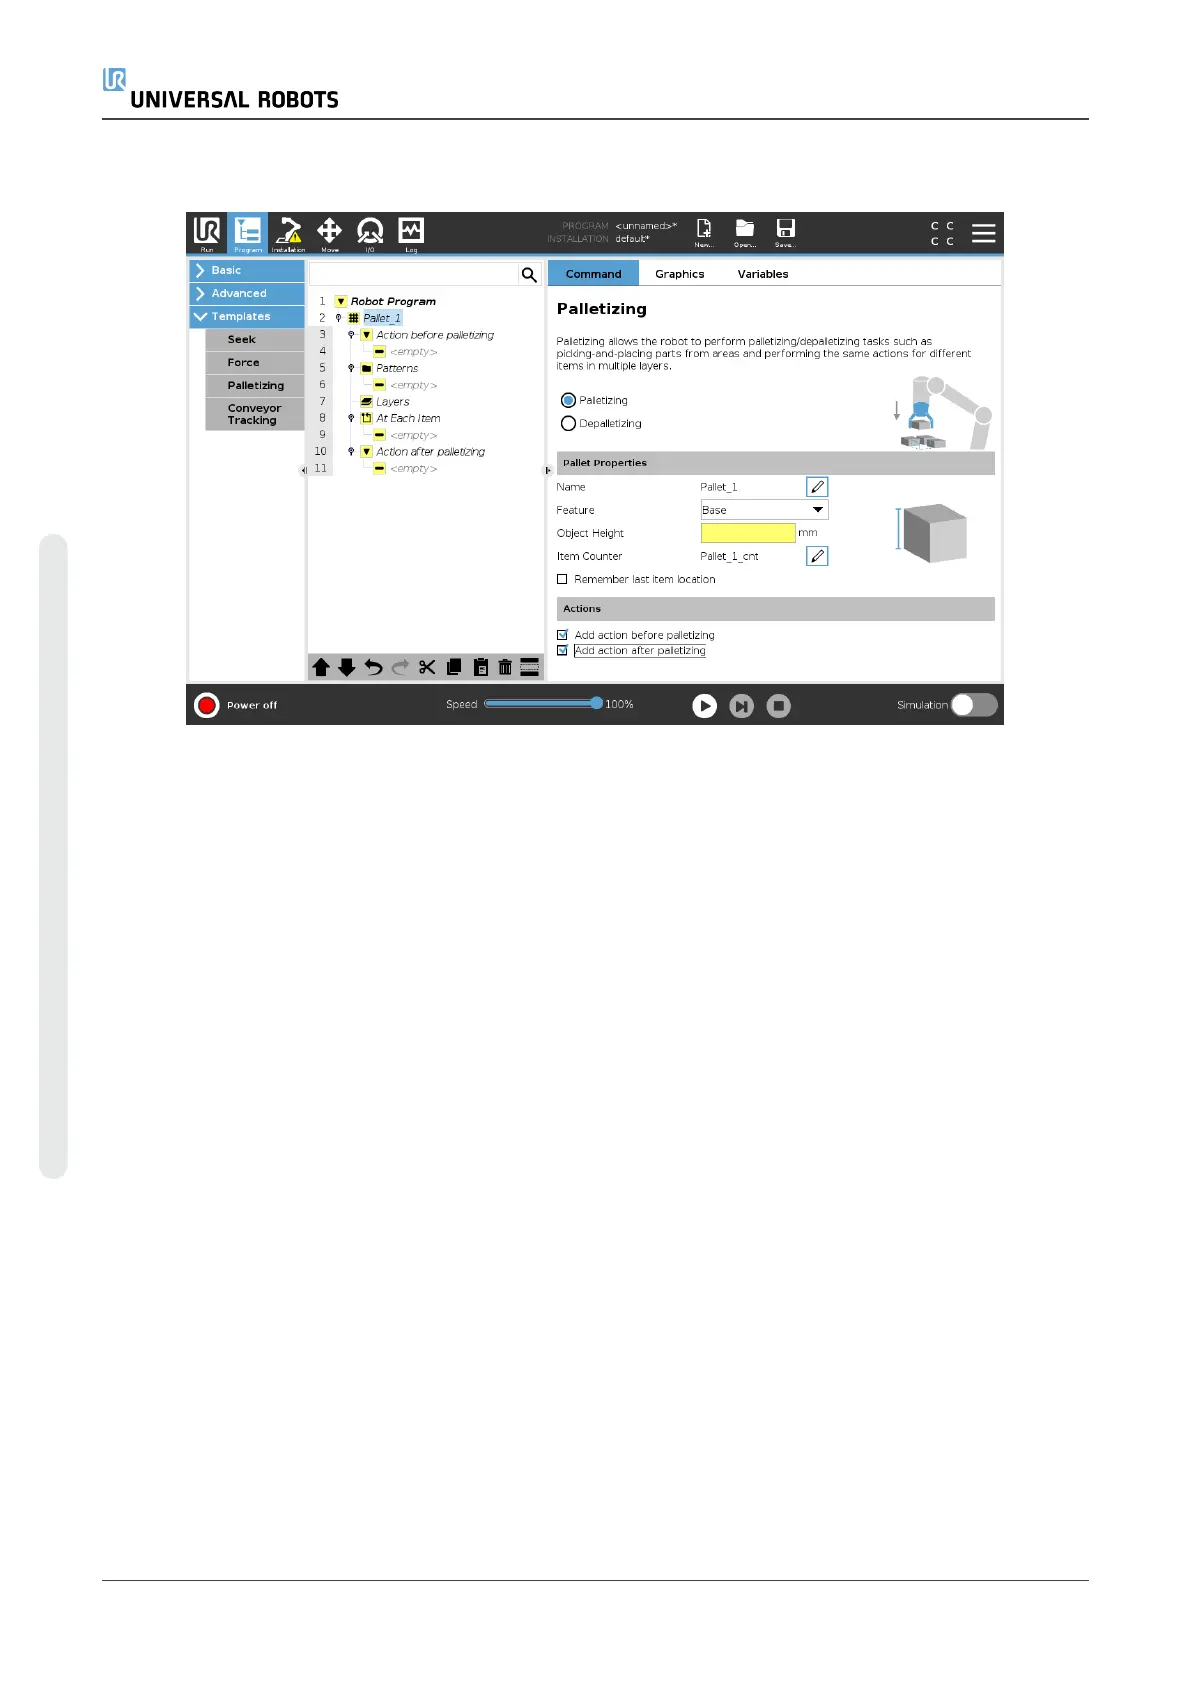
Creating a Palletizing Program
1. Decide if you want to teach a Feature (see 24.17. Featureson page223) or use a Base as a
reference plane.
2. In the Program Tab, under Templates, tap Palletizing.
3. On the Palletizing screen, select one of the following actions depending on the desired
action.
1. Select Palletizing to organize items onto a pallet.
2. Select Depalletizing to remove items from a pallet.
4. Under Pallet Properties, specify the Name, Feature (see Step 1), Object Height, and Item
Counter name for your program. Select the Remember last item location box if you want the
robot to restart at the item it was handling when it stopped.
5. On the Palletizing screen, under Actions, add additional actions to be performed before or
after palletizing sequence by selecting the following:
1. Add Action Before Palletizing: These actions are performed before starting to
palletize.
2. Add Action After Palletizing: These actions are performed after finishing palletizing.
6. On the Program Tree, tap the Patterns node to designate patterns for your layers. You can
create the following type of patterns: Line, Grid, or Irregular (see figure below). On this
screen, you can select if you want to include a separator between layers (see Adding a
Separator Between Layers in a Palletizing Sequenceon page181).
UR5e 178 User Manual
23.Program Tab
Copyright © 2009–2021 by UniversalRobotsA/S. All rights reserved.
 Loading...