4-8
IM DLM6054-01EN
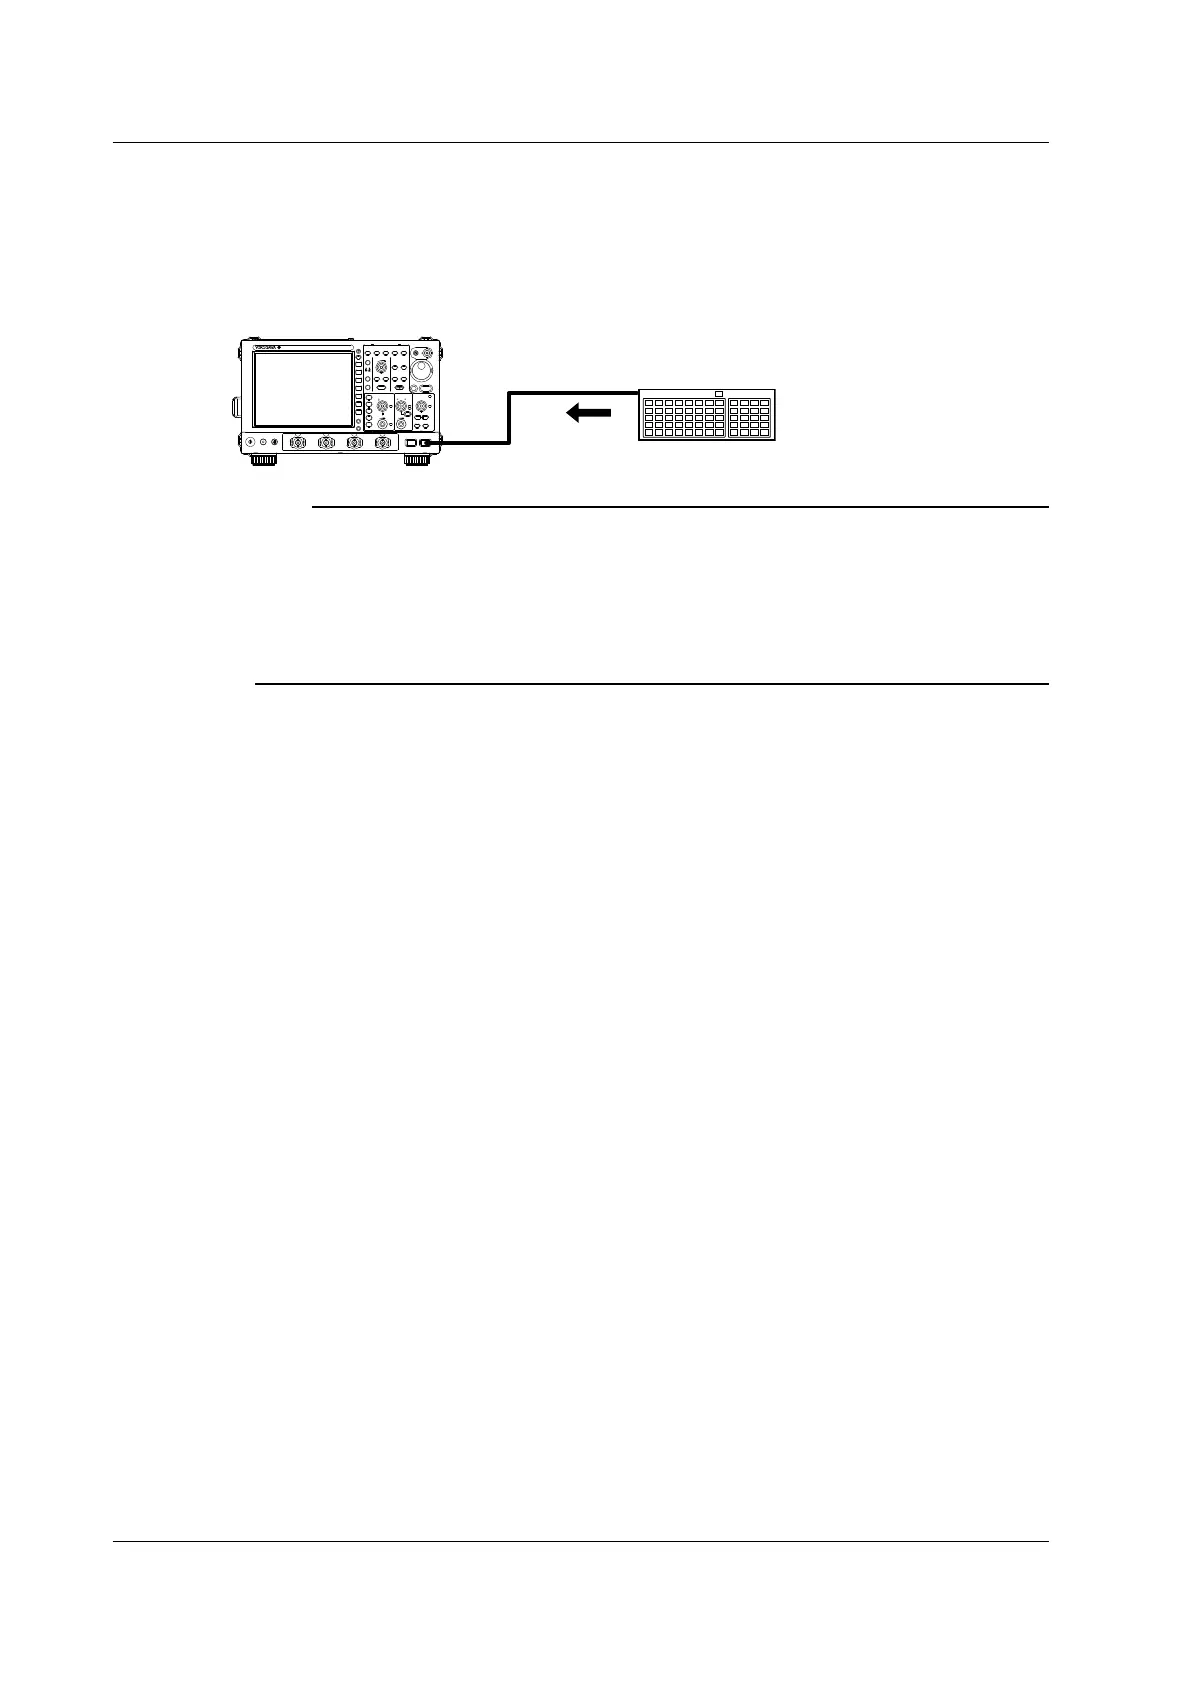
Connection Procedure
Connect a USB keyboard directly to the DL6000/DLM6000 using a USB cable as shown in the figure
below. You can connect or remove the USB cable regardless of whether or not the DL6000/DLM6000
power switch is turned on (hot-plugging is supported). Connect the type A connector of the USB cable
to the DL6000/DLM6000, and connect the type B connector to the keyboard. When the power switch
is on, the keyboard is detected and enabled approximately 6 seconds after it is connected.
USB keyboard
USB cable
PRINT
FILE
UTILITY
DISPLAY
ACQUIRE
X - Y
VERTICAL
POSITION
PUSH
ODIV
PUSH
FINE
SCALE
HORIZONTAL
POSITION
TIME/DIV
PUSH
50%
0 s
TRIGGER
LEVEL
TRIG’D
PUSH
50%
ZOOM
EDGE
ENHANCED
MODE B TRIG
ACTION
GO / NO-GO
ZOOM1 ZOOM2
SEARCH
4321
RUN / STOP
SHIFT
DELAY
1
2
3
4
LOGIC
ESC
CLEAR
SNAP
CURSOR
MEASURE
ANALYSIS
MATH/REF
FFT
AUTO
SETUP
SETUP
MENU
HISTORY
SINGLE
REST SET
DL6000/
DLM6000
Note
• Only connect a compatible USB keyboard, mouse, printer, or storage device to a USB port for peripherals.
• Do not connect multiple keyboards. You can connect one keyboard, one mouse, and one printer to the
DL6000/DLM6000.
• Do not connect and disconnect multiple USB devices repetitively. Wait for at least 10 seconds after you
connect or remove one USB device before you connect or remove another USB device.
• Do not remove USB cables during the time from when the DL6000/DLM6000 is turned on until key
operation becomes available (approximately 20 to 30 seconds).
Entering File Names, Comments, and Other Items
When a keyboard is displayed on the screen, you can enter file names, comments, and other items
using the USB keyboard.
4.3 Using USB Keyboards and Mouse Devices
 Loading...