To define an analysis region
1 Examine each channel of the time-capture buffer (as described in the previous task) to
decide which region you want to analyze.
2 Press [
Active Trace
], then press [
A
] if the capture buffer contains data from one
channel, [
AB
] if it contains data from two, or [
ABCD
]ifitcontainsdatafromfour.
3 If the FFT instrument mode is selected, press [
Meas Data
][
ALL CHANNELS
]
[
MORE CHOICES
][
CAPTURE CHANNEL *
].
or
If any other instrument mode is selected, [
Meas Data
][
ALL CHANNELS
]
[
CAPTURE CHANNEL *
].
4 Press [
Scale
], then press [
AUTOSCALE ON OFF
] to highlight ON.
5 Press [
AXES SCAL MARKERS
], press [
AXIS X Y
] to highlight X, then press [
FULL SCALE
].
6 Press [
Inst Mode
][
TIME CAPTURE
][
ANALYSIS REGION
][
ALL CHANNELS
].
7 Press [
STRT TIME CHANNEL *
] <number> [
S
], then press [
STOP TIME CHANNEL *
]
<number> [
S
] to define the beginning and end of the analysis region.
If you prefer, you can set an independent analysis region for each channel in the
capture buffer. In steps 3 and 6, just press [
CHANNEL 1 2
] (or [
CHANNEL 1 2 3 4
]) to
highlight the channel whose analysis region you want to define. Setting independent
regions allows you to measure with greater delays between channels than are possible
when you measure directly from the inputs using trigger delays. There is one
important restriction on independent analysis regions: If you specify regions of
different lengths for different channels, the analyzer stops measuring when all the data
has been taken from the shortest region.
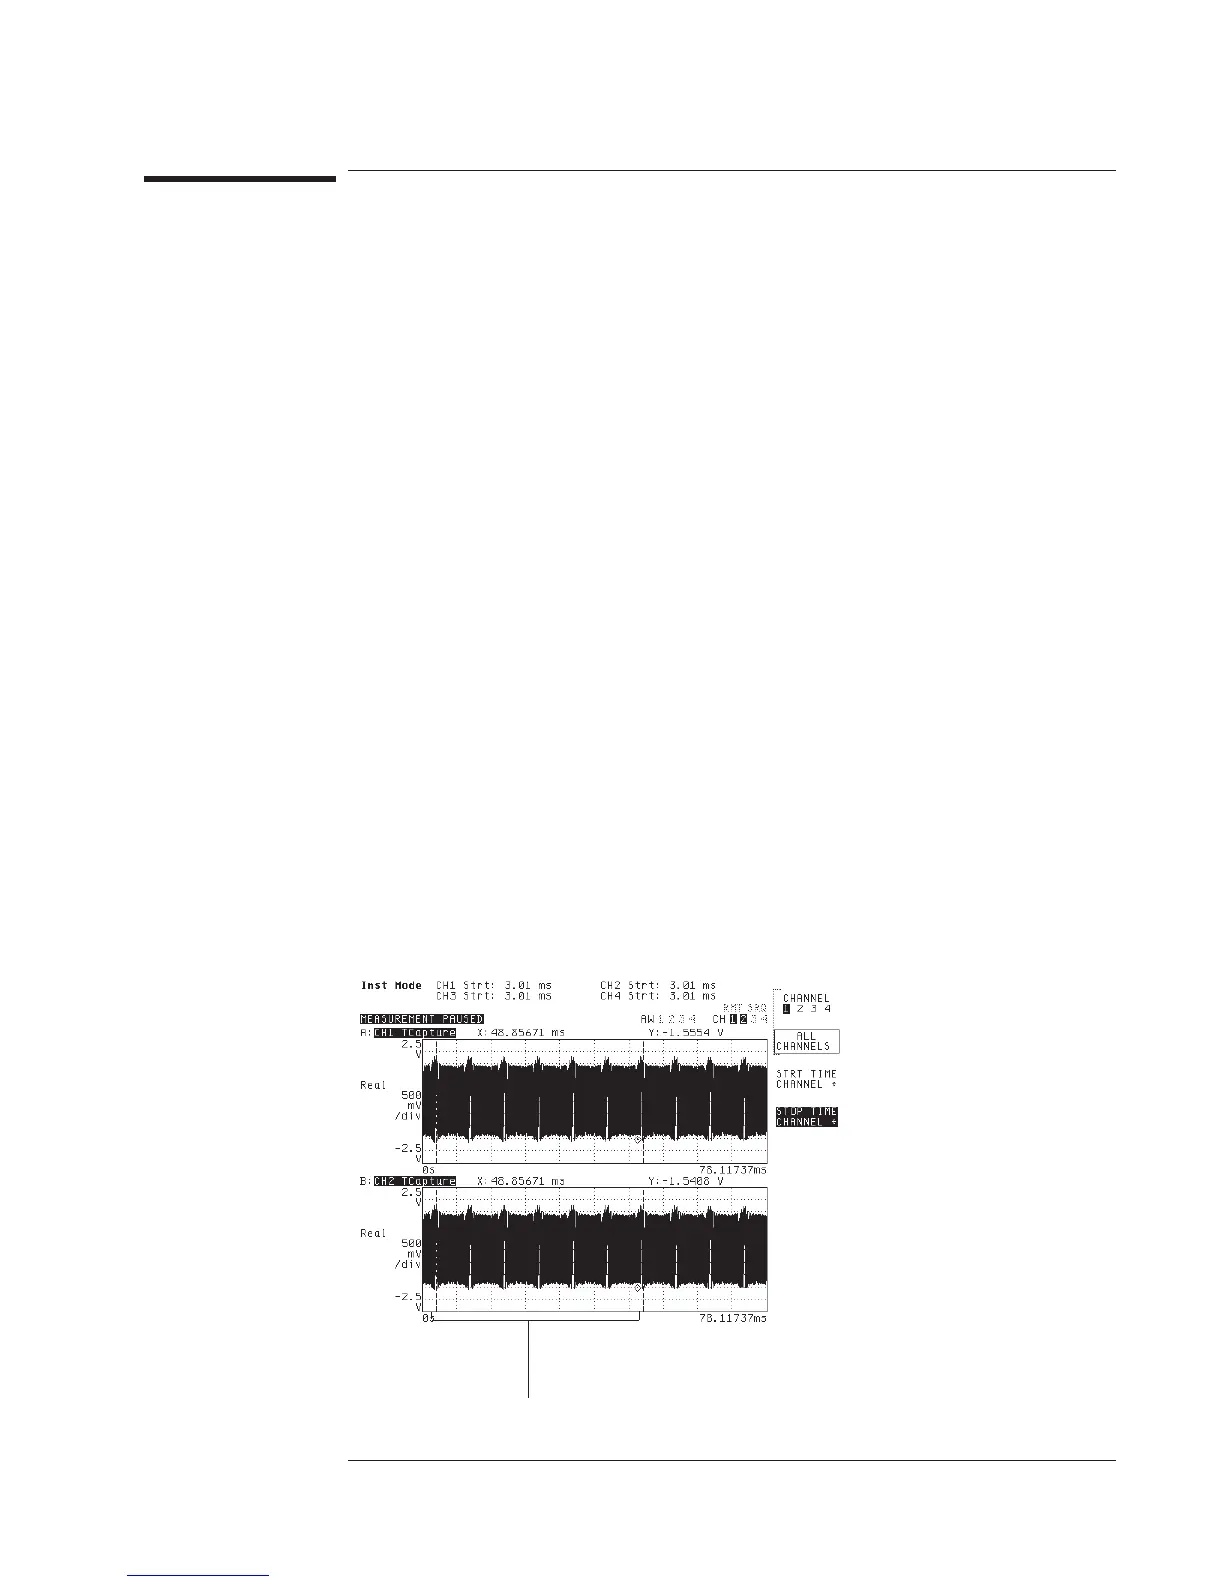
The analyzer will measure from this region of the
capture buffer.
Agilent 35670A
Operator's Guide Using Time Capture
7-9