Chapter 3 75
Setting Measurement Conditions
Setting Stimulus Conditions
3. Setting Measurement
Conditions
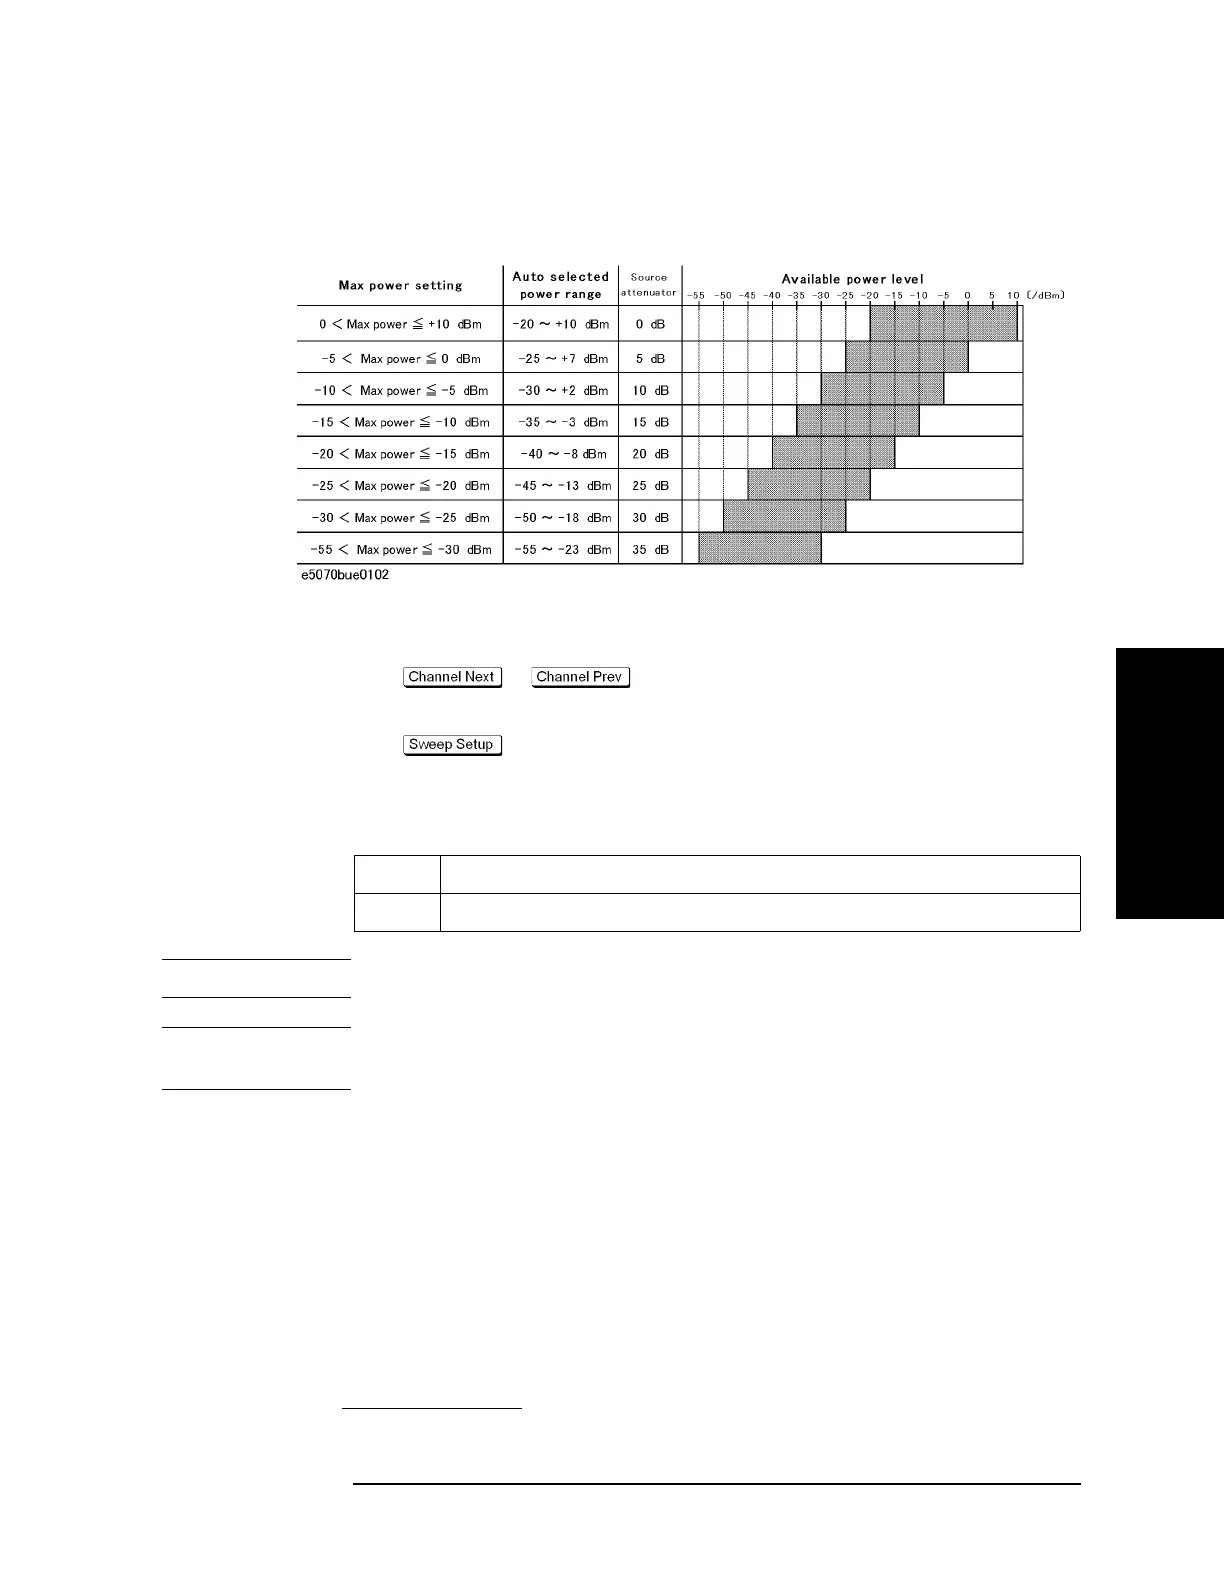
Figure 3-6 Available power level and selected power range with Auto Power Range set function
ON (when maximum frequency is over 3 GHz (for E5071B only))
*1
Setting the level
Step 1. Press or to select the channel for which you want to set the
power level.
Step 2. Press .
Step 3. Press Power.
Step 4. Press Port Couple and select the on/off setting of the level coupling for all ports.
ON The same power level is outputted to all ports.
OFF A specific power level is outputted to each port independently.
NOTE The power level of port 1 is coupled with the power level for all ports.
NOTE If you change the on/off setting of the level coupling, all ports are automatically changed to
the same level value as that of port 1.
Step 5. When setting level for all ports (Port Couple ON)
1. Press Power.
2. Enter the power level using the ENTRY block keys on the front panel.
When setting level for each port (Port Couple OFF)
1. Press Port Power.
2. Press the softkey corresponding to each port (Port 1 Power to Port 4 Power).
*1. The available power level over 3 GHz changes according to measurement frequencies.
 Loading...