ADR233B
Ref ID : ADR233B/IM/I&P
Rev No. : 05
Page No. : 44 of 479
2.2.5 Dismantling the Goods
While dismantling the device, always refer standard ESD (Electrostatic Discharge) precautions.
The minimum precautions to be followed are as follows:
• Use an antistatic wrist band earthed to a suitable earthing point.
• Avoid touching the electronic components and PCBs.
2.3 Installation Procedure
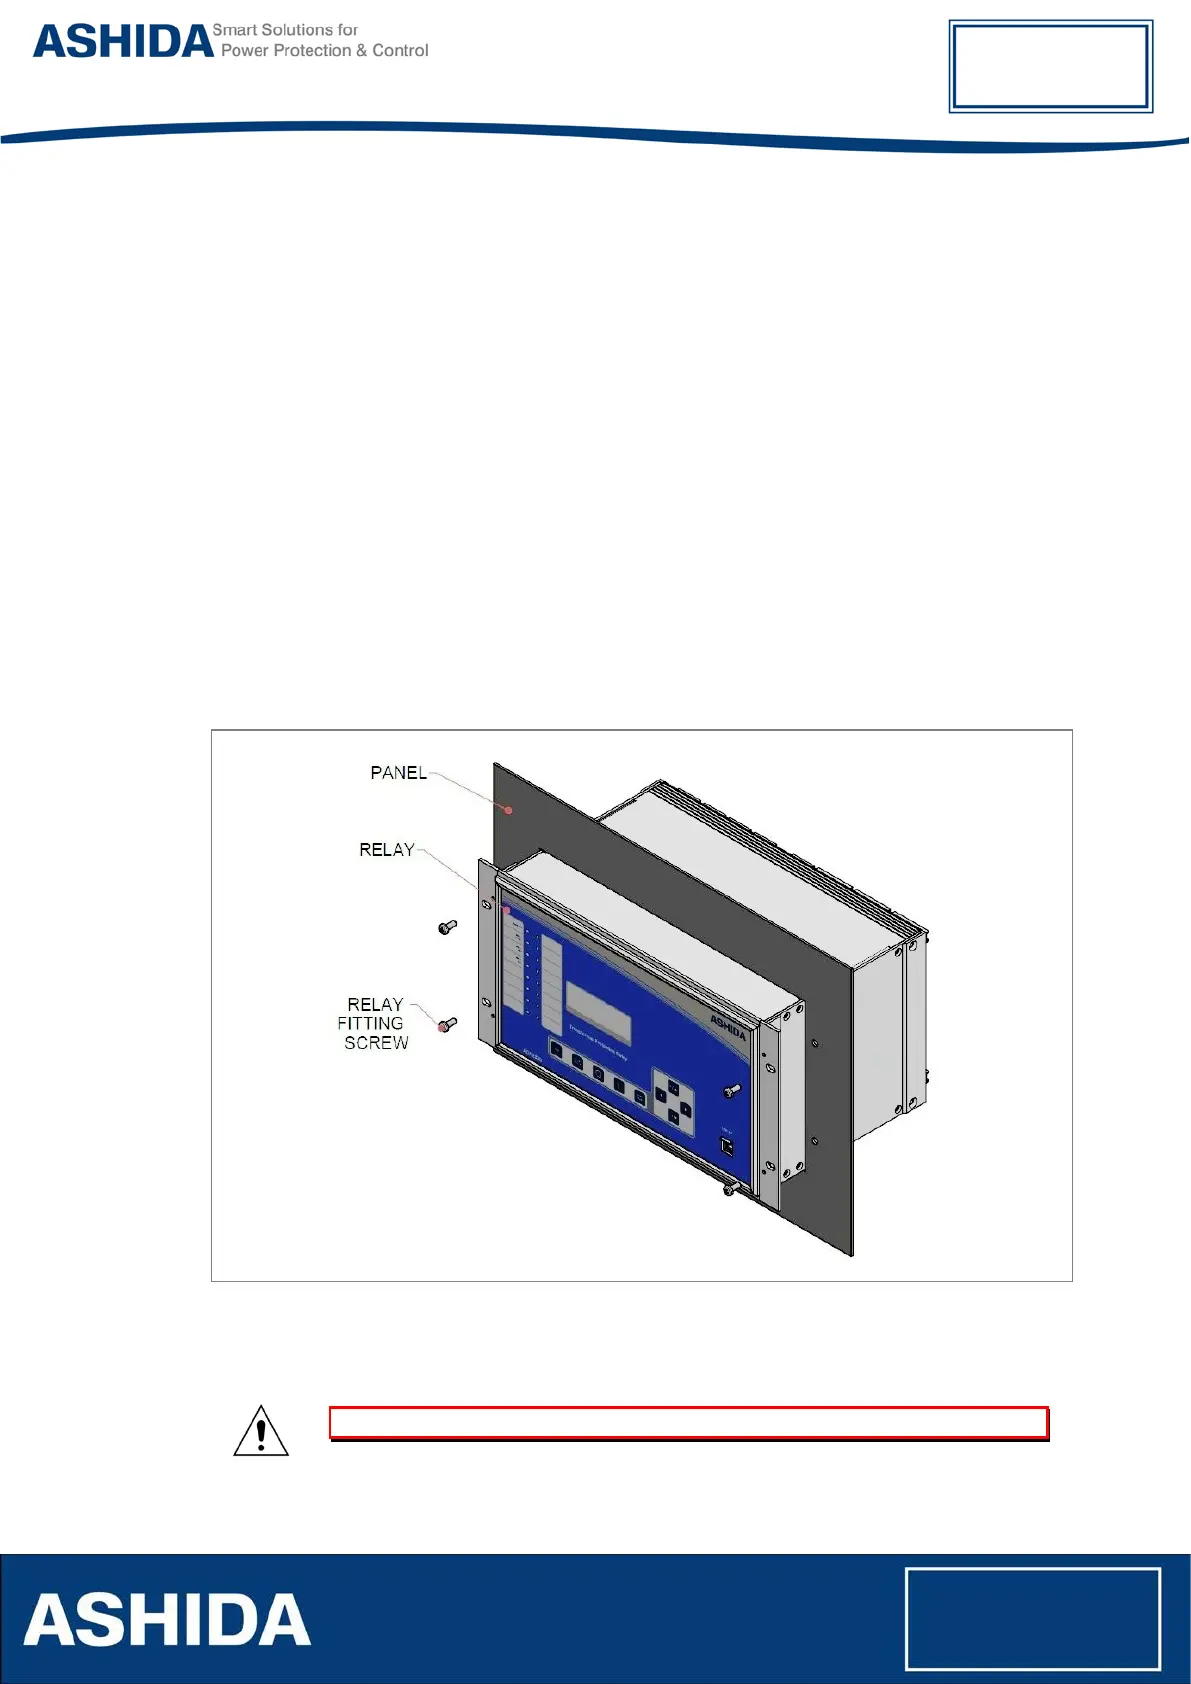
2.3.1 Safe Mounting of Modular version
ADR233B supports rack mounting and can be mounted into panels using M6 X 15 screws.
The fitting screws are supplied along with the relay.
Procedure for mounting the device into panel:
Loose the M6 X 15 screws from the relay, then insert the Relay in to the panel cut-out as show
below.
Figure 1: Inserting relay in to the panel cut-out
After inserting the Relay in the Panel, use M6 X 15 Screws to fasten the relay to the Panel.
Caution: All screws should be fastened properly. Always use M6 X15 screws