Doc ID :ADR233B/IM/01
Ref ID : ADR233B/IM/UG
Rev No. : 05
ADR233B
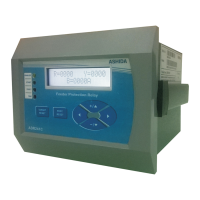
18.
EDIT Feather Touch Key to ‘EDIT’ the setting
19.
TARGET
RESET
Feather Touch Key ‘TARGET RESET’ to clear the fault LED indications, clear the
Alarms and ‘RESET’ the Relay Contacts. To CANCEL the changes done in setting
(By pressing this key all LED’s ON for 1 sec and OFF)
20.
“”
Feather Touch Key ‘PB1 operation’ to operate assigned respective Output locally by
pressing this key.
21.
“
”
Feather Touch Key ‘PB2 operation’ to operate assigned respective Output locally by
pressing this key.
22.
PROT.
RESET
Feather Touch Key “PROT. RESET” is provided for Hardware Reset. This key is
interlocked with “TARGET RESET” key.
23.
◄ Feather Touch Key “Left Arrow” [◄] for navigating through the submenus and also
to SAVE the changes made in settings.
24.
+ /▲ Feather Touch Key “Plus” [ + ] to INCREMENT the values & the “Up Arrow” key
[▲] to SCROLL the Main Menu up.
25.
- /▼
Feather Touch Key “Minus” [ - ] to 'DECREMENT' the values & the “Down Arrow”
key [▼] to SCROLL the Main Menu down.
26.
►
Feather Touch Key Right Arrow [►] to VIEW the settings and to navigate through
the menus and submenus.
27.
USB USB communication Port (accessible after opening the front cover)
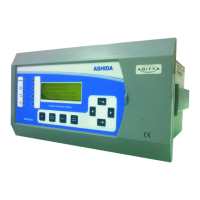
8.2 User interface
8.2.1 LCD Display
20x4 LCD with back lit is used as humans machine interface (HMI) for the followings:
• Display of relay type, ID and serial number
• Display of current software version
• Display of menu driven Protection Settings
• Display of online measurement of parameters
• Display of Date & Time.
• Display of Current status of all input.
• Display of Voltage status of all input.
• Display of fault data
• Display of Error Log for hardware and software faults
8.2.2 Touch Keys
The function of relay controlled by the following keys provided on the Front Plate: