INSTALLATION AND STARTUP
15-4 Belanger, Inc.® * PO BOX 5470 * Northville, MI 48167-5470 * Ph (248) 349-7010 * Fax (248) 380-9681 1MANUL220
Chapter 15 Wheel Cleaning and CTA Options
Wheel Stingers® and Freestanding CTA – Installation of a Bell-Hose
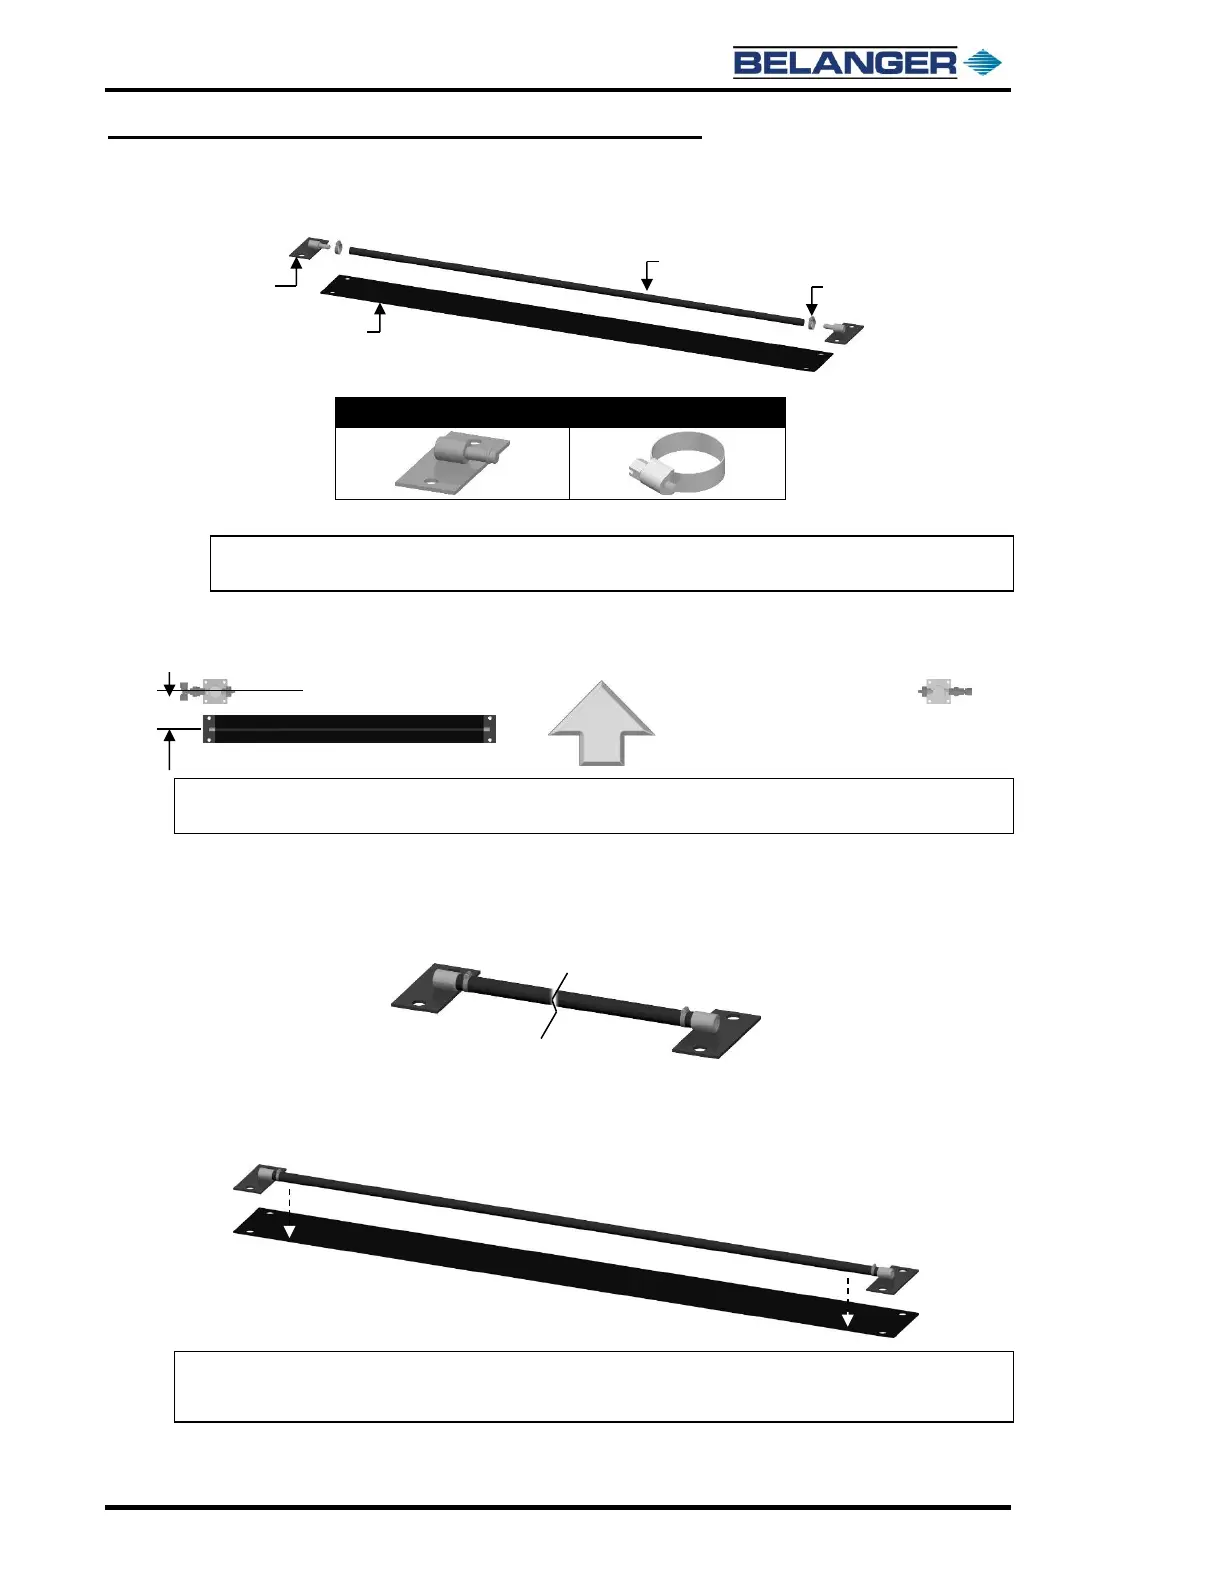
1) Locate the components for the Bell Hose and plastic Wear Strip assembly as shown below.
Note: The plastic Wear Strip will slow down the wear of the hose against the cement floor as
vehicles roll over it.
2) Lag the Wear Strip and Floor Mounts to the floor at the locations shown below.
Note: The Bell Hose Assembly only needs to be across half of the bay since only one tire is required
to run over the hose to activate it.
3) Once lagged to the floor, secure the Bell Hose to the two Floor Mounts realizing it will need
to be stretched and cut-to-fit. Secure it into place using the supplied clamps.
The completed assembly should appear as shown below.
4) The two floor mounts will be secured to the floor. The one in the middle of the tunnel will
have a plug installed in the end and the other one will have a 1/4” push-in tube fitting
installed
Note: The floor mount in the middle of the tunnel will have a plug installed in the end.
Note: The floor mount on the wall side will have a 1/4” push-in tube fitting installed.