Printing Photos and Images (Windows)
Printing Photos and Images (Windows)
This topic describes how to print photos based on the following example.
•
Document: Photo image from a digital camera
•
Page size: 10×12 inches (254.0×304.8 mm)
•
Paper: Roll
•
Paper type: Canon Premium Glossy Paper 2 280
•
Roll paper width: 10 inches (254.0 mm)
1
Choose Print in the application menu.
2
Select the printer in the dialog box, and then display the printer driver dialog box. (See "Accessing the Print-
er Driver Dialog Box from Applications .") ➔ P.156
3
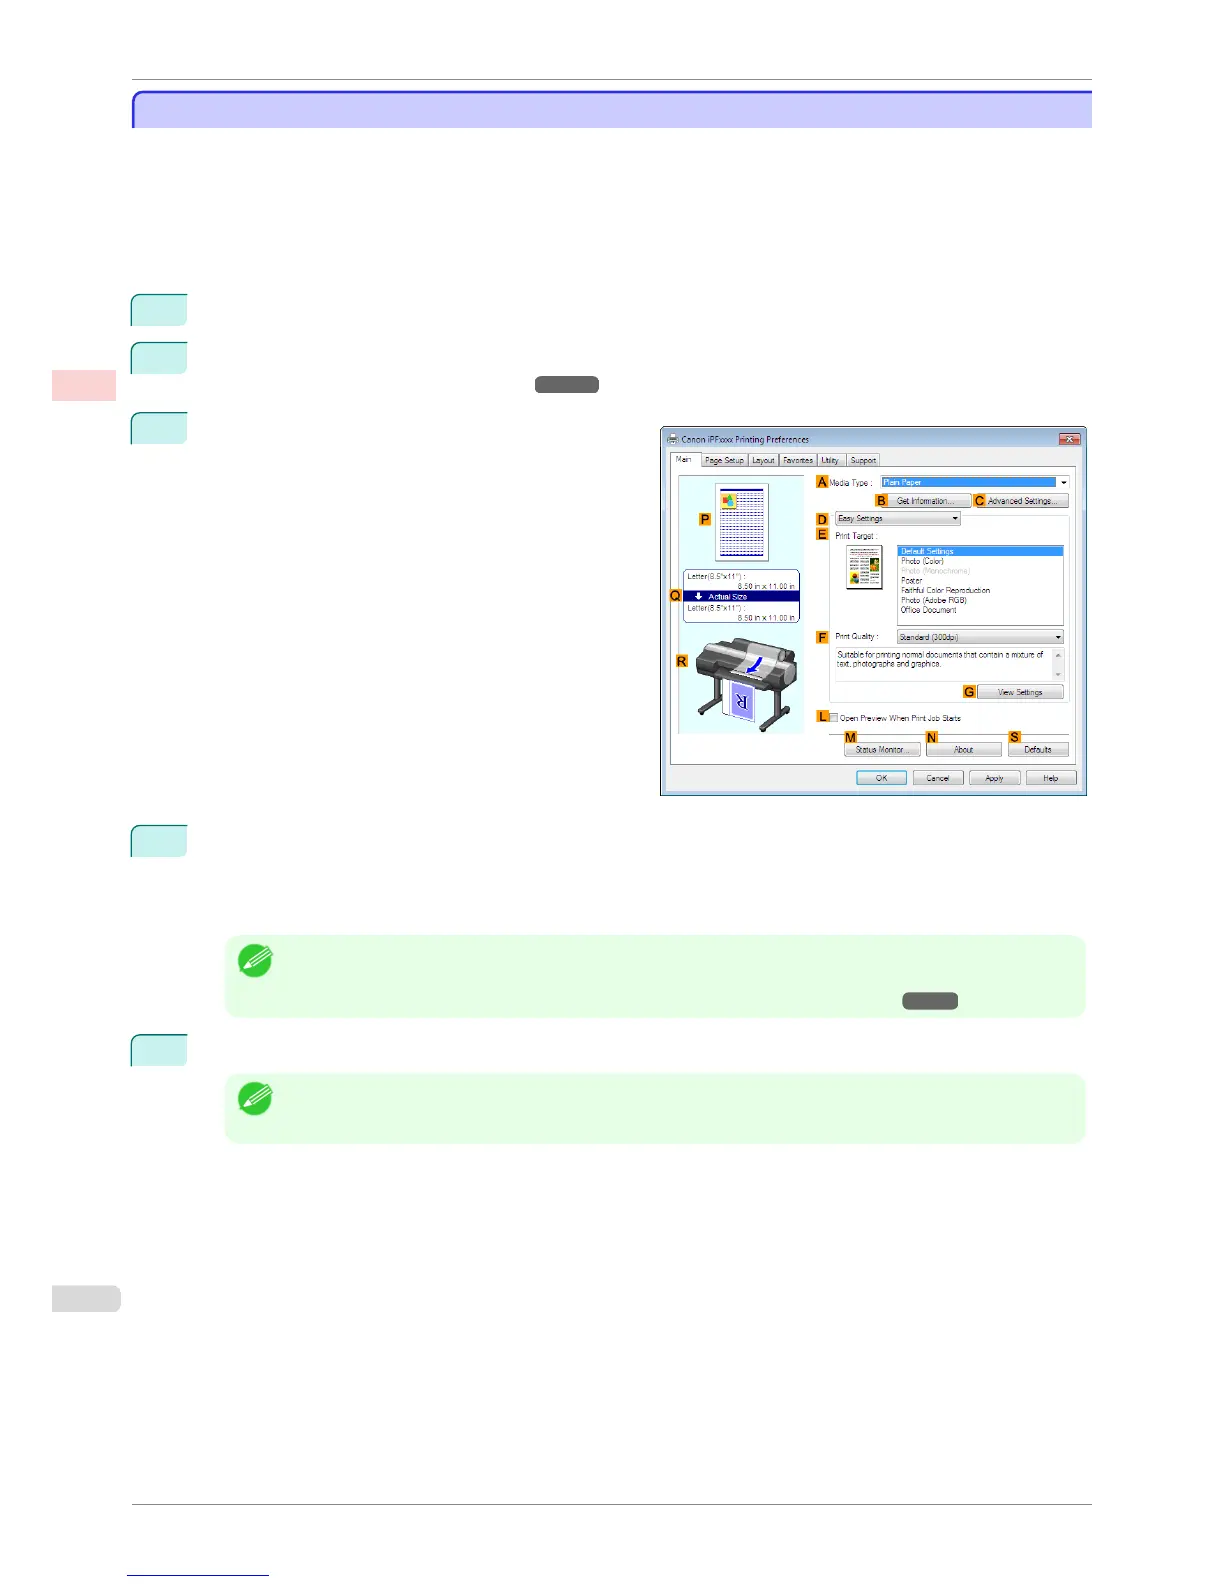
Make sure the Main sheet is displayed.
4
In the AMedia Type list, select the type of paper that is loaded. In this case, click Canon Premium Glos-
sy Paper 2 280.
In the AMedia Type, choose the type of paper used for printing, such as Glossy Paper, Canon Coated
Paper, and so on. Make sure the paper you select is loaded in the printer.
Note
• The paper type setting in the printer driver and related software (as well as on the Control Panel ) is updated
when you install the Media Configuration Tool from the User Software CD-ROM or if you change paper informa-
tion by using the Media Configuration Tool. For details, see "Media Configuration Tool." ➔ P.510
5
After confirming that DEasy Settings is selected, click Photo (Color) in the EPrint Target list.
Note
• You can check the settings values selected in the E Print Target list by clicking G View Settings.
Printing Photos and Images (Windows)
iPF6400S
User's Guide
Enhanced Printing Options Printing Photos and Office Documents
36