the DC input wiring. The connection order is negative (–), positive (+), and GND. The DC power supply is
secured into the system chassis with two captive screws mounted on the faceplate.
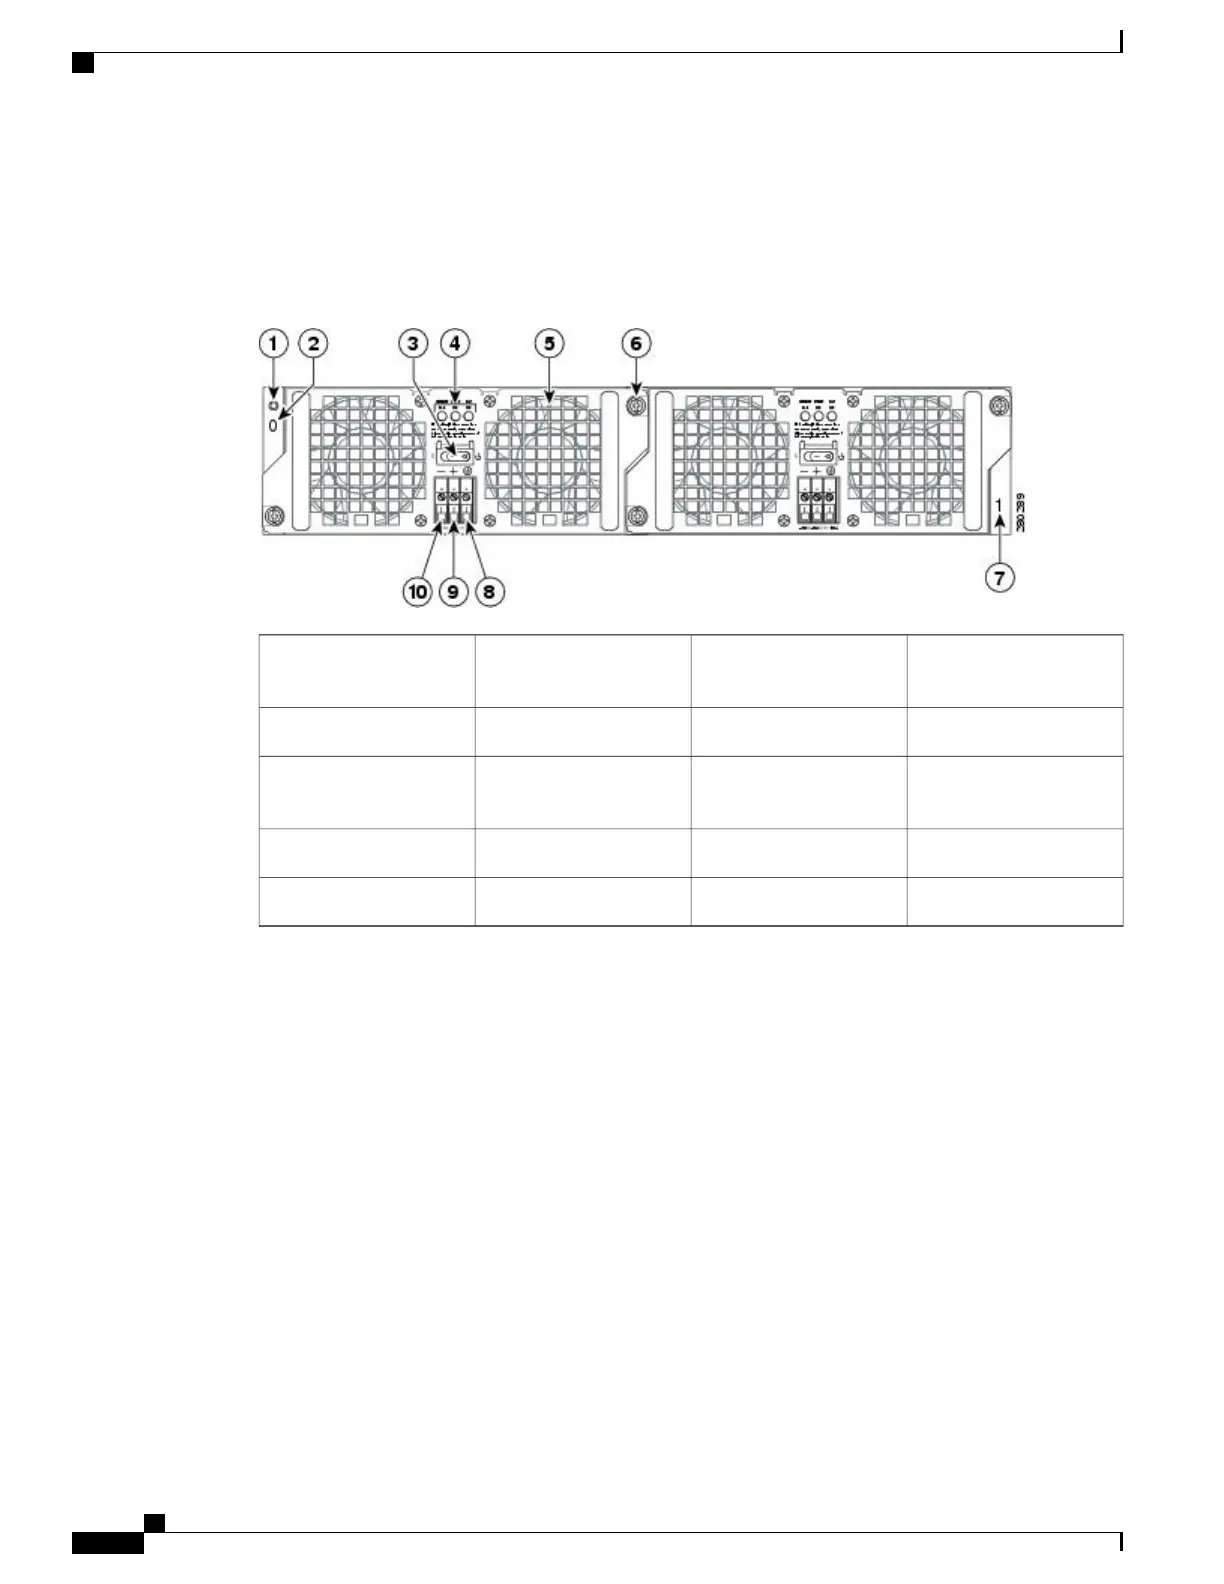
The following image shows the –48 VDC Power Supply for the Cisco ASR 1002 Router.
Figure 85:
–
48 VDC Power Supply for the Cisco ASR 1002 Router
Power supply captive
installation screw
6Chassis ESD socket1
Power supply slot 1 label7Power supply slot 0 label2
Ground lead8Power supply switch
Standby/On (|)
3
Positive lead9Power supply LEDs4
Negative lead10Fan5
The Cisco ASR 1002 Router –48 VDC power supply LEDs are described in the following table.
Cisco ASR 1000 Series Router Hardware Installation Guide
228
Cisco ASR 1002 Router Overview and Installation
Power Supplies in the Cisco ASR 1002 Router

 Loading...


