14. Adjust Mode Field Service Ver. 1.0 Aug. 2005
202
bizhub 200/250/350
Adjustment / Setting
14.3 Settings in the Adjust Mode
14.3.1 Printer
A. Registration (CD)
Functions
• To vary and adjust the image start position in the main scanning direction for each
paper source.
Use
• The PH Unit has been replaced.
• The image on the copy deviates in the main scan direction.
• A faint image occurs on the leading edge of the image.
Adjustment
Specifica-
tion
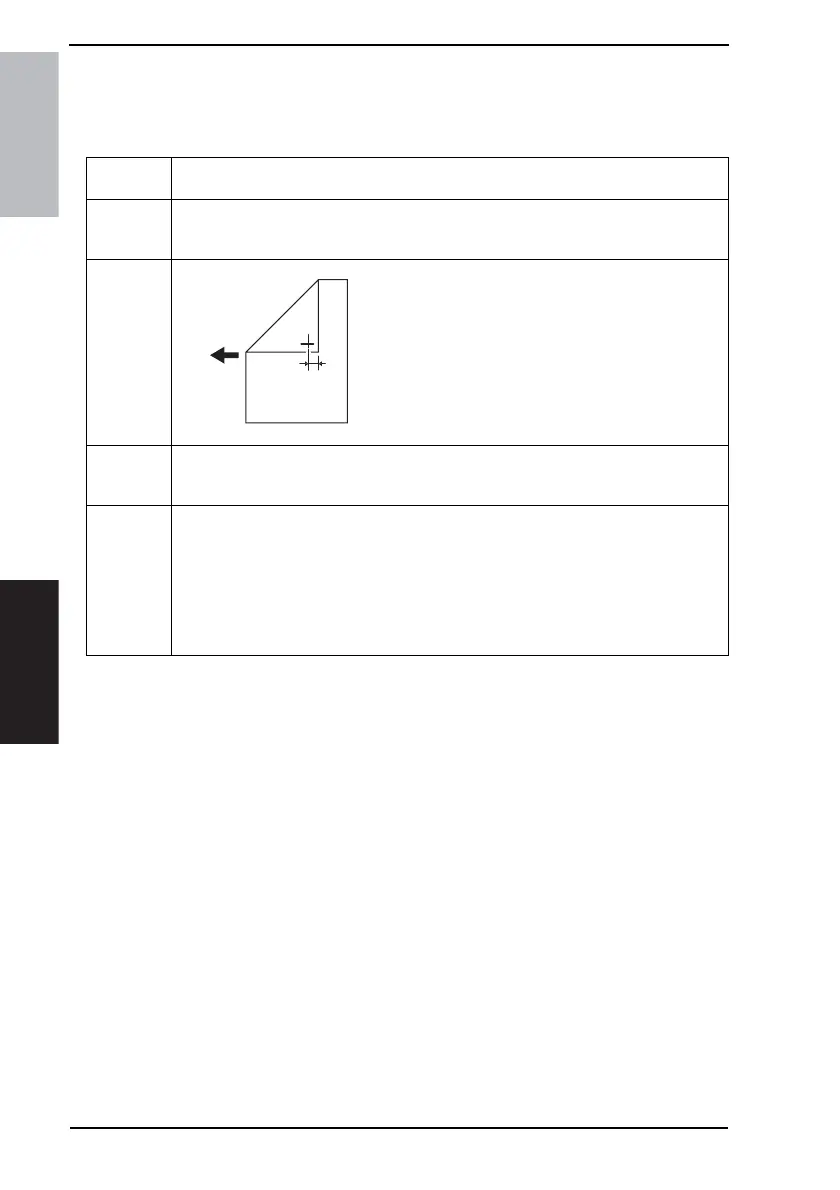
Width A on the test pattern produced should fall
within the following range.
Specifications: 10 mm ± 2.0 mm
Setting Range: -4.0 mm to +4.0 mm
(in 0.1 mm increments)
Adjustment
Instructions
If width A on the test pattern is wider than specifications.
Longer than the actual scale: decrease the setting value.
Shorter than the actual scale: increase the setting value.
Setting/
Procedure
1. Enter the Adjust Mode.
2. Touch [Printer] and [Registration (CD)] in that order.
3. Touch the [Test Print].
4. Select the paper source and press the Start key.
5. Check the dimension of width A on the test pattern.
6. If it fails to meet the specifications, change the setting and redo the check.
7. If it meets the specifications, touch [END].
8. Following the same procedure, adjust for all other paper sources.
4040F3C517D
Width A