Field Service Ver. 1.0 Aug. 2005 4. Disassembly/Reassembly
7
FK-503Maintenance
4. Disassembly/Reassembly
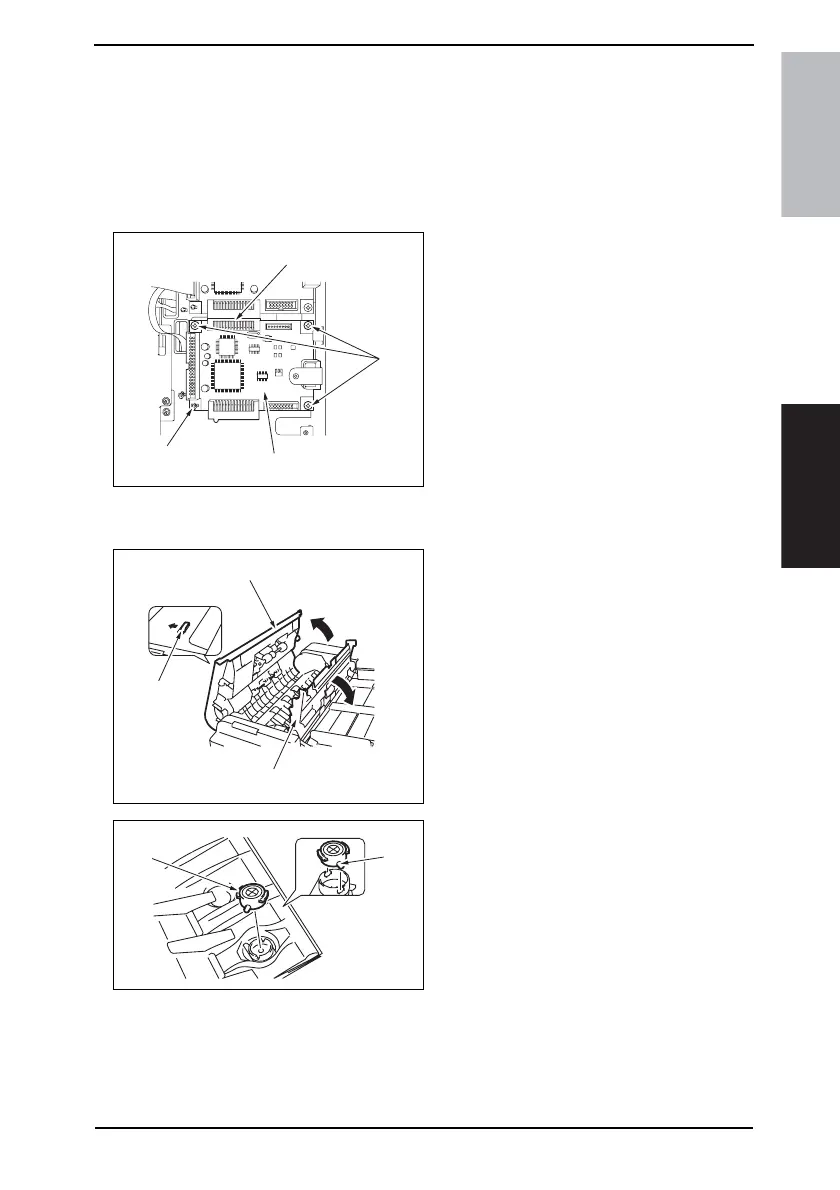
4.1 FAX Board (with G3 Multi Port option)
1. Remove the Upper Rear Cover.
☞ For details, see Service Manual of the machine.
2. Remove the Rear Cover.
☞ For details, see Service Manual of the machine.
3. Remove three screws [1].
4. Unlock the card spacer [2].
5. Sliding the Fax Board [4] downward,
disconnect the connector [3] and
then remove the Fax Board [4].
4.2 Spare TX Marker Stamp 2
1. Unlock the Top Door of the Auto-
matic Document Feeder [1].
2. Open the Top Door [2].
3. Open the Processing Guide [3].
4. Using tweezers, pick up and remove
the stamp (ink portion) [1].
NOTE
• At reinstallation, align the round
protrusion [2] on the stamp with a
slit in the TX Marker Stamp 2.
4040F2C684DA
[1]
[4]
[2]
[3]
4040F2C685DA
[1]
[2]
[3]
4040F2C686DA
[1]
[2]