5•Service
Doc. 065051-03 1/08 141
c. Tape one end of a piece of string or tubing to the end of the
sampling needle assembly line. This will help you thread the new
line through the autosampler later in the procedure.
d. From the inside of the autosampler, pull the tubing into the
autosampler compartment, along with the end of the attached
string or tubing. Go on to Step 10
.
9. If you are replacing an 8.5 mL sampling needle assembly
(P/N 061267), disconnect the sampling needle line from the coupler
that connects it to the larger ID tubing (see Figure 5-11
).
NOTE The coupler may be hidden behind the metal
frame supporting the needle arm assembly.
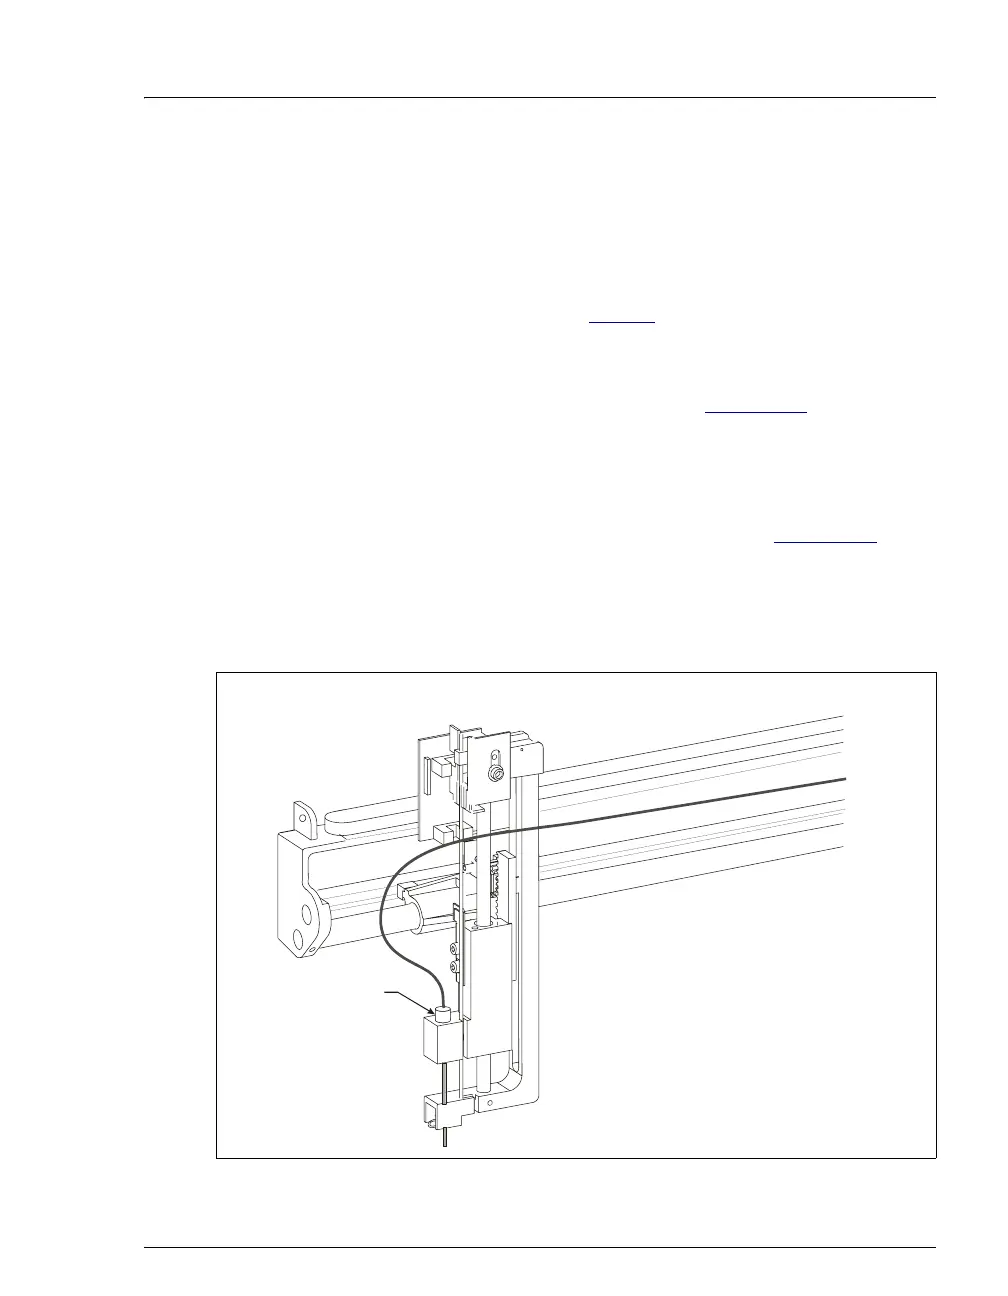
10. Turn the needle fitting above the needle block (see Figure 5-12)
counterclockwise until it is loose.
11. Pull the needle assembly up and out of the needle block and cradle.
12. Remove the needle assembly from the autosampler.
Figure 5-12. Removing the Needle from the Cradle
Needle Block
Needle Cradle
Needle Fitting