AS Autosampler Operator’s Manual
144 Doc. 065051-03 1/08
10. If you are replacing a 1.2 mL sampling needle assembly
(P/N 054271), follow the steps below:
a. Tape the string or tubing that was pulled into the compartment in
Section 5.4.1
, Step 8d to the free end of the new tubing. Pull the
string or tubing, along with the new tubing, out the back of the
compartment.
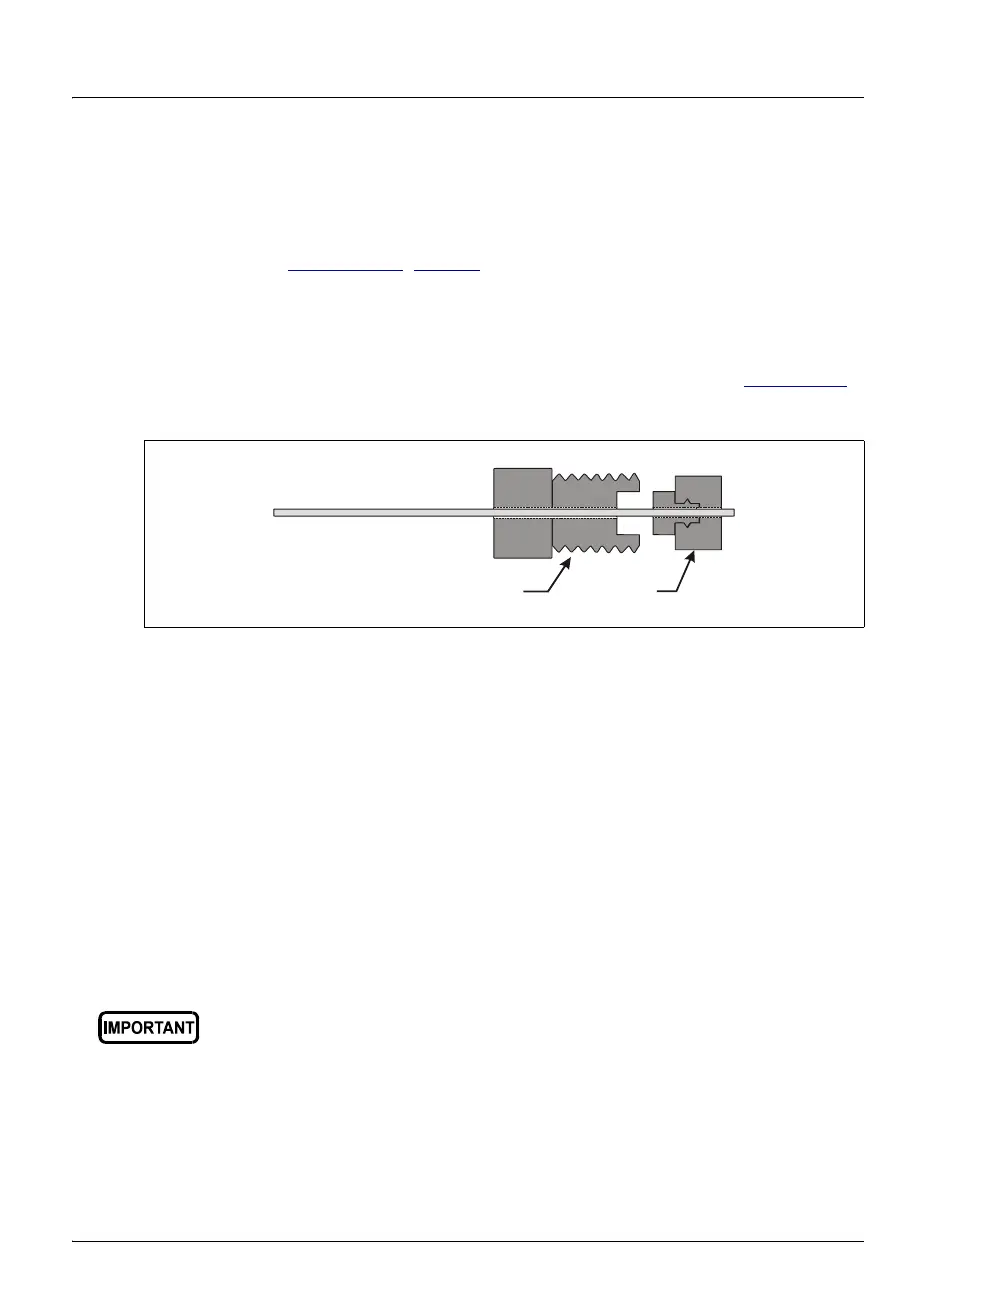
b. Slide the bolt, large end first, onto the end of the tubing and then
slide the ferrule, small end first, onto the tubing (see Figure 5-14
).
Slide the ferrule about 10 mm (3/8 in) past the end of the tubing.
c. Insert the tubing with the bolt and ferrule into port C on the
sample syringe. Push the tubing snugly into the bottom of the
port.
d. While holding the tubing with one hand to avoid twisting it,
screw the bolt into the port fingertight. This seats the ferrule onto
the tubing.
e. Carefully move the needle arm to the left front corner of the
compartment and make sure it is all the way down. Verify that
there is enough slack in the sampling needle line to prevent the
tubing from being pulled.
Figure 5-14. Installing the Ferrule Fitting and Bolt
If the fitting leaks when operation is resumed, tighten the bolt slightly.
Do not overtighten. Overtightening can damage the inside of the
valve.
Bolt
(P/N 052230)
Tubing
Ferrule
(P/N 052231)