283
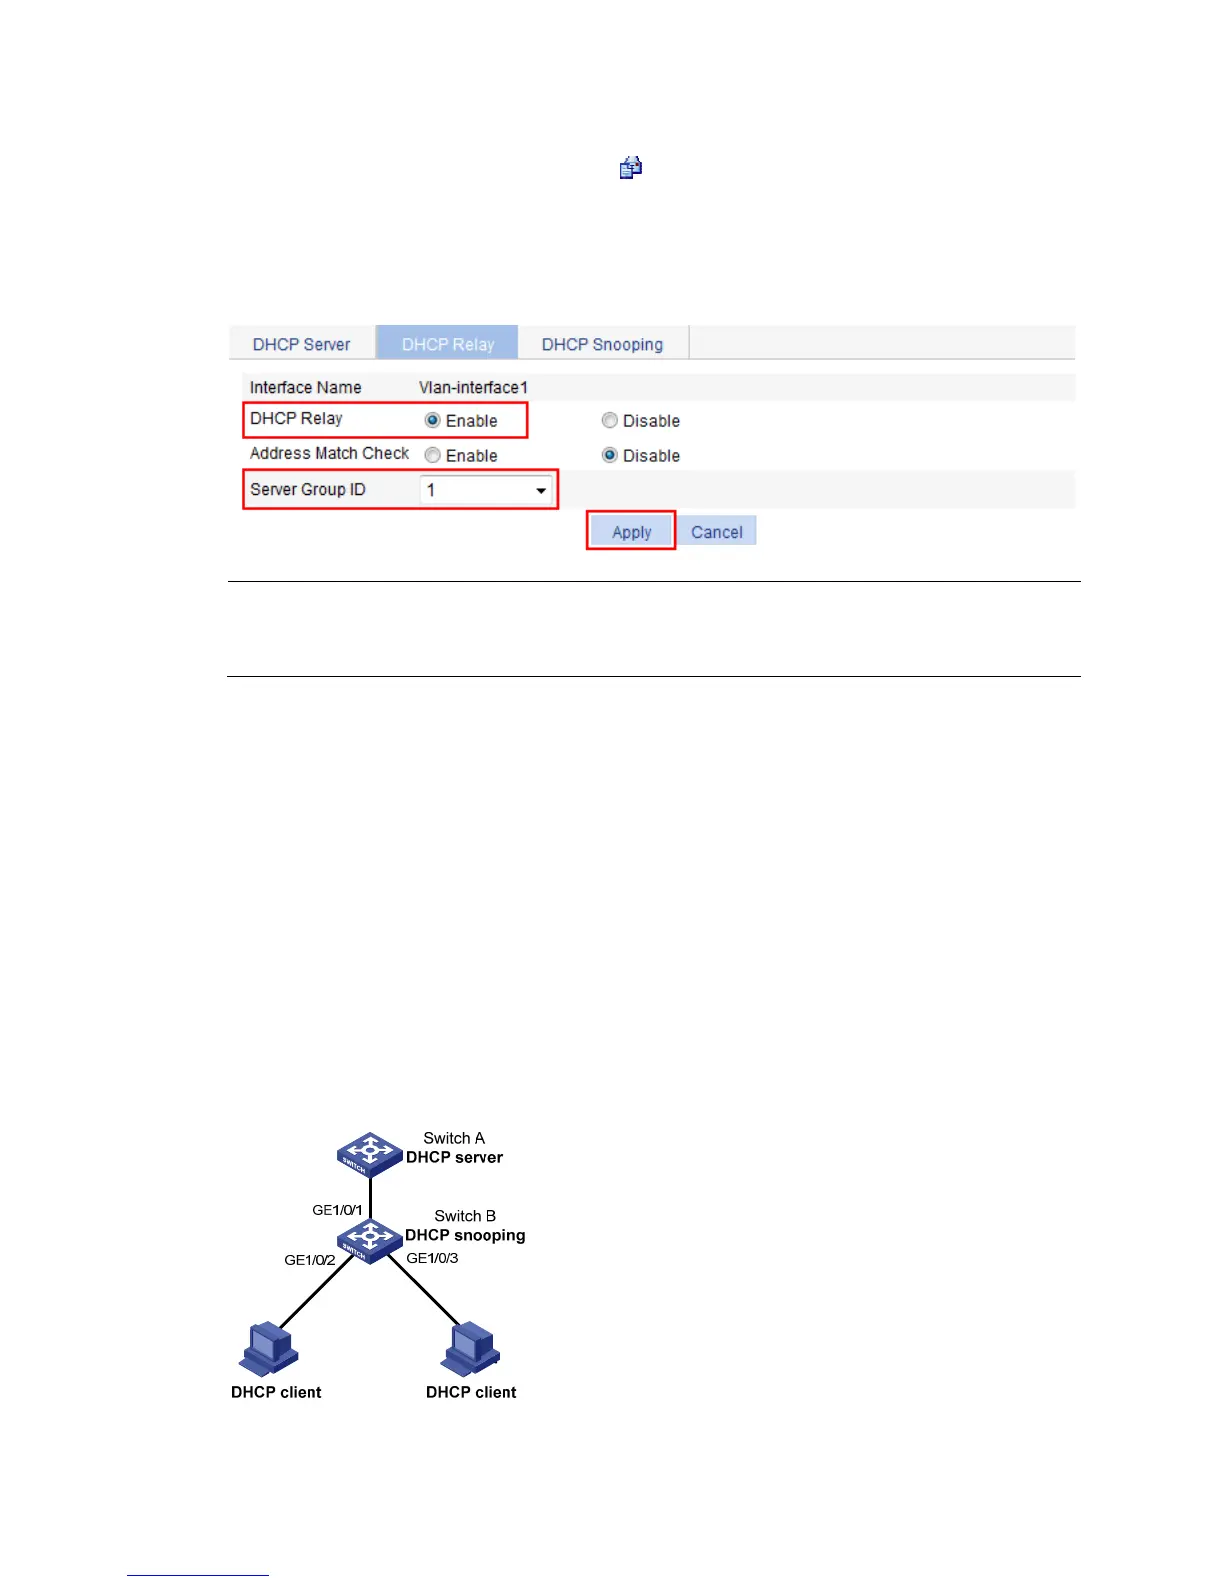
3. Enable the DHCP relay agent on VLAN-interface 1:
a. In the Interface Config field, click the icon of VLAN-interface 1.
b. Select the Enable option for DHCP Relay, and select 1 for Server Group ID, as shown in Figure
270.
c. Cli
ck Apply.
Figure 270 Enabling the DHCP relay agent on an interface and correlate it with a server group
NOTE:
Because the DHCP relay agent and server are on different subnets, you need to configure a static route o
dynamic routing protocol to make them reachable to each other.
DHCP snooping configuration example
Network requirements
As shown in Figure 271, a DHCP snooping device (Switch B) is connected to a DHCP server through
GigabitEthernet 1/0/1, and to DHCP clients through GigabitEthernet 1/0/2 and GigabitEthernet
1/0/3.
• Enable DHCP snooping on Switch B and configure DHCP snooping to support Option 82.
Configure the handling strategy for DHCP requests containing Option 82 as replace.
• Enable GigabitEthernet 1/0/1 to forward DHCP server responses. Disable GigabitEthernet 1/0/2
and GigabitEthernet 1/0/3 from forwarding DHCP server responses.
• Configure Switch B to record clients' IP-to-MAC address bindings in DHCP-REQUEST messages and
DHCP-ACK messages received from a trusted port.
Figure 271 Network diagram
 Loading...