Manual tasks and settings
Operating Manual 7.1 Rev.: 18.06.2008 65
Setting up the work area
To get optimum use of the base material, you first need to define the work
area. Thereby the milling depth limiter's plastic base must be located
entirely above the base material. Accordingly, when setting up the work
area, you must make sure that the milling/drilling head is positioned over
the base material with at least 12 mm clearance to the edges of the
material to be processed.
Make absolutely sure to set the co-ordinates in the order specified
(starting with the front left-hand corner - then the rear right-hand corner).
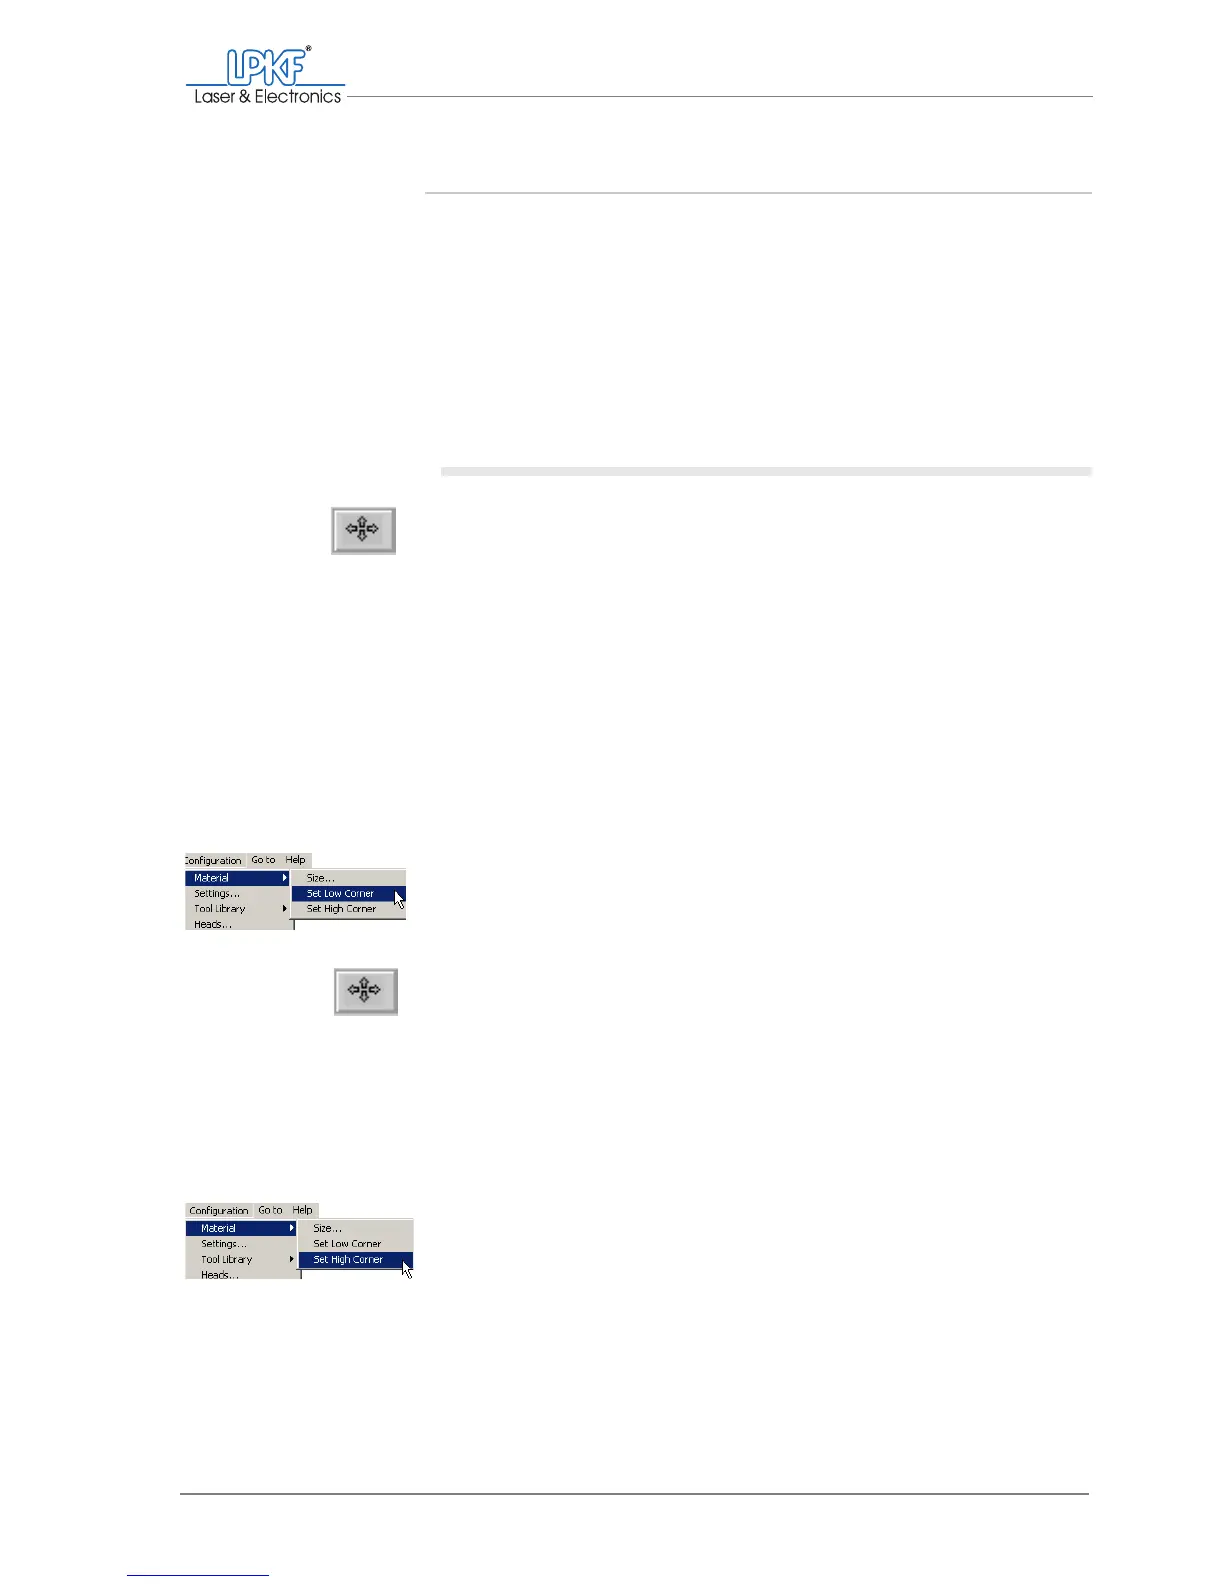
Defining the work area
1. Click on the Move by mouse button.
2. Drag the mouse pointer with the left mouse button pressed to the
front left-hand corner of the desired work area.
The milling/drilling head will move immediately and can be posi-
tioned directly with the mouse.
Note: If you release the mouse button before completing the positioning
task, you will need to click on the Move by mouse button again before re-
suming.
3. Make sure that the milling/drilling head is in the correct position with
the milling depth limiter's plastic base located entirely above the
base material. The pass hole pins must not be located in the work
area.
4. In the BoardMaster menu bar, click on Configuration > Material >
Set Low Corner.
The co-ordinates for the front left-hand corner of the work area are read in.
5. Click on the Move by mouse button.
6. Drag the mouse pointer with the left mouse button pressed to the
rear right-hand corner of the desired work area.
The milling/drilling head will be positioned following the movement of the
mouse.
7. Make sure that the milling/drilling head is in the correct position with
the milling depth limiter's plastic base located entirely above the
base material.
8. In the BoardMaster menu bar, click on Configuration > Material >
Set High Corner.
The co-ordinates for the rear right-hand corner are read in and the base
material is displayed in dark grey in BoardMaster.