Creating a pass hole system for the vacuum table
82 ProtoMat
®
S62
Preparing the circuit board plotter and vacuum table
Before you can drill the pass holes, you need to prepare the circuit
board plotter:
1. Carefully squeeze the milling depth limiter's plastic base and pull it
down and out of the milling/drilling head.
If it is not already there, move the milling/drilling head to the zero
position for easier access to the base.
2. Click on the Move to pause button in order to move the traversing
table to the loading position.
3. Remove the sinter plate from the vacuum table.
4. Check that the red pass hole strips are in place in the vacuum
table.
5. If you are replacing an existing pass hole system:
– Use a collet to pull the pass hole pins out of the red plastic strips.
– Move the plastic strips in the guide groove so that the new pass
holes can be positioned as appropriate for the size of your material.
– If no more pass holes will fit in the plastic strips:
Lift the strips out of the guide groove and insert a new pair.
Note: The pass holes should be positioned at least 5 mm from the edge of
the base material.
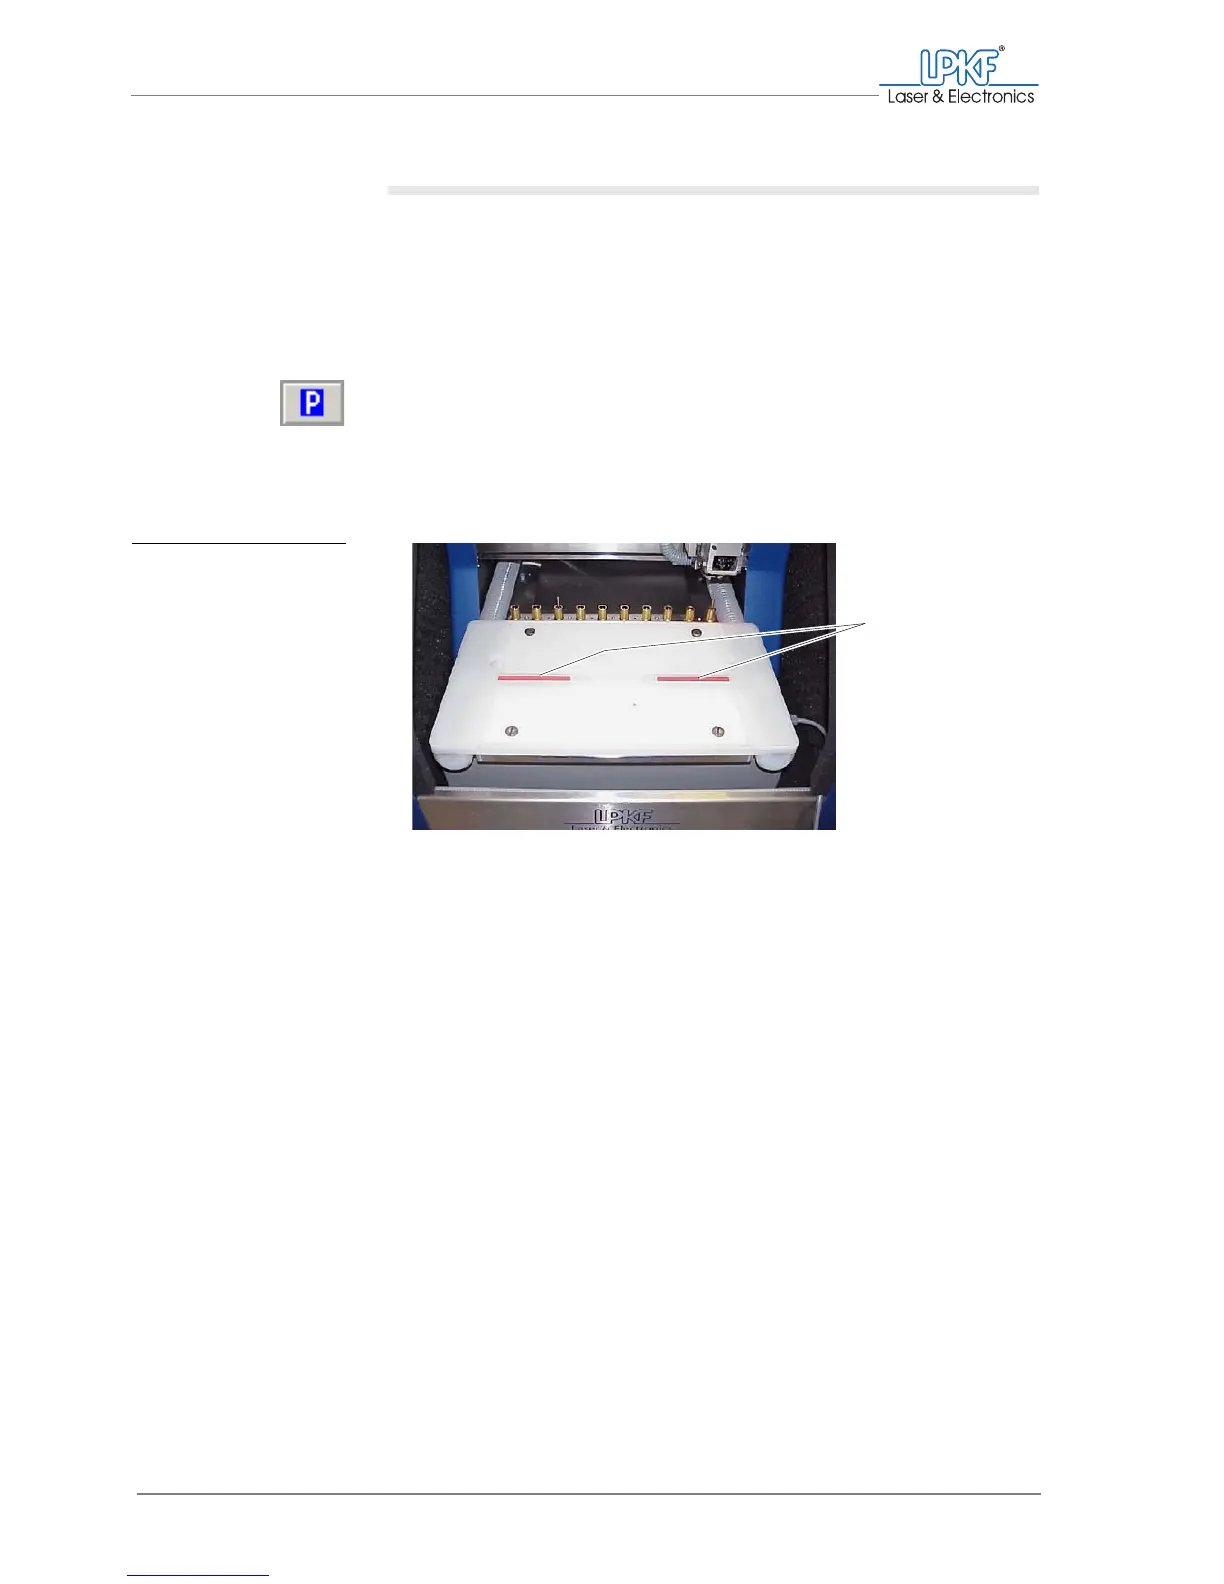
[]
Fig. 32: Pass hole strips in
the vacuum table
1 Pass hole strips in the vacuum table
1