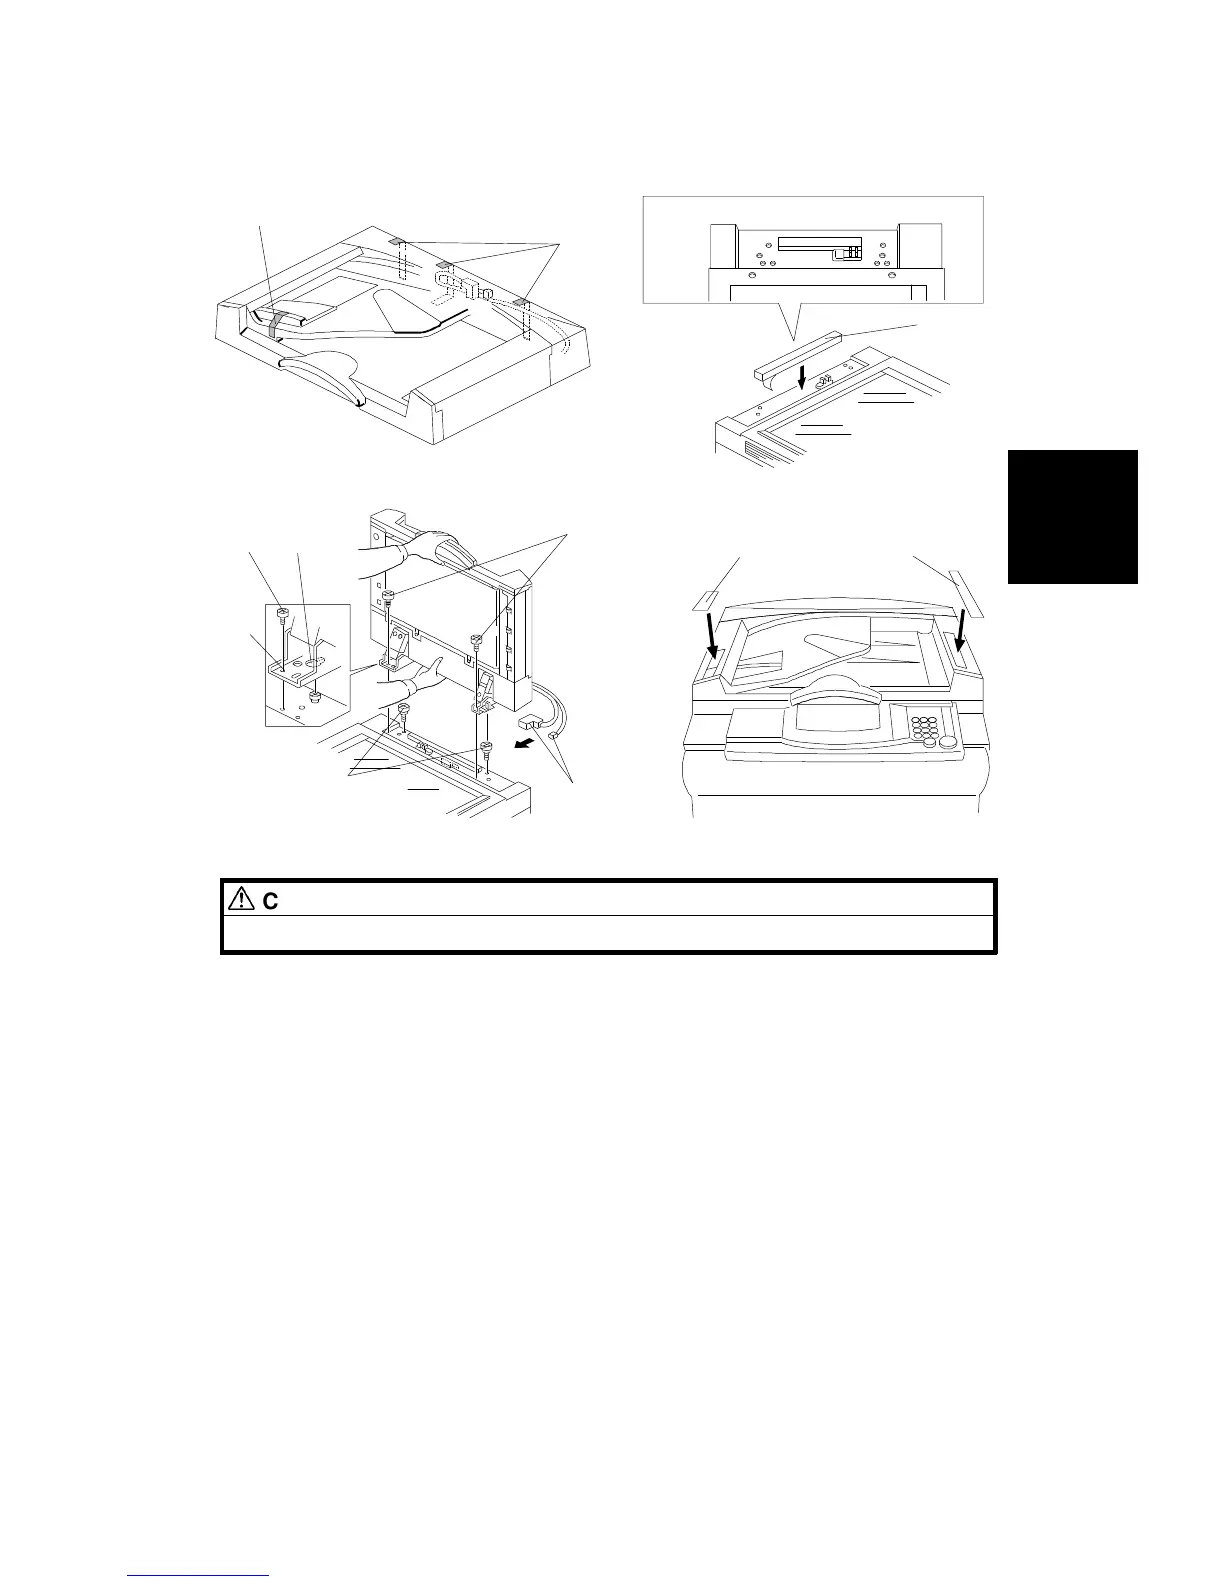
5.2 INSTALLATION PROCEDURE
CAUTION
Unplug the copier before starting the following procedure.
1. Remove the strips of tape [A].
2. Attach the sponge retainer [B] to the top cover of the copier as shown.
3. Tighten the two stud screws [C].
4. Mount the ARDF by aligning the holes [D] in the ARDF over the stud
screws [C], then slide the ARDF to the front as shown.
NOTE: When mounting the ARDF, hold it as shown in the illustration.
Holding it in another way may damage the ARDF.
5. Screw the two M4 x 10 screws [E] into the holes [F] and tighten them.
6. Attach the connectors [G] into the socket on the rear of the copier.
7. Affix the symbol explanation decal [H] and the combine originals
explanation decal [I] to the ARDF as shown.
[A]
[A]
[B]
[E]
[D]
[E]
[G]
[C]
[F]
[I] [H]
Installation
Procedure
ARDF (A548) INSTALLTION
SM 3-45 A166/A187/A189