7.5.2 Two Sided Original Mode
Note:
•
After replacing the DF main board, always do the Rough Adjustment
using VR102 first. Then do the Fine Adjustment procedure.
•
At other times, just do the Fine Adjustment procedure.
•
After completing this adjustment, be sure to turn off the dip switch.
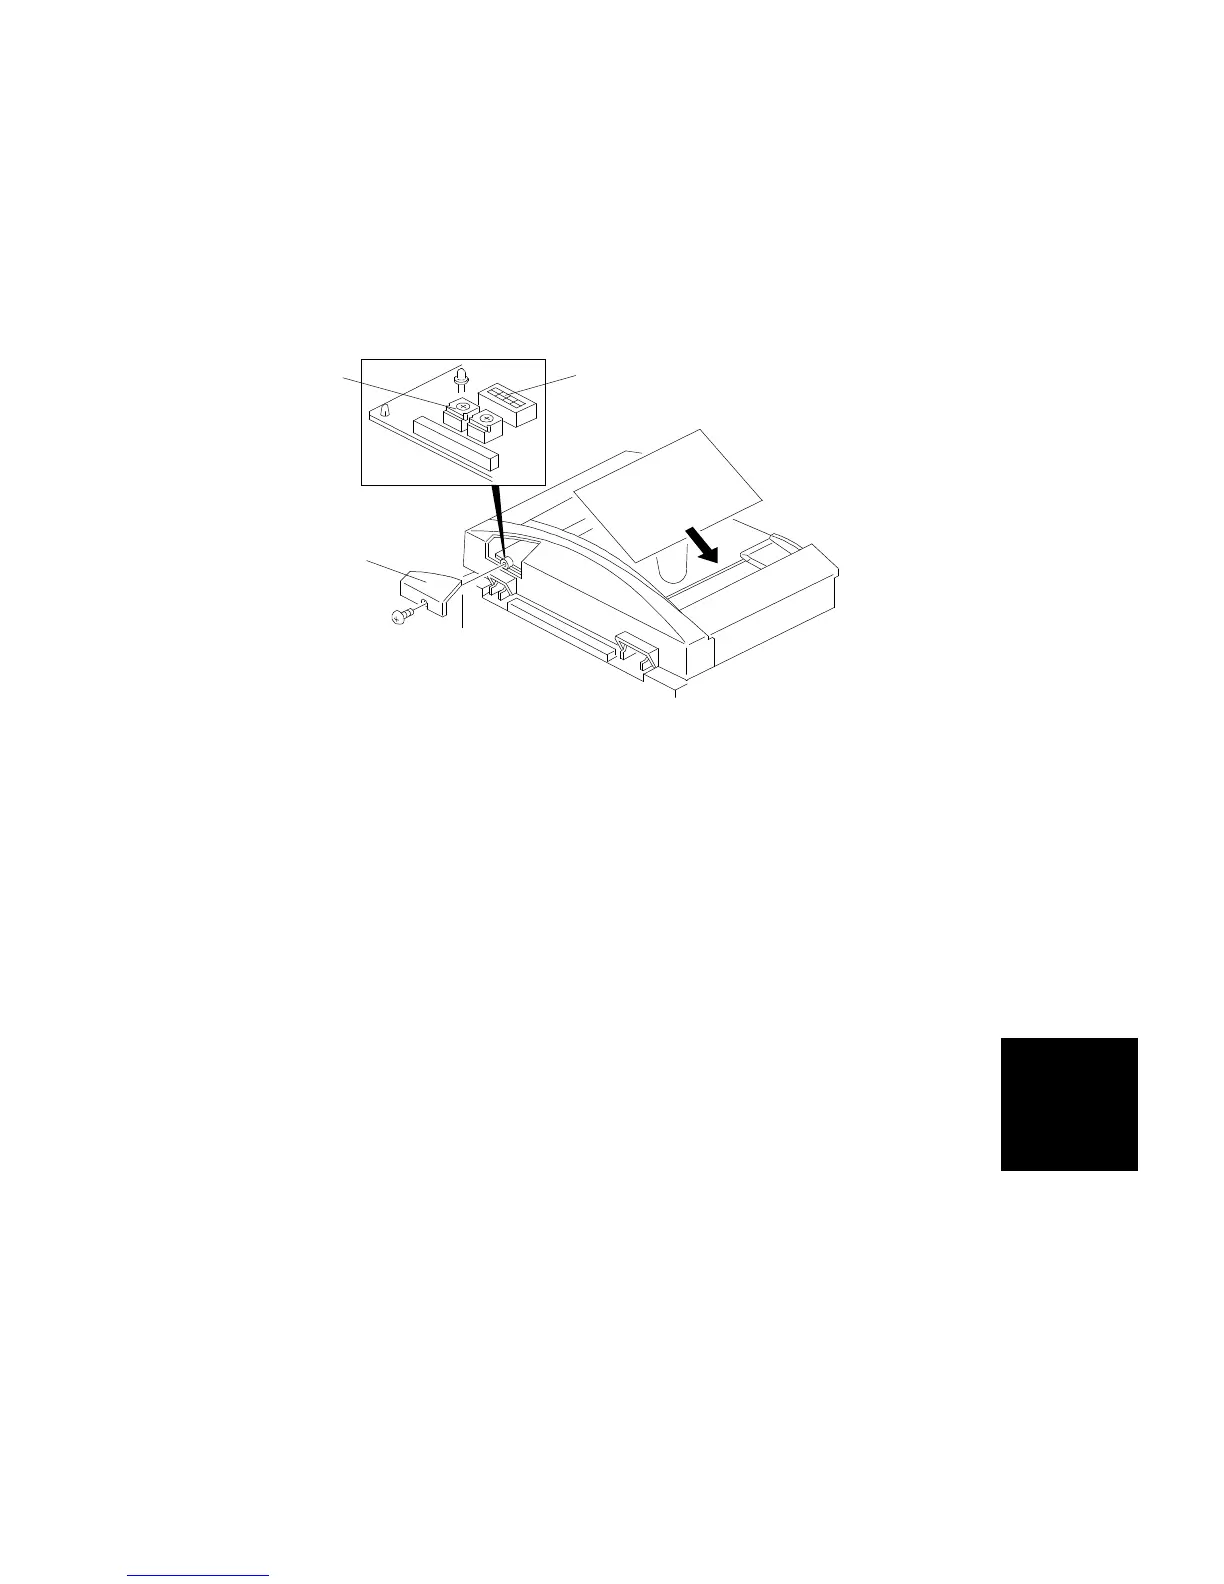
- Rough Adjustment (Using VR102) -
1. Remove the copier’s left original scale (2 screws).
2. Remove the small cover [A] at the rear of the DF upper cover (1 screw).
3. Turn on dip switch 101-3 [B].
4. Place a sheet of A4/8
1/2
" x 11" sideways paper (64 g/m
2
, 17 lb) on the
original table. (The paper will feed automatically.)
5. After the original stops on the exposure glass, raise the DF carefully so
that the original does not move.
6. Check that the gap between the trailing edge of the paper and the left
edge of the original rear scale is 10 ± 2 mm.
7. If the gap is not within this specification, adjust the registration with
VR102 [C]. (Turning VR102 counter-clockwise will increase the gap.)
- Fine Adjustment (Using a Copier SP Mode) -
1. Perform steps 1 through 6 of the rough adjustment procedure.
2. If the gap is not within specification, adjust the registration with the copier
SP mode for the DF Registration Adjustment in two-sided original mode.
(Increasing the setting will increase the gap.)
[B]
[A]
[C]
ARDF
DF61 (A548)
REPLACEMENT AND ADJUSTMENT
SM 7-23 A166/A187/A189