7. TRANSFER BELT UNIT
7.1 TRANSFER BELT SECTION
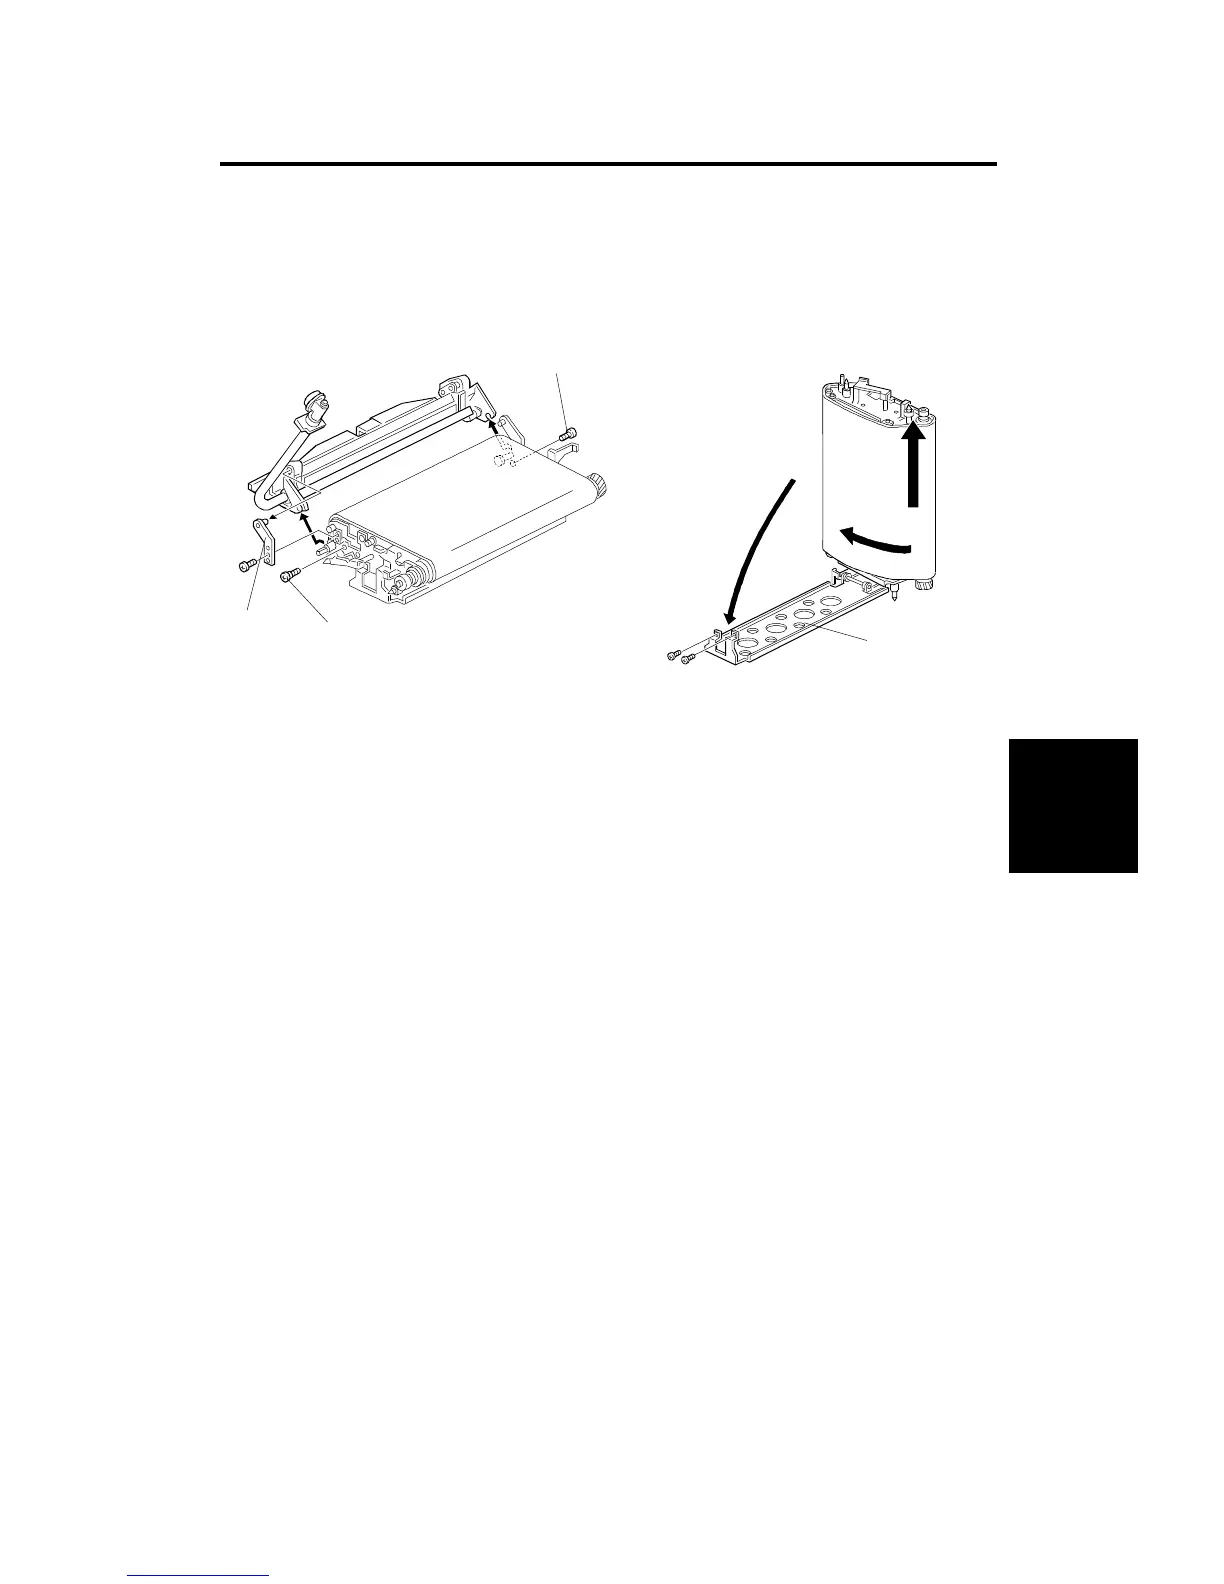
7.1.1 Transfer Belt
1. Remove the transfer belt unit (see section 3. INSTALLATION PROCEDURE).
2. Remove the cleaning unit bracket [A] (1 screw).
3. Remove the cleaning unit. Lift as shown by arrows above.
NOTE: Keep the cleaning unit level to prevent toner spillage.
3. Remove the belt tension screws [B].
4. Lift up the transfer belt unit by the chain. Detach the upper part of the
transfer belt bracket [C] (2 screws). Lower the bracket, as shown.
5. Pull and turn the belt to remove it, as shown.
NOTE: 1) During transfer belt removal, hold the belt by the edge. Do
not touch the belt surface or the belt may become stained
causing poor copy quality.
2) After removing the transfer belt, clean each roller with water
or alcohol. When using alcohol, set the rollers aside; be sure
to allow sufficient time to dry. If alcohol remains on the rollers
when the belt is replaced, the rollers may adhere to the belt.
[A]
[B]
[B]
[C]
Replacement
and
Adjustment
TRANSFER BELT UNIT
SM 5-51 A166/A187/A189