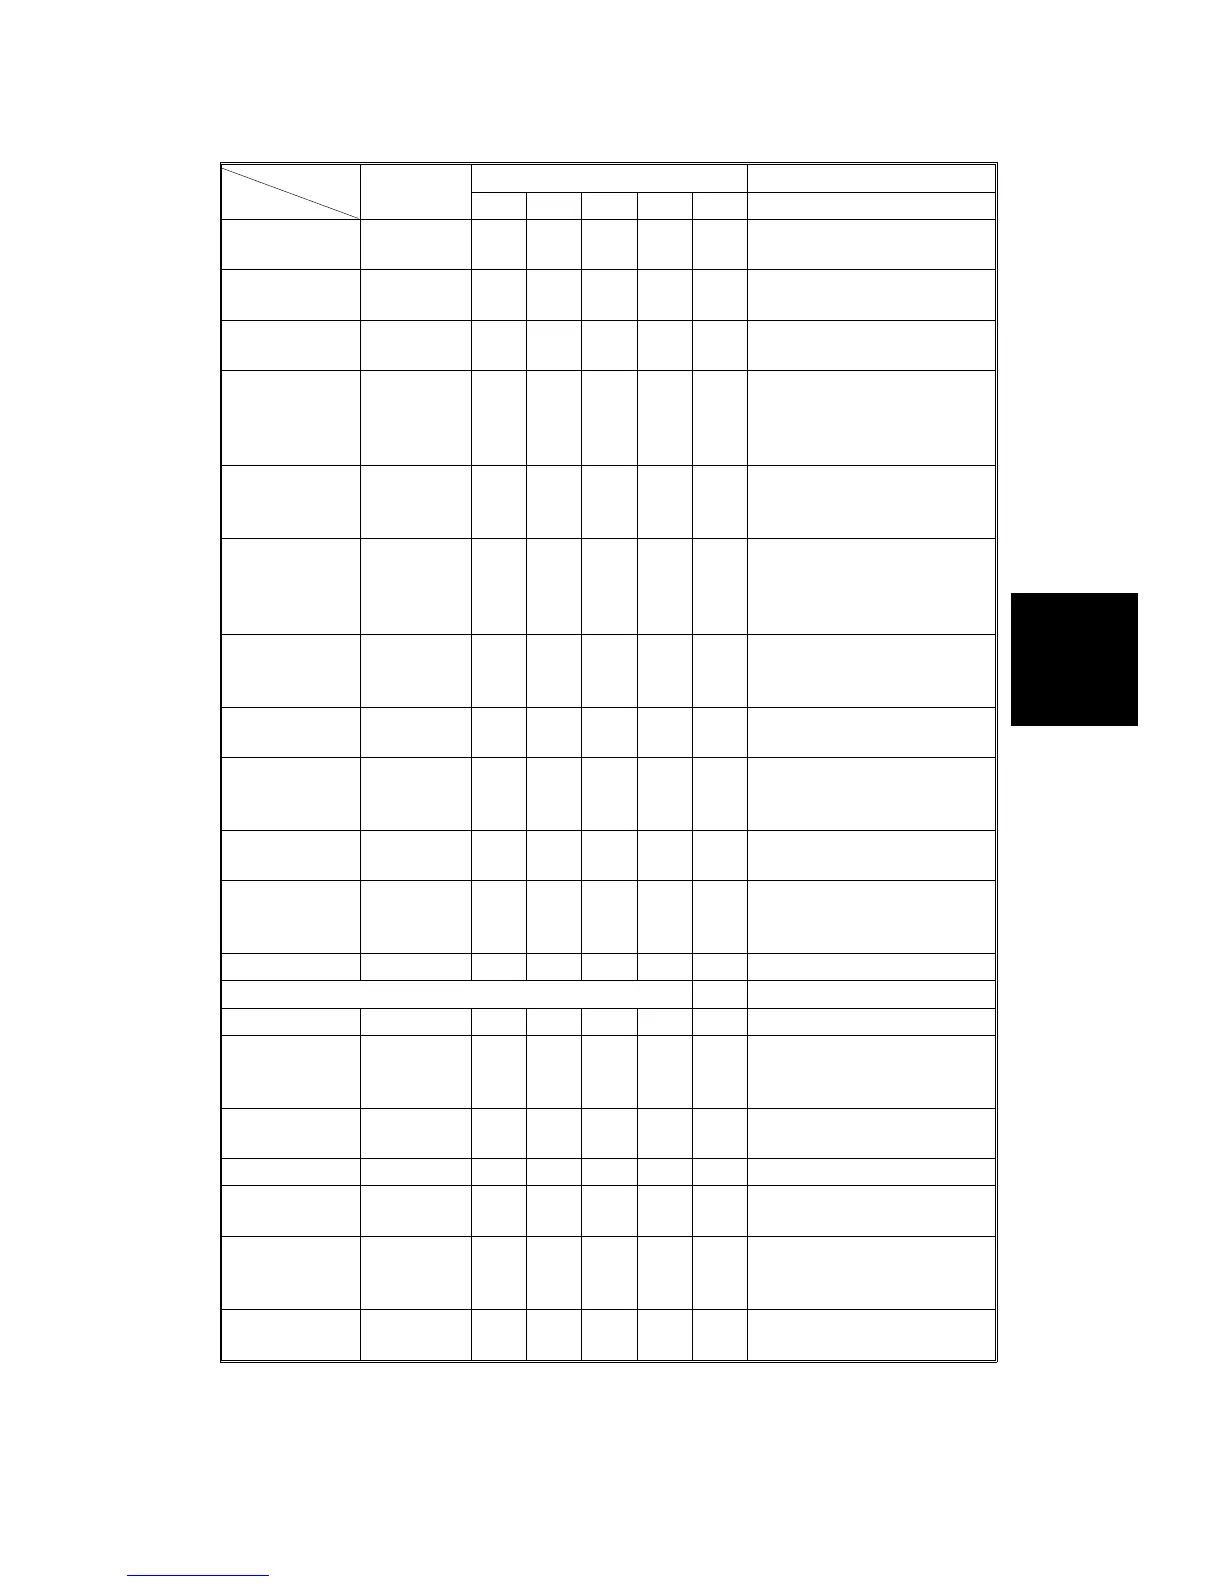
Interval
EM
Regular PM (Scans)
Remarks
Item 40K 80K 120K 160K 200K
Discharge
brush
I C C C C C Clean taking care not to
bristle up the brush.
Exit guide
(Paper transfer)
I C C C C C Wipe with a dry cloth.
Cleaning blade R R R R R When replacing, apply
setting powder (54429101).
Cleaning
entrance seal
I C C C C C Clean with a dry cloth.
Visually check. Replace if
necessary. (i.e. cracked or
warped)
Cleaning side
seal
C C C C C Clean with a dry cloth.
Visually check. Replace if
necessary (i.e. torn)
Toner
receptacle seal
C C C C C Clean with a dry cloth.
Visually check. Replace if
cracks, warps or breakages
are found.
Cleaning unit
(including
SOLs)
C C C C C Wipe with a dry cloth every
visit.
Lubricant
brush holder
C C C C C Detach the lubricant brush
and wipe it with a dry cloth.
Lubricant brush I R I R I Check if the lubricant brush
is loose. Replace along with
the lubricant bar.
Cleaning
support roller
C C C C C Wipe with a dry cloth.
Lubricant bar I R I R I Replace if damaged or the
brush is not rubbing against
the bar.
FUSING AND TRANSPORT UNITS
Hot roller R R R R R
Heat-isolating
bushings
L L L L L When replacing the fusing
roller, apply grease
(BARRIERTA JFE552).
Hot roller shaft
bearings
R Wipe with a dry cloth.
Pressure roller C R C R C Clean with alcohol.
Pressure roller
cleaning blade
C R C R C Clean with alcohol.
Oil pan pads R R R R R See Section 5.
Replacement and
Adjustment (9.11).
Pressure roller
shaft bearings
C C C R C Wipe with a dry cloth.
Service
Tables
REGULAR PM TABLE
SM 4-39 A166/A187/A189


 To Next Page