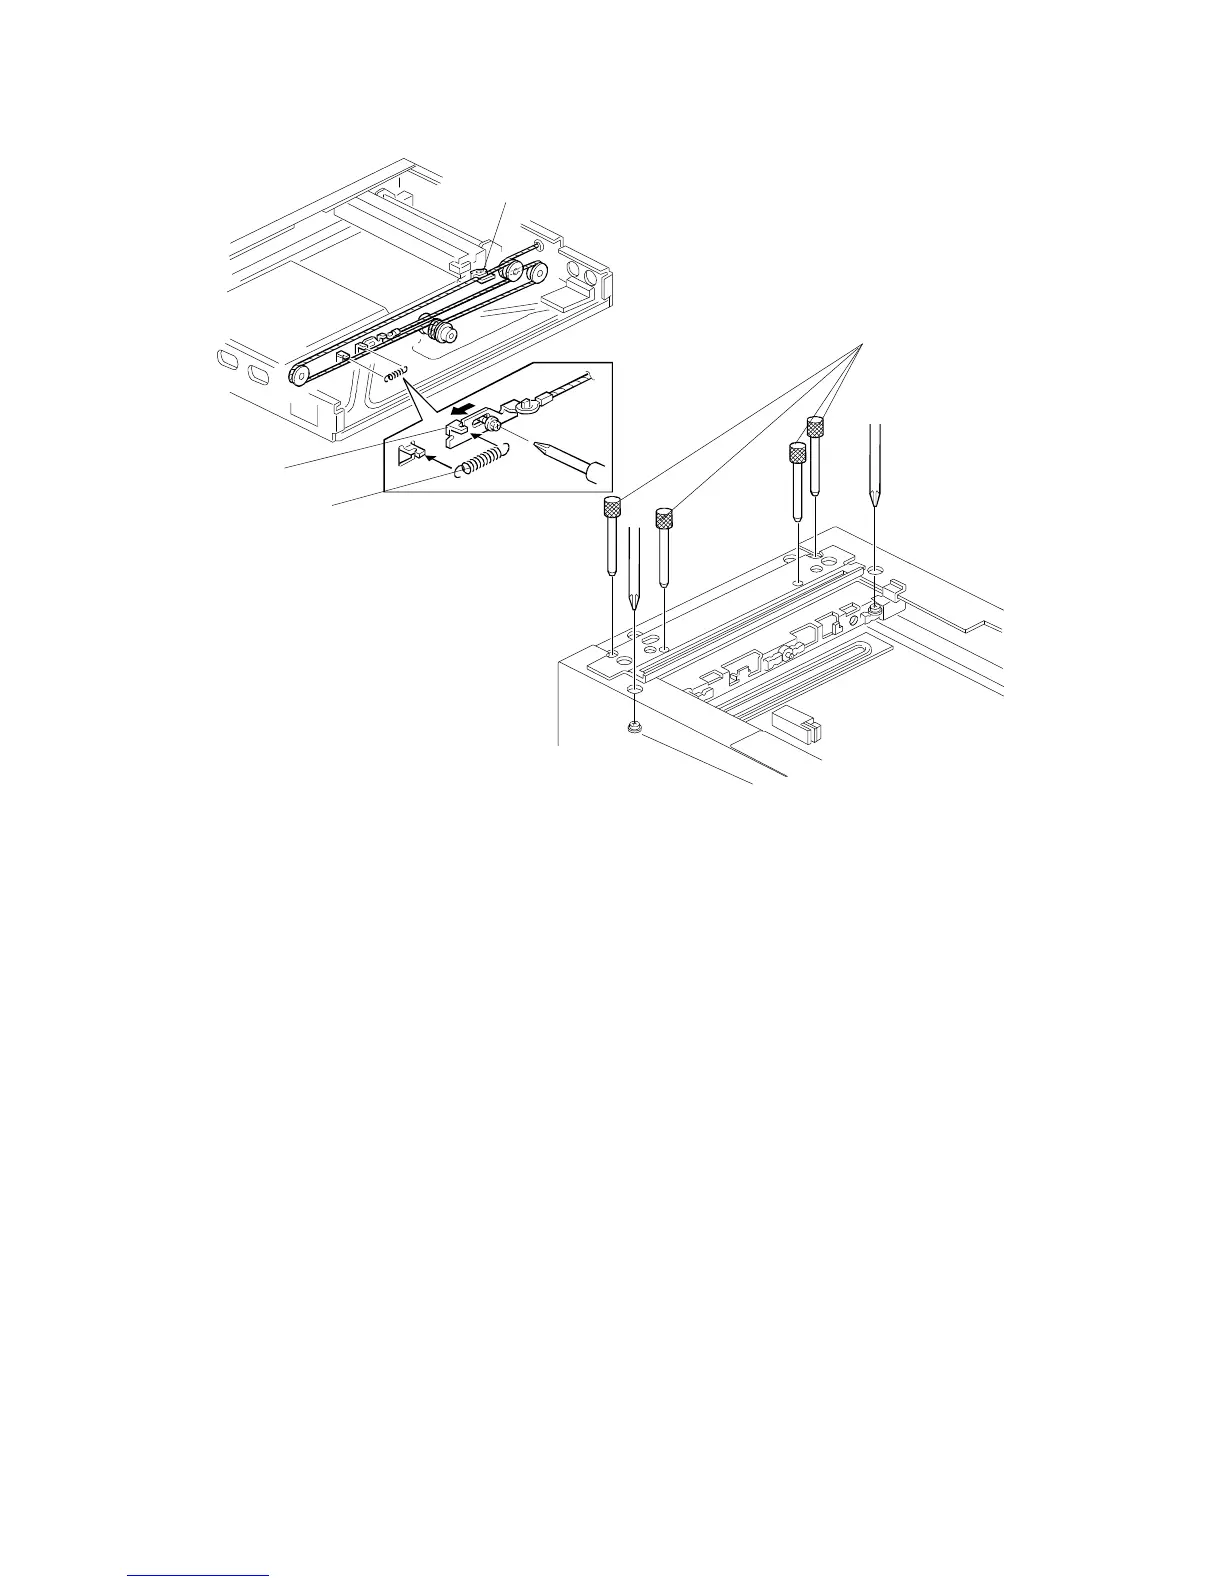
13. Pull the wire taut with the wire tension spring [A] and attach the wire
tension bracket [B] (1 screw).
14. Reinstall the frames and upper stays by the reverse procedure of their
removal.
15. Secure the 1st scanner at the front and rear with the scanner locking pins
[C] as shown. Set and tighten the scanner wire clamp [D].
NOTE: Make sure to place the pins in the correct holes; the pins should
slide in and out easily.
Part number: A0069104 (4pcs/set)
16. Remove the scanner locking pins [C]. Tension the scanner wire by
executing a scanner free run (SP mode 4-13-2).
17. Re-secure the 1st scanner with the locking pins [C]. Then loosen and
reset the scanner wire clamp [D].
18. Remove the scanner locking pins.
19. Reassemble the scanner unit by the reverse procedure of its disassembly.
[A]
[D]
[B]
[C]
SCANNER UNIT
A166/A187/A189 5-22 SM