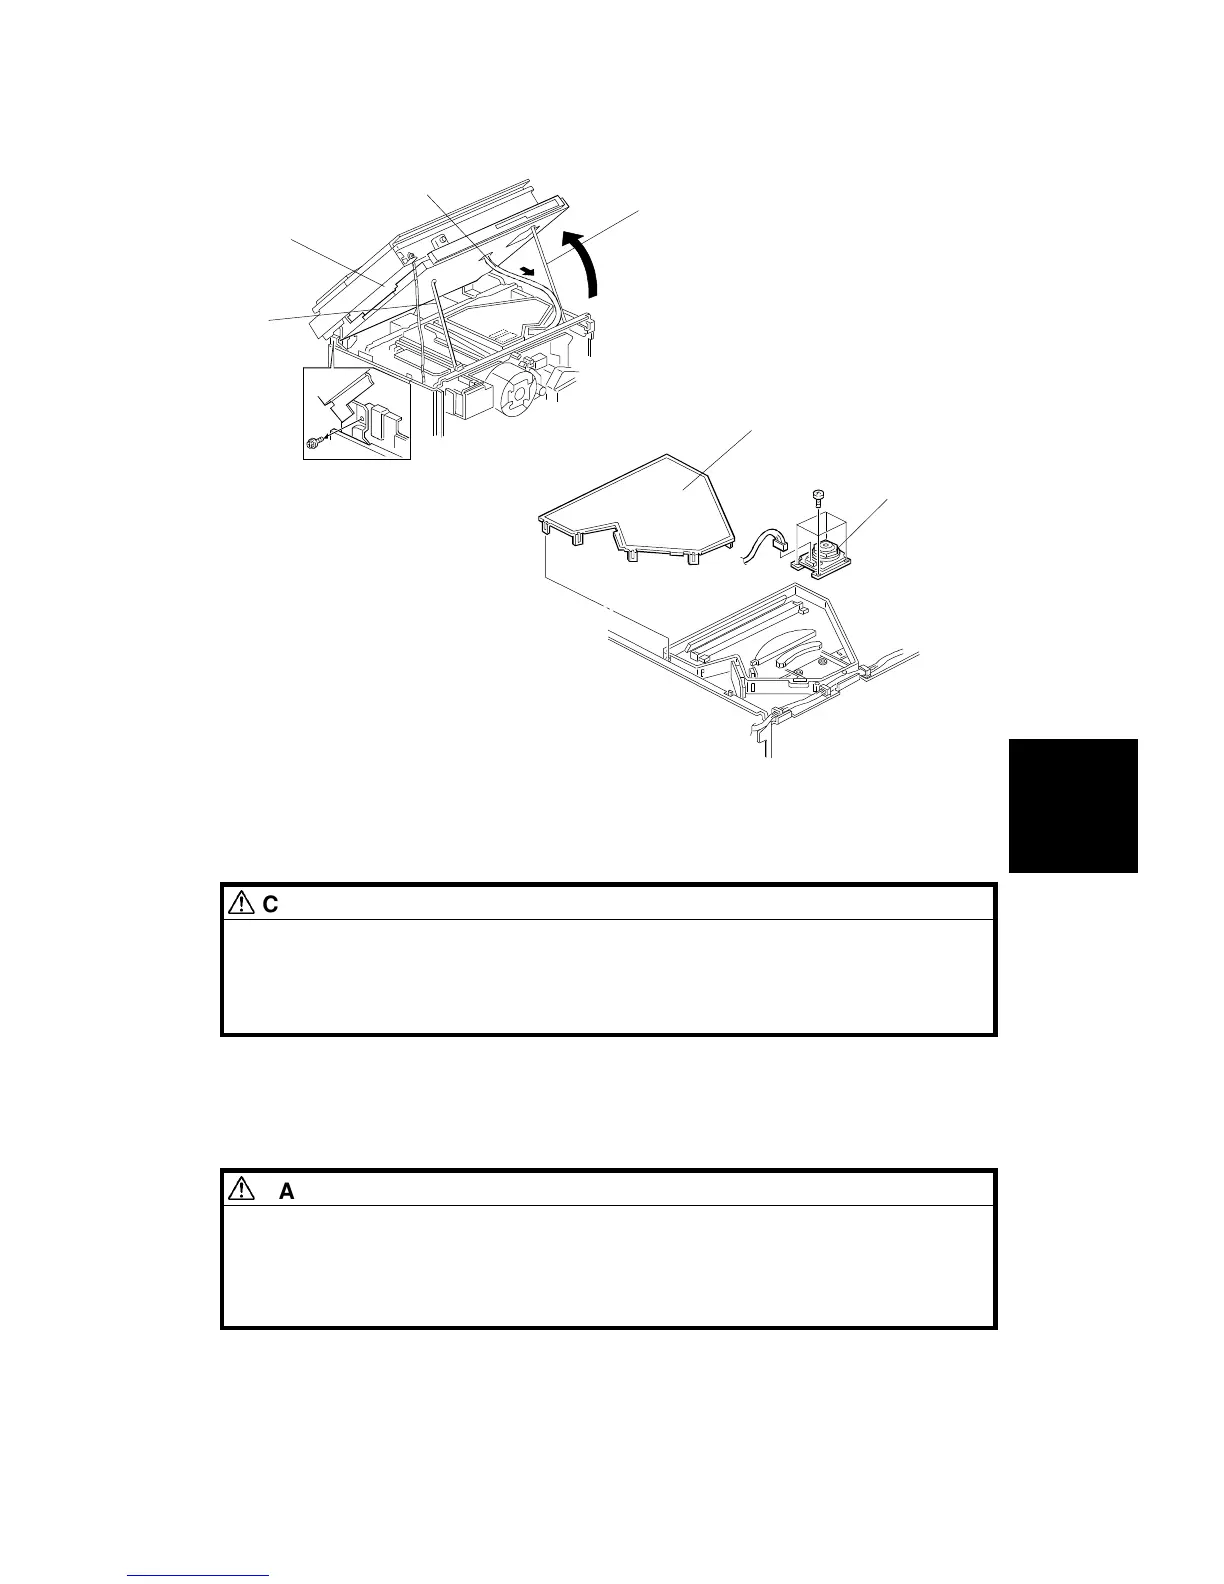
8. Carefully pull the harness [A] so as to provide slack while opening the
printer control box [B] as shown (1 screw). Set the printer control box
support bar [C].
CAUTION
Take care not to knock the support bars (C and D) while the scanner
unit and printer control box are open. If the support bars are disengaged,
the scanner unit and printer control box may suddenly fall into the
closed position.
9. Remove the optical housing cover [E] (10 hooks).
10. Remove the polygon motor [F] (4 screws and 1 connector).
11. Install the new polygon motor by the reverse procedure of its removal.
DANGER
1. Do not attempt to trigger the LD with the optical housing cover
open.
2. After reassembly, make sure that the optical housing cover is
completely closed.
[B]
[A]
[D]
[C]
[F]
[E]
Replacement
and
Adjustment
LASER UNIT
SM 5-33 A166/A187/A189